Repairing Fire Resistant Materials: Fireplace Bricks and Refractory Mortar
Learn how to inspect, repair, and maintain fire resistant materials like fireplace bricks and refractory mortar to ensure safe, efficient hearth operation.

The Anatomy of Fireplace Brick Degradation
The firebox of a masonry fireplace operates in one of the most punishing thermal environments in residential construction. While standard face bricks are fired at approximately 1,800°F during manufacturing, the interior of a wood-burning fireplace routinely exceeds 1,500°F during active use, with localized hot spots pushing much higher. When standard clay bricks are subjected to these extreme, cyclical temperatures, they undergo rapid thermal expansion and contraction, inevitably leading to micro-fracturing, spalling, and catastrophic structural failure.
This is why building codes mandate the use of specialized fire resistant materials for fireplace bricks and surrounding masonry. Medium-duty and high-duty fireclay bricks, manufactured to ASTM C27 standards, are fired at temperatures exceeding 2,800°F. They possess a lower coefficient of thermal expansion and higher thermal shock resistance. However, even these specialized materials degrade over decades of use. The primary culprit is rarely the brick itself, but rather the failure of the refractory mortar joints, which allows moisture infiltration and acidic wood ash to compromise the entire firebox assembly.
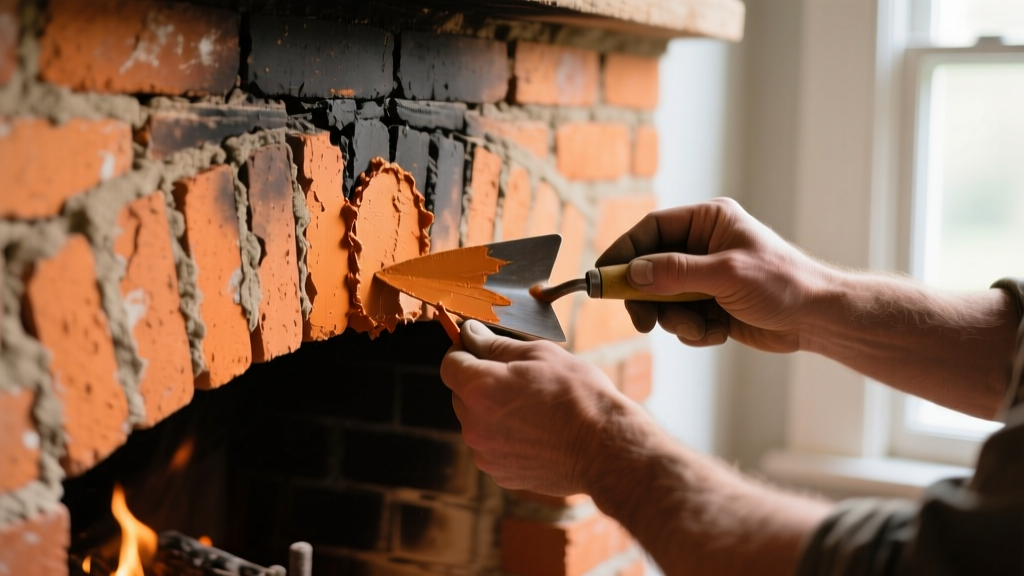
Diagnosing Firebrick and Refractory Mortar Damage
Before purchasing replacement materials, conduct a systematic inspection of the firebox. The Chimney Safety Institute of America (CSIA) recommends annual inspections to catch these specific failure modes before they threaten the surrounding combustible framing of the home.
Identifying Critical Failure Modes
- Mortar Joint Erosion (Washout): Wood ash contains high levels of potassium and sodium. When combined with ambient moisture or roof leaks, ash forms potassium hydroxide (lye), a highly caustic alkaline solution that rapidly dissolves standard Portland cement mortar. If you can scrape the mortar out with a flathead screwdriver, the joint has failed.
- Thermal Spalling: If the face of the firebrick is flaking off in thin, horizontal layers, moisture has penetrated the brick's porous surface. When the fire is lit, the trapped water turns to steam, expanding and blowing the face off the brick.
- Structural Cracking: Hairline cracks on the surface of a firebrick are generally cosmetic and acceptable. However, cracks that penetrate entirely through the brick, or cracks wider than 1/16-inch, compromise the thermal barrier and require immediate replacement.
- Parge Coat Delamination: Many older fireboxes feature a stucco-like refractory coating (parging) over the brick. If this is hollow-sounding when tapped or peeling away, it must be chipped off and reapplied using a castable refractory cement.
Material Selection: Sourcing the Right Fire Resistant Materials
Selecting the correct fire resistant materials for fireplace bricks requires matching the material to the specific thermal and structural demands of the repair. As of 2026, professional-grade refractory materials are widely available through masonry supply houses and specialized online retailers.
| Material Type | Primary Use Case | Max Temperature | Estimated Cost (2026) |
|---|---|---|---|
| Medium-Duty Fireclay Brick (ASTM C27) | Standard residential firebox walls and floors | 2,800°F | $4.50 - $7.00 / brick |
| High-Duty Fireclay Brick | Commercial fireplaces, pizza ovens, coal-burning stoves | 3,000°F+ | $8.00 - $12.00 / brick |
| Air-Setting Refractory Mortar (e.g., Sairset) | Tuckpointing joints, laying new firebrick | 3,000°F | $65 - $85 / 50lb bucket |
| Hydraulic-Setting Refractory Mortar | Outdoor fireplaces, high-moisture environments | 3,000°F | $50 - $70 / 50lb bag |
| Castable Refractory Cement | Re-parging damaged walls, casting custom shapes | 2,500°F - 3,000°F | $45 - $60 / 50lb bag |
Step-by-Step Firebrick Replacement and Tuckpointing
Repairing a firebox requires precision, particularly regarding mortar joint thickness. According to the Brick Industry Association (BIA) Technical Notes, refractory mortar joints must be kept significantly thinner than standard masonry joints to prevent the mortar from shrinking and cracking under high heat.
1. Demolition and Preparation
Remove damaged firebricks using a cold chisel and a mason's hammer. Avoid using a rotary hammer drill or aggressive power chisels, as the high-impact vibrations will induce micro-fractures in the adjacent, healthy firebricks. Once the damaged bricks are removed, use a stiff wire brush to clean the backup masonry. Vacuum all dust and debris, then lightly mist the surrounding bricks with water from a spray bottle. Fireclay bricks are highly porous; if they are completely dry, they will suck the moisture out of the refractory mortar too quickly, preventing a proper chemical cure.
2. Mixing and Applying Refractory Mortar
If using a hydraulic-setting dry mortar, mix it with clean, cool water to a consistency resembling thick peanut butter. For air-setting wet mortars (which come pre-mixed in buckets), simply stir the contents; do not add water, as this dilutes the chemical binders. Apply a 1/2-inch bed of mortar to the firebox floor or shelf. Butter the top, bottom, and one side of the replacement firebrick with a 1/8-inch layer of mortar.
3. Setting the Brick and Tooling the Joint
Slide the brick into place, tapping it gently with the handle of your trowel. Critical Specification: Refractory mortar joints must be compressed to a maximum thickness of 1/16-inch to 1/8-inch. Thick joints act as thermal weak points. Strike the joints flush with the brick face using a jointer or the edge of your trowel. Do not use a concave jointing tool, as compressing the mortar too deeply can draw excess water to the surface and weaken the joint.
Curing and Maintenance Protocols
The most common mistake DIYers and novice masons make is lighting a massive fire immediately after repairing the firebox. Refractory mortars require a highly specific, gradual curing process to drive out chemical and physical moisture without causing steam explosions within the joint.
The Graduated Curing Schedule
- Day 1 (Post-Air Dry): Light a small, low-heat fire using only crumpled newspaper and dry kindling. Do not add large logs. Maintain this small fire for 30 to 45 minutes, then let it burn out naturally.
- Day 2: Light a slightly larger fire using kindling and one or two small, split logs (no larger than 3 inches in diameter). Burn for one hour.
- Day 3: Build a moderate fire with standard-sized cordwood. This final stage brings the refractory mortar to its operational temperature, completing the ceramic firing process of the air-setting binders.
Properly repaired and cured fire resistant materials will protect the structural integrity of the fireplace for decades. To maximize the lifespan of your fireplace bricks, ensure your firewood is seasoned to a moisture content below 20% to reduce the formation of caustic ash-lye, and schedule an annual CSIA-certified inspection to monitor joint wear before it becomes a critical hazard.
FAQ: Common Fireplace Brick Repair Questions
Can I use firebricks to line a zero-clearance metal fireplace?
No. Zero-clearance fireplaces are engineered as closed thermodynamic systems. Adding firebricks alters the weight distribution and thermal dissipation, potentially overheating the metal chassis and voiding the UL listing and home insurance coverage.
Why is my refractory mortar cracking after the first fire?
This is almost always caused by joints that were laid too thick (exceeding 1/8-inch) or by firing the fireplace too hot, too soon, which flashes the moisture into steam before it can evaporate through the porous brick.
Written by
James ThorntonJames Thornton is a construction industry veteran with 25 years of hands-on experience in wood framing, lumber grading, and residential building codes. He started as a framing carpenter in rural Oregon, earned his ICC Residential Building Inspector certification, and eventually became a senior plan reviewer for the City of Portland Bureau of Development Services. James holds a B.S. in Wood Science & Technology from Oregon State University and is a certified lumber grader through the West Coast Lumber Inspection Bureau (WCLIB). He has inspected over 3,000 residential construction sites and authored the city's internal guide on advanced framing techniques (2x6 at 24" O.C.). James lives in Bend, OR, where he builds custom timber-frame cabins and competes in lumberjack sports.
More from James Thornton
View all
Insulation
Best Home Insulation Materials: Complete 2026 Guide
Compare top home insulation materials for 2026. Find R-values, installed costs per square foot, and best uses for fiberglass, spray foam, and mineral wool.
Aug 4, 2026

Sustainable Building
Certify Your Green Building Material for LEED and WELL
Step-by-step guide to certifying a green building material for LEED v5 and WELL v2. Master EPDs, HPDs, and VOC limits for 2026 project specifications.
Aug 4, 2026

Stone & Masonry
Veneer Stacked Stone Panels: Interior Design & Style Showcase
Discover how veneer stacked stone panels transform interiors. Explore modern design profiles, material pairings, and technical installation specs.
Aug 4, 2026