Screwing Into Brick or Mortar: Fastener Comparison Guide
Learn the best methods for screwing into brick or mortar. Compare masonry screws, sleeve anchors, and chemical adhesives for secure installations.

The Core Dilemma: Brick Unit vs. Mortar Joint Placement
When mounting fixtures to a masonry wall, the first critical decision is whether to drill into the brick unit itself or the mortar joint. This choice dictates your fastener type, load capacity, and the long-term integrity of the wall. According to the Brick Industry Association (BIA), modern clay bricks typically exhibit compressive strengths ranging from 3,000 to 12,000 psi, whereas mortar joints are inherently weaker by design to act as a sacrificial buffer.
Placement Decision Framework
- Choose the Brick Unit When: You are mounting heavy loads (exceeding 50 lbs), such as structural brackets, heavy shelving, or large television mounts. The high compressive strength of the fired clay provides maximum pull-out and shear resistance.
- Choose the Mortar Joint When: You are mounting light loads (under 50 lbs) like holiday lighting, small picture frames, or conduit clips. Mortar is significantly easier to drill and, crucially, much easier to patch and color-match if you need to remove the fixture later.
- Historic Masonry Exception: For buildings constructed before 1930, always drill into the mortar. The National Park Service Preservation Brief 6 emphasizes that historic bricks are often soft and under-fired; drilling into them can cause irreversible spalling and cracking. Mortar is designed to be repointed and replaced.
Fastener Showdown: Mechanical Anchors vs. Chemical Alternatives
Once the substrate is selected, you must choose the appropriate fastening system. The market offers several distinct technologies, each with specific failure thresholds and installation requirements.
1. Masonry Screws (e.g., Tapcon)
Masonry screws cut their own threads directly into the base material. The industry standard, such as the ITW Buildex Tapcon #10 x 2-1/2-inch Hex-Washer-Head screw, relies on precise hole sizing to achieve grip.
- Best For: Light to medium loads (up to 150 lbs pull-out in solid brick).
- Cost: Approximately $0.45 per screw.
- Limitation: Highly susceptible to 'spinning' if the hole is accidentally over-drilled or if the masonry is crumbly. They cannot be re-tightened once stripped.
2. Sleeve and Wedge Anchors
These mechanical anchors expand against the walls of the drilled hole when the nut is tightened. A standard 1/2-inch x 3-3/4-inch zinc-plated sleeve anchor provides robust holding power through friction and mechanical interlock.
- Best For: Medium to heavy loads (up to 600 lbs pull-out in solid brick).
- Cost: Approximately $1.85 per anchor.
- Limitation: The expansion force can crack fragile bricks or blow out the back of a brick veneer if the embedment depth is too close to the unbacked edge.
3. Chemical Epoxy Anchors (e.g., Simpson Strong-Tie SET-3G)
Chemical anchors use a two-part epoxy or hybrid resin to bond a threaded rod to the masonry. As detailed in the Simpson Strong-Tie Anchor Systems catalog, high-modulus epoxies like SET-3G cure to a strength that often exceeds the base material itself.
- Best For: Critical structural loads, edge-distance applications, and hollow brick veneers where mechanical expansion is impossible.
- Cost: $38 to $45 per 9oz cartridge, plus $2 per threaded rod.
- Limitation: Requires meticulous hole cleaning and strict temperature/curing time adherence.
4. Heavy-Duty Construction Adhesives (The Non-Drilling Alternative)
For flat, non-structural fixtures, polyurethane adhesives like Loctite PL Premium 3X offer a drill-free alternative. While not a 'screw', it is a vital alternative to consider for attaching furring strips or lightweight siding battens to brick.
- Best For: Flat surface bonding where shear force dominates and pull-out force is minimal.
- Cost: $8 to $12 per 10oz tube.
- Limitation: Zero mechanical pull-out strength; fails completely under direct tensile loads.
Load Capacity and Cost Comparison Matrix
| Fastener Type | Optimal Substrate | Est. Pull-Out (Solid Brick) | Avg. Cost / Unit | Installation Time |
|---|---|---|---|---|
| Masonry Screw (Tapcon) | Solid Brick / Mortar | 150 - 250 lbs | $0.45 | 1-2 minutes |
| Sleeve Anchor (1/2') | Solid Brick Only | 400 - 600 lbs | $1.85 | 2-3 minutes |
| Wedge Anchor (1/2') | Solid Brick / Concrete | 600 - 800 lbs | $2.10 | 2-3 minutes |
| Chemical Epoxy (w/ Rod) | Brick / Hollow Veneer | 1,500 - 2,500+ lbs | $6.00+ | 10-15 minutes + cure |
Execution Protocol: Maximizing Pull-Out Strength
The highest-rated anchor will fail if the installation protocol is ignored. Follow these exact specifications to ensure maximum holding power.
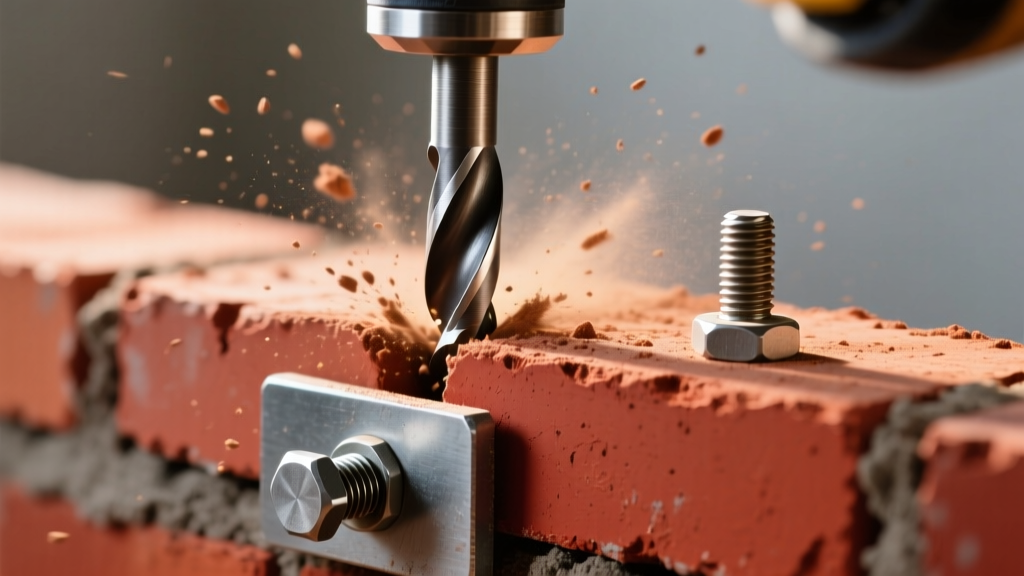
- Bit Selection: Use a carbide-tipped SDS-Plus rotary hammer bit. Standard black-oxide twist bits will dull instantly and overheat, glazing the inside of the masonry hole and reducing friction.
- Drilling Technique: For modern, hard-fired brick, use the hammer-drill setting. For older, historic, or highly fragile brick, use rotary-only mode to prevent micro-fractures in the surrounding clay matrix.
- Depth Control: Drill the hole exactly 1/4-inch deeper than the required embedment depth of the anchor. This provides a void for dust accumulation, ensuring the anchor seats fully.
- The 40% Rule (Hole Cleaning): This is the most skipped step. Leaving masonry dust in the hole reduces pull-out strength by up to 40%. Use a wire brush to score the inside of the hole, followed by blowing it out with compressed air (minimum 20 PSI) or a dedicated manual hole pump. Repeat twice.
Never drill a mechanical expansion anchor closer than 1.5 inches to the edge or corner of a brick unit. The outward radial force of the expanding sleeve will exceed the tensile strength of the clay corner, causing a catastrophic 'blow-out' or spall. If you must mount near an edge, use a chemical epoxy anchor, which exerts zero expansion stress.
Common Failure Modes and Troubleshooting
Symptom: The Anchor Spins During Tightening
Cause: The drilled hole is oversized, or the masonry is too soft/crumbly to support the cut threads of a masonry screw.
Fix: Do not attempt to pack the hole with wooden matchsticks or plastic wedges. Remove the spinning fastener, clean the hole, and inject a hybrid chemical anchor (like Hilti HIT-HY 200-A or Simpson SET-3G) with a threaded rod. The epoxy will bridge the gap and bond to the irregular cavity walls.
Symptom: Mortar Joint Crumbling Around the Fastener
Cause: Using a mechanical wedge anchor in a Type N or Type O mortar joint. These softer mortars (750 psi and 350 psi respectively) cannot withstand the localized crushing force of a steel wedge expanding against them.
Fix: Switch to a masonry screw (which cuts rather than crushes) or use a nylon-plug anchor designed specifically for soft masonry, which distributes the load over a wider surface area.
Summary: Selecting the Right System
There is no universal 'best' fastener for masonry; the correct choice is entirely dependent on the substrate condition and the load vector. For quick, light-duty mounts in mortar, standard masonry screws offer unbeatable speed and economy. For heavy structural loads in solid brick, sleeve anchors provide reliable mechanical interlock. However, when dealing with hollow brick veneers, fragile historic masonry, or extreme load requirements near edges, two-part chemical epoxy anchors remain the undisputed, professional-grade solution.
Written by
David NakamuraDavid Nakamura is a licensed architect (AIA) and construction technology writer focused on sustainable building methods, mass timber engineering, and high-performance building envelopes. He holds a Master of Architecture from the University of Washington and is a certified Passive House Consultant (CPHC). David spent eight years at the Seattle firm Mithun, where he led the design of three LEED Platinum projects, before founding his own practice specializing in net-zero residential design. He serves on the editorial advisory board of GreenBuilder Magazine and has authored peer-reviewed papers on cross-laminated timber (CLT) connections for the Journal of Structural Engineering. In his spare time, David teaches woodworking at Pratt Fine Arts Center and kayaks the Puget Sound.
More from David Nakamura
View all
Construction Cost
Labor Cost to Build a Deck Per Sq Ft: 2026 Installation Guide
Discover the exact labor cost to build a deck per sq ft in 2026. This installation guide breaks down contractor rates, complexity factors, and hidden fees.
Aug 4, 2026

Construction Cost
How Much Does It Cost to Build a 3 Bedroom House? Financing Guide
Learn exactly how much it costs to build a 3 bedroom house and explore 2026 financing options, construction loan types, and budget frameworks for your build.
Aug 4, 2026

Construction Cost
Cost to Build a Tennis Court: 2026 Guide
How much does it cost to build a tennis court in 2026? Breakdowns for asphalt, concrete, and synthetic surfaces plus fencing and lighting.
Jul 30, 2026