How to Install Cheap Stone Veneer: A Pro-Level DIY Guide
Learn how to install cheap stone veneer with pro-level techniques. Master substrate prep, mortar mixing, and pattern mapping to elevate budget materials.

The Reality of Budget Stone Veneer
Budget manufactured stone veneer (MSV) typically costs between $4.50 and $7.00 per square foot in 2026, compared to $12.00 to $18.00 for premium natural thin veneer. The primary trade-off for this lower price point is a lack of mold variation. While premium lines feature 15 to 20 unique stone casts, budget lines often rely on just 3 to 5 repetitive molds. If installed without a strategic layout plan, these repetitive patterns become immediately obvious, resulting in a synthetic, mass-produced appearance.
The secret to making cheap stone veneer look authentic lies entirely in the installation methodology. By manipulating substrate preparation, mortar consistency, and deliberate pattern mapping, you can mask the material's limitations and achieve a high-end architectural finish.
Material Breakdown: Mortar-Based vs. Mortarless Budget Veneer
Before purchasing materials, you must choose your installation system. Budget veneer is sold in both traditional mortar-based formats and interlocking mortarless formats.
| Feature | Mortar-Based Budget MSV | Mortarless/Polyurethane Panels |
|---|---|---|
| Material Cost (per sq. ft.) | $4.50 - $7.00 | $6.00 - $9.00 |
| Installation Difficulty | High (Requires masonry skills) | Low (Interlocking tongue-and-groove) |
| Aesthetic Authenticity | High (Real grout lines and depth) | Medium (Visible seams if misaligned) |
| Best Application | Fireplace surrounds, exterior wainscoting | Interior accent walls, basement bars |
This guide focuses on the mortar-based installation, as it provides the highest return on investment for aesthetic authenticity when using budget materials.
Essential Tools and Materials
Do not substitute masonry materials with standard tile adhesives. The dead load of stone veneer requires specific structural support.
- Moisture Barrier: Grade D, 60-minute asphalt felt paper.
- Lath: 2.5 lb per square yard galvanized diamond mesh lath.
- Fasteners: 1.5-inch galvanized roofing nails (minimum 10 per square foot).
- Scratch Coat Mortar: Type S masonry cement mixed with washed masonry sand (1:2.25 ratio).
- Setting Mortar: Polymer-modified thin-set (e.g., Custom Building Products VersaBond) or Type S mortar.
- Grout: Type N masonry cement tinted to your desired joint color.
- Tools: 1/2-inch notched trowel, pointing trowel, masonry hawk, grout bag, concave jointer, wire brush.
Step-by-Step Installation: The Pro-Finish Method
Step 1: Substrate Prep and Weatherproofing
For interior drywall or exterior sheathing, staple two layers of Grade D felt paper horizontally, overlapping the seams by 2 inches. Over the felt, unroll the 2.5 lb galvanized lath. Secure the lath using 1.5-inch roofing nails driven directly into the wall studs (not just the sheathing) every 6 inches along the edges and every 16 inches in the field. Ensure the lath is pulled tight; loose lath will cause the scratch coat to crack under the veneer's weight.
Step 2: The Scratch Coat Application
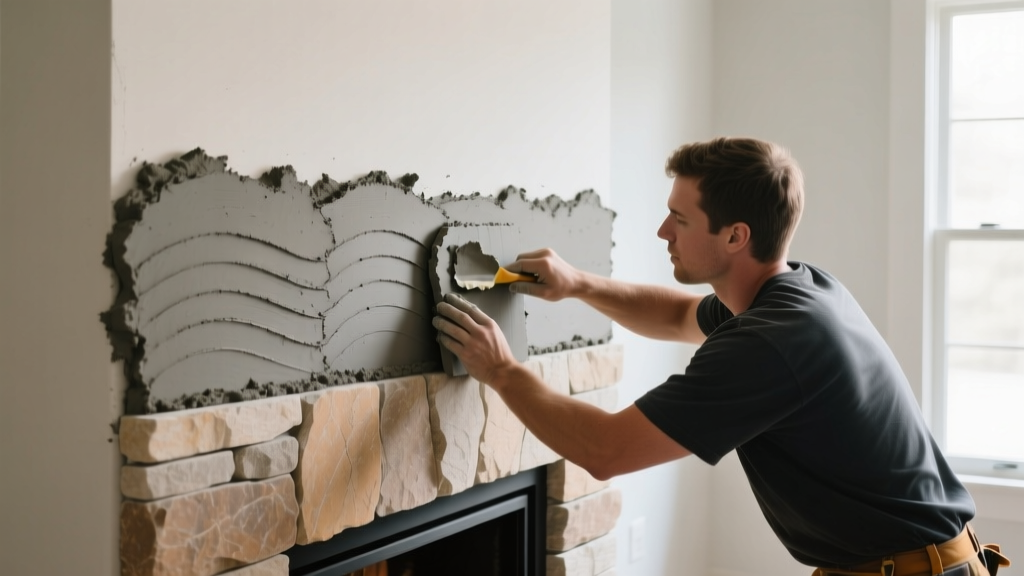
Mix your Type S mortar to a consistency similar to thick peanut butter. Using a flat trowel, apply a 1/2-inch thick layer of mortar directly over the lath, forcing it through the mesh to create a mechanical lock. Before the mortar sets (usually within 45 minutes), use a wire rake or notched trowel to score horizontal grooves into the surface. This 'scratch coat' must cure for a minimum of 48 hours before applying the stone.
Step 3: Dry-Fitting and Pattern Mapping (The Critical Step)
This is where you defeat the repetitive molds of cheap veneer. Clear a 50-square-foot space on your floor and lay out the stones. Identify the 3 to 5 unique mold patterns in your budget batch. Deliberately mix sizes, colors, and shapes. Turn stones upside down or rotate them 90 degrees to alter their profile. By mapping out 10-square-foot sections on the floor first, you ensure no two identical stones are placed within 3 feet of each other on the wall.
Step 4: Application and Back-Buttering
Dampen the scratch coat and the back of the stone veneer with a spray bottle of water. Apply a 1/2-inch layer of setting mortar to the wall using a notched trowel. Crucially, you must also 'back-butter' the stone by applying a thin layer of mortar to its back. Press the stone firmly into the wall bed, wiggling it slightly until mortar squeezes out the sides. This squeeze-out ensures 100% coverage and prevents hollow spots that lead to delamination.
Step 5: Grouting and Tooling the Joints
Wait 24 hours after setting the stones before grouting. Load a canvas grout bag with Type N mortar and fill the joints to a depth of 1/2 inch. Allow the grout to firm up for about 30 to 45 minutes (it should be thumbprint-hard). Use a metal concave jointer to compress and smooth the mortar joints. Finally, lightly brush the stone faces with a stiff bristle brush to remove excess mortar and expose the natural aggregate texture.
Pro Tip: To further hide the artificial nature of budget MSV, purchase a concrete acid stain or masonry dye in a complementary earth tone. Lightly mist random stones with the dye during the dry-fit phase to break up the uniform factory coloring and introduce natural variation.
Common Failure Modes and Troubleshooting
According to defect reports analyzed by InterNACHI, the majority of stone veneer failures are related to moisture intrusion and improper load support. Avoid these specific edge cases:
- Efflorescence (White Powdery Stains): Caused by water migrating through the wall and bringing soluble salts to the surface. Fix: Ensure weep holes are present at the base of exterior installations and use a breathable, silane-siloxane penetrating sealer rather than an acrylic film-forming sealer, which traps moisture.
- Delamination (Stones Falling Off): Caused by failing to wet the substrate or the stone before applying mortar, which causes the dry materials to suck the moisture out of the mortar before it cures. Fix: Always mist surfaces prior to buttering.
- Pattern Fatigue: The 'stacked stone' look is highly unforgiving with budget materials because the horizontal lines highlight repetitive mold lengths. Fix: Always opt for a 'grouted joint' or 'ashlar' pattern when using cheap veneer, as the mortar lines break up the visual geometry.
Cost Analysis: Budget Veneer vs. Natural Stone
Understanding the true cost of your project requires factoring in the ancillary materials, not just the stone itself. Below is a comparative cost breakdown for a standard 50-square-foot interior fireplace surround in 2026.
| Cost Category | Budget MSV (Mortar-Based) | Premium Natural Thin Veneer |
|---|---|---|
| Stone Material (50 sq. ft.) | $275.00 | $750.00 |
| Lath, Felt, and Fasteners | $65.00 | $65.00 |
| Mortar, Grout, and Thin-Set | $85.00 | $95.00 |
| Waste Factor (10%) | $27.50 | $75.00 |
| Total Material Cost | $452.50 ($9.05 / sq. ft.) | $985.00 ($19.70 / sq. ft.) |
By investing the extra labor required for meticulous dry-fitting and proper scratch-coat preparation, you effectively bridge the $500+ material gap between budget manufactured stone and premium natural stone, achieving a high-end architectural result on a strict budget.
Written by
James ThorntonJames Thornton is a construction industry veteran with 25 years of hands-on experience in wood framing, lumber grading, and residential building codes. He started as a framing carpenter in rural Oregon, earned his ICC Residential Building Inspector certification, and eventually became a senior plan reviewer for the City of Portland Bureau of Development Services. James holds a B.S. in Wood Science & Technology from Oregon State University and is a certified lumber grader through the West Coast Lumber Inspection Bureau (WCLIB). He has inspected over 3,000 residential construction sites and authored the city's internal guide on advanced framing techniques (2x6 at 24" O.C.). James lives in Bend, OR, where he builds custom timber-frame cabins and competes in lumberjack sports.
More from James Thornton
View all
Insulation
Best Home Insulation Materials: Complete 2026 Guide
Compare top home insulation materials for 2026. Find R-values, installed costs per square foot, and best uses for fiberglass, spray foam, and mineral wool.
Aug 4, 2026

Sustainable Building
Certify Your Green Building Material for LEED and WELL
Step-by-step guide to certifying a green building material for LEED v5 and WELL v2. Master EPDs, HPDs, and VOC limits for 2026 project specifications.
Aug 4, 2026

Stone & Masonry
Veneer Stacked Stone Panels: Interior Design & Style Showcase
Discover how veneer stacked stone panels transform interiors. Explore modern design profiles, material pairings, and technical installation specs.
Aug 4, 2026