DIY Stone Veneer Fireplace: Complete Material & Cost Guide
Master your DIY stone veneer fireplace with this complete material guide. Compare manufactured vs. natural stone, mortar specs, and costs.

Material Selection: Manufactured vs. Natural Thin Veneer
Selecting the correct stone veneer for an interior fireplace surround dictates the structural preparation, mortar requirements, and final aesthetic. The market is dominated by three distinct material categories, each governed by different physical properties and ASTM standards. For DIY applications, weight per square foot and cutting requirements are the primary limiting factors.
| Material Type | Weight (lbs/sq ft) | Avg Cost (Materials) | Diy Skill Level | Governing Standard |
|---|---|---|---|---|
| Manufactured Stone (e.g., Cultured Stone) | 8.5 - 10.5 | $6.00 - $9.50 | Intermediate | ASTM C1670 |
| Natural Thin Veneer (NTV) | 12.0 - 15.0 | $8.50 - $14.00 | Advanced | ASTM C616 / C568 |
| Lightweight Interlocking (e.g., AirStone) | 4.0 - 5.5 | $10.00 - $12.50 | Beginner | Proprietary / ICC-ES |
Manufactured stone veneer (MSV) remains the most popular choice for DIY fireplace surrounds. Brands like Boral Cultured Stone and Eldorado Stone utilize lightweight aggregates and iron oxide pigments cast in molds taken from real stone. MSV is forgiving during installation because the color runs through the entire thickness of the unit, meaning accidental chips during cutting can be rotated or hidden. Natural Thin Veneer (NTV), sliced from real quarried limestone or slate, requires a wet saw with a continuous rim diamond blade to cut without shattering the sedimentary layers. Lightweight interlocking systems eliminate the need for metal lath and scratch coats, adhering directly to primed drywall or cement board using proprietary adhesives, but they offer a limited selection of linear ledge profiles.
Substrate Preparation: The Step That Prevents Delamination
The most common cause of catastrophic veneer failure in DIY fireplace projects is improper substrate preparation. Standard drywall (gypsum board) cannot support the shear load of a mortar-based stone veneer system. The framing must be sheathed with a minimum 1/2-inch cement backer board, such as James Hardie HardieBacker or USG Durock, secured to wood studs every 8 inches with corrosion-resistant backer board screws.
The Moisture and Lath Matrix
Once the cement board is installed, the surface requires a weather-resistant barrier and a mechanical key for the mortar. Even in interior applications, a moisture barrier prevents the highly alkaline mortar from degrading the cement board fibers during the curing process.
- Moisture Barrier: Apply one layer of Grade D building paper or 15 lb asphalt felt. Overlap horizontal seams by 2 inches and vertical seams by 6 inches.
- Metal Lath: Use 2.5 lb per square yard galvanized expanded metal lath. Attach using 1-inch galvanized roofing nails or staples, penetrating the wood studs by at least 1/4 inch.
- Overlap Requirements: Lath must overlap horizontal joints by 1 inch and vertical joints by 2 inches. Wrap lath around inside and outside corners by at least 6 inches to prevent corner cracking.
Mortar Specifications: Why Type N Fails
DIYers frequently purchase standard Type N masonry mortar from big-box stores for veneer applications. This is a critical error. Type N lacks the bond strength and polymer additives required to hold heavy stone units in a vertical, non-load-bearing application. According to installation guidelines from major manufacturers like Eldorado Stone, you must use a polymer-modified veneer stone mortar or a high-strength Type S mortar mixed with an acrylic fortifier.
For the scratch coat, mix polymer-modified mortar to a consistency that will hold a 1/4-inch ridge when scored. Apply a 1/2-inch layer over the lath and score it horizontally with a notched trowel to create a mechanical key. Allow the scratch coat to cure for a minimum of 24 to 48 hours before applying the setting bed and stone.
The Hidden Costs: Budgeting a 35 Sq Ft Fireplace Surround
Material calculators often only account for the field stone. A realistic budget must include corner pieces, which are priced per linear foot, as well as the consumable substrate materials. Below is a precise cost breakdown for a standard 35 square foot fireplace surround featuring 8 linear feet of outside corners.
| Component | Quantity Required | Unit Cost | Total Estimate |
|---|---|---|---|
| Manufactured Field Stone | 35 sq ft (add 10% waste) | $7.50 / sq ft | $288.75 |
| Manufactured Corner Pieces | 8 linear ft | $12.00 / lin ft | $96.00 |
| 1/2" Cement Backer Board | 2 sheets (3x5) | $35.00 / sheet | $70.00 |
| Galvanized Metal Lath & Fasteners | 1 roll (8 sq yd) | $45.00 / roll | $45.00 |
| Polymer-Modified Veneer Mortar | 4 bags (80 lb) | $22.00 / bag | $88.00 |
| Total Material Cost | $587.75 |
Execution: Clearances and Jointing Techniques
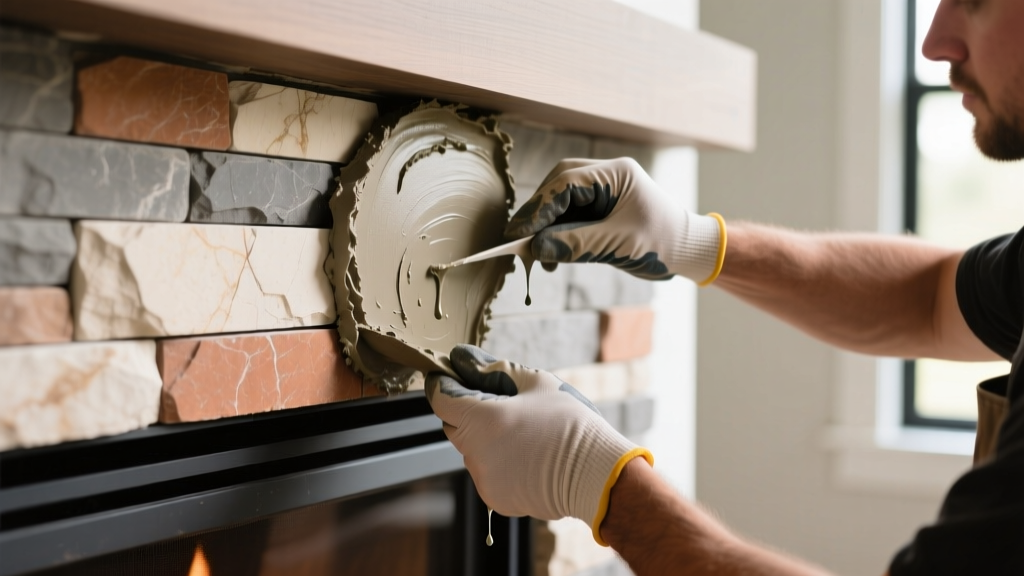
When installing stone veneer around a firebox, maintaining proper clearances to combustible materials is a life-safety requirement. The U.S. Fire Administration and NFPA 211 standards dictate that combustible materials, such as wooden mantels or trim, must be kept at least 6 inches away from the firebox opening. If the stone veneer is applied over a non-combustible substrate that extends beyond the firebox, the stone itself can abut the metal firebox, but the wooden mantel above must still respect the 6-inch clearance rule or follow the specific manufacturer's tested clearance reductions.
Dry-Stack vs. Mortared Joints
The installation technique drastically alters the final shadow lines and maintenance requirements of the fireplace.
- Standard Mortared Joints (1/2" to 1" wide): Requires a grout bag to fill joints after the stones are set. This method is highly recommended for fireplaces because it seals the gaps, preventing ash, soot, and dust from accumulating in the crevices. Joints must be tooled with a concave jointer to compress the mortar and increase water resistance.
- Dry-Stack (Zero Clearance): Stones are placed directly against one another with no mortar between the units. While visually striking, dry-stack applications on fireplaces require a solid, continuous mortar bed behind the stones to ensure structural integrity. The lack of grout lines makes dusting the fireplace surround difficult, requiring regular vacuuming with a brush attachment.
Common DIY Failure Modes and How to Avoid Them
Understanding the chemical and physical failure modes of masonry veneer separates successful renovations from expensive teardowns.
1. Efflorescence (White Powder Deposits)
The Cause: Efflorescence occurs when water-soluble salts within the mortar or the stone itself migrate to the surface and crystallize upon evaporation. In interior fireplaces, this is almost always caused by using too much water in the mortar mix or applying stone over a damp scratch coat.
The Fix: Strictly adhere to the water-to-mortar ratios on the bag. Do not re-temper (add water to) mortar that has begun to set. If efflorescence appears, remove it with a dry, stiff-bristle nylon brush. Never use muriatic acid on manufactured stone veneer, as it will strip the iron oxide pigments and permanently bleach the surface.
2. Delamination at the Hearth Line
The Cause: The transition point where the vertical stone veneer meets the horizontal hearth experiences high thermal expansion and contraction cycles. If the lath is not properly wrapped and secured at this 90-degree angle, the mortar bed will crack and separate.
The Fix: Install a weep screed or a metal stopping bead at the base of the veneer. Ensure the lath wraps continuously from the vertical wall onto the horizontal hearth substrate without a seam at the exact fold line.
3. Spalling on Natural Thin Veneer
The Cause: Applying a non-breathable masonry sealer to natural sandstone or limestone veneer traps moisture inside the stone. When the fireplace is lit, the heat turns the trapped moisture into steam, causing the face of the stone to pop off (spall).
The Fix: Most interior manufactured and natural stone veneers do not require sealing. If a sealer is desired for dust-proofing, use only a penetrating, breathable silane/siloxane sealer that allows water vapor to escape while repelling liquid stains.
Written by
David NakamuraDavid Nakamura is a licensed architect (AIA) and construction technology writer focused on sustainable building methods, mass timber engineering, and high-performance building envelopes. He holds a Master of Architecture from the University of Washington and is a certified Passive House Consultant (CPHC). David spent eight years at the Seattle firm Mithun, where he led the design of three LEED Platinum projects, before founding his own practice specializing in net-zero residential design. He serves on the editorial advisory board of GreenBuilder Magazine and has authored peer-reviewed papers on cross-laminated timber (CLT) connections for the Journal of Structural Engineering. In his spare time, David teaches woodworking at Pratt Fine Arts Center and kayaks the Puget Sound.
More from David Nakamura
View all
Construction Cost
Labor Cost to Build a Deck Per Sq Ft: 2026 Installation Guide
Discover the exact labor cost to build a deck per sq ft in 2026. This installation guide breaks down contractor rates, complexity factors, and hidden fees.
Aug 4, 2026

Construction Cost
How Much Does It Cost to Build a 3 Bedroom House? Financing Guide
Learn exactly how much it costs to build a 3 bedroom house and explore 2026 financing options, construction loan types, and budget frameworks for your build.
Aug 4, 2026

Construction Cost
Cost to Build a Tennis Court: 2026 Guide
How much does it cost to build a tennis court in 2026? Breakdowns for asphalt, concrete, and synthetic surfaces plus fencing and lighting.
Jul 30, 2026