How to Install Rustic Stone Veneer: A Step-by-Step Mortared Guide
Master the installation of rustic stone veneer with our expert guide. Learn substrate prep, mortar mixing, layout techniques, and jointing for a flawless finish.

Substrate Preparation: The Foundation of a Lasting Install
Rustic stone veneer profiles—characterized by irregular shapes, varied thicknesses, and rough-hewn textures—demand a flawless substrate. Unlike uniform ledgestone panels, the dimensional variance of rustic stone (often ranging from 1 to 3.5 inches in thickness) places uneven sheer stress on the wall assembly. Failure to prepare the substrate correctly leads to delamination, water intrusion, and structural sagging.
For wood-framed exterior walls, the assembly must follow a strict moisture-management sequence. Begin by applying two layers of Grade D building paper or a high-performance weather-resistive barrier (WRB) over the OSB or plywood sheathing. Overlap horizontal joints by 2 inches and vertical joints by 6 inches. Next, attach a weep screed at the base of the wall. According to ASTM C1063 standards, the weep screed must be positioned a minimum of 4 inches above finished soil grade or 2 inches above paved surfaces to prevent capillary moisture wicking.
Install 2.5 lb self-furring galvanized metal lath over the WRB. Use 1-inch or 1.25-inch galvanized roofing nails or staples, driving them directly into the wall studs at 6-inch vertical intervals and 16-inch horizontal intervals. Ensure the lath cups face upward to catch the scratch coat mortar.
Material Selection: Mortar and Lath Specifications
The mortar used for rustic stone veneer must accommodate both the heavy weight of the stone and the thermal expansion/contraction of the wall assembly. While Type N mortar is sometimes used for interior applications, exterior installations require the higher compressive and bond strength of Type S mortar or a specialized polymer-modified veneer mortar.
| Mortar Type | Compressive Strength | Best Application | Working Time |
|---|---|---|---|
| Type N (Standard) | 750 PSI | Interior, low-stress walls | 60-90 minutes |
| Type S (High Strength) | 1,800 PSI | Exterior, freeze-thaw climates | 45-60 minutes |
| Polymer-Modified Veneer | 2,500+ PSI | High-moisture, seismic zones | 30-45 minutes |
For rustic profiles, a polymer-modified mortar (such as SPEC MIX Stone Veneer Mortar or Quikrete Veneer Stone Mortar) is highly recommended. The polymer additives increase bond strength and reduce the risk of the heavy, irregular stones slipping before the mortar cures.
The Scratch Coat: Creating a Mechanical Bond
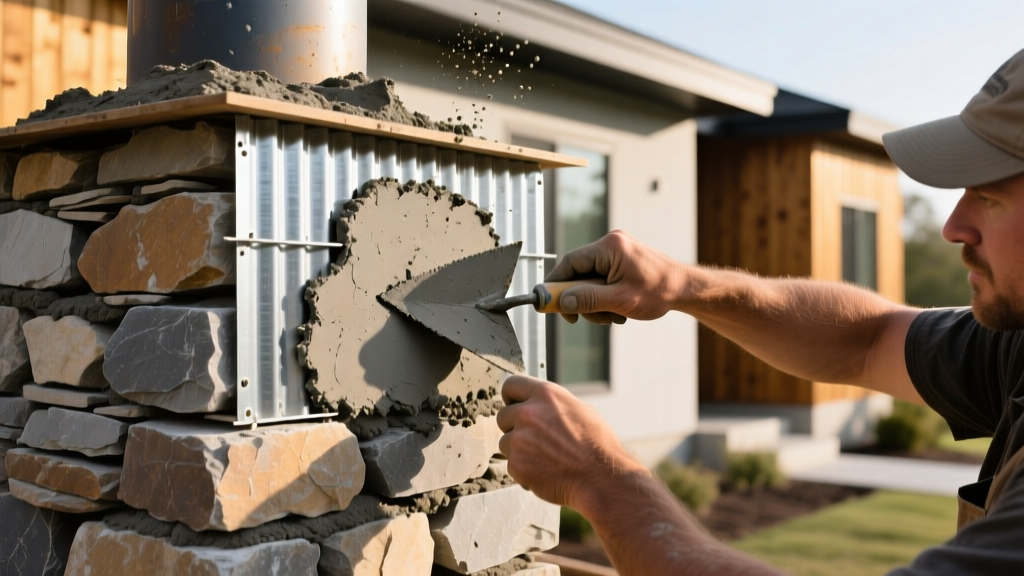
The scratch coat is a 1/2-inch thick layer of mortar applied to the metal lath. Its primary purpose is to encapsulate the lath and provide a textured, rigid surface for the setting bed to grip.
- Mix the Mortar: Combine the mortar to a consistency resembling thick peanut butter. It should hold its shape on a trowel held at a 90-degree angle without sliding off.
- Apply the Coat: Using a flat trowel, force the mortar completely through the lath mesh to ensure full encapsulation. Then, apply additional mortar to reach a uniform 1/2-inch thickness.
- Score the Surface: While the mortar is still thumbprint-soft, use a notched trowel or a scratch rake to create deep horizontal grooves across the entire surface. These horizontal lines provide the mechanical key for the setting bed.
- Cure Time: Allow the scratch coat to cure for a minimum of 24 to 48 hours. In hot, dry climates, lightly mist the scratch coat with water twice a day to prevent rapid drying and shrinkage cracking.
Dry-Fitting and Layout Strategy for Rustic Profiles
The most common failure in rustic stone veneer installation is "pattern fatigue"—a repetitive, unnatural layout that makes manufactured stone look obviously fake. Before mixing any setting mortar, lay out the stones on the ground to plan your pattern.
Follow these layout rules to achieve an authentic, natural appearance:
- The Rule of Thirds: Avoid aligning vertical joints in any repeating pattern. Stagger joints so that no continuous vertical line extends beyond 12 inches.
- Vary the Sizing: Mix large, medium, and small stones randomly. Do not place two identically sized or shaped stones adjacent to one another.
- Corners First: Always install corner pieces before the flat field stones. Alternate the long and short legs of the corner pieces to mimic the interlocking pattern of full-thickness natural masonry.
Setting the Stone: Application and Jointing Techniques
Once the layout is planned and the scratch coat is fully cured, begin the setting process. According to the Masonry Veneer Manufacturers Association (MVMA), back-buttering is non-negotiable for irregular stone profiles.
Step-by-Step Setting Process
- Apply the Setting Bed: Trowel a 1/2-inch layer of fresh mortar onto the cured scratch coat. Work in manageable sections (approximately 10 to 15 square feet at a time) to prevent the mortar from skinning over.
- Back-Butter Every Stone: Use a margin trowel to apply a 1/2-inch layer of mortar to the back of the rustic stone. Ensure the mortar covers the entire perimeter and the center of the stone.
- Press and Wiggle: Press the stone firmly into the setting bed. Wiggle it slightly to collapse the mortar and force out air pockets. The mortar should squeeze out around the edges, creating a seal.
- Maintain Joint Widths: Rustic stone typically requires wider, irregular joints (ranging from 1/2 inch to 1.5 inches). Use wooden shims or spacers temporarily if a heavy stone begins to sag.
Tooling the Joints
Wait until the mortar in the joints is thumbprint-hard (usually 30 to 60 minutes, depending on humidity) before tooling. Use a pointing trowel or a jointing tool to compact the mortar into the joints. Compressing the mortar increases its density and weather resistance. Finally, use a stiff-bristle brush (never a wire brush, as metal bristles can break off, embed in the mortar, and rust) to sweep away excess mortar and texture the joints to match the rustic aesthetic.
Troubleshooting Common Installation Failures
Even experienced masons encounter issues when working with highly irregular rustic profiles. Here is how to diagnose and fix the most common edge cases.
1. Efflorescence and Moisture Trapping
Symptom: White, powdery salt deposits appear on the stone or mortar joints weeks after installation.
Cause: Water moving through the wall assembly dissolves soluble salts in the mortar and deposits them on the surface as it evaporates.
Fix: Ensure the weep screed is completely unobstructed. Do not seal the stone immediately after installation; the wall assembly must breathe and dry out for at least 28 days. If efflorescence appears, dry-brush it off and apply a breathable, silane/siloxane penetrating sealer only after the wall is fully cured.
2. The "Column" Effect (Vertical Stacking)
Symptom: Stones appear to stack directly on top of one another, creating unnatural vertical columns that ruin the rustic illusion.
Cause: Failing to dry-fit or relying too heavily on uniformly sized stones.
Fix: Cut larger stones using a diamond-blade wet saw to create custom, irregular shapes that break up vertical lines. Always overlap the joint of the stone below by at least 30% with the stone above.
Curing, Cleaning, and Final Inspection
Protect the newly installed rustic stone veneer from direct sunlight, high winds, and rain for the first 48 hours using breathable tarps. Rapid moisture loss will cause the mortar to cure weak and crumbly, while heavy rain can wash out uncured joints.
After the initial 48-hour cure, perform a final cleaning. Mix a mild solution of water and a specialized masonry cleaner (avoid muriatic acid, which can etch the cementitious binders in manufactured rustic stone and cause permanent discoloration). Rinse the wall thoroughly with a garden hose, never a high-pressure washer, which can erode the fresh mortar joints.
"The beauty of rustic stone veneer lies in its imperfections. Your goal as an installer is not to force the stones into a rigid grid, but to guide their natural, chaotic geometry into a structurally sound, water-resistant assembly." — Fine Homebuilding Masonry Guide
By adhering strictly to substrate preparation protocols, utilizing high-bond polymer-modified mortars, and executing a randomized, dry-fitted layout, your rustic stone veneer installation will achieve both the timeless aesthetic of natural fieldstone and the structural longevity required by modern building codes.
Written by
Sarah WhitfieldSarah Whitfield is a chartered quantity surveyor (MRICS) and construction cost analyst with 15 years of experience in material pricing, procurement strategy, and project budgeting. She earned her degree in Construction Management from the University of Reading (UK) and has worked on projects ranging from $2M custom homes to $180M mixed-use developments across North America and Europe. Sarah currently leads cost estimating for BuildMat Insight, maintaining a proprietary database of 4,000+ material price points updated quarterly. She is a frequent contributor to RSMeans cost data panels and has presented at the International Cost Engineering Council (ICEC) congress. Based in Denver, CO, Sarah is an avid trail runner and volunteer mentor for Women in Construction.
More from Sarah Whitfield
View all
Wood & Lumber
What Are the Different Types of Wood? A Builder's Guide
Compare structural softwoods, finish hardwoods, and engineered lumber. Analyze Janka ratings, MOE values, and 2026 pricing for construction.
Aug 4, 2026

Walls & Panels
Steel Framing vs Wood Framing: Corrosion and Moisture Defense
Compare steel framing vs wood framing for moisture resistance. Learn about galvanized coatings, condensation risks, and corrosion protection strategies.
Jul 21, 2026

Stone & Masonry
How to Cut Stone Veneer: Wet Saw vs Grinder Comparison
Compare the best tools for cutting stone veneer. We review wet saws, angle grinders, and chop saws to help you achieve clean, chip-free cuts.
Jul 21, 2026