Mason's Mark Stone Veneer Installation: Pro Step-by-Step Guide
Learn how to install Mason's Mark stone veneer with our pro guide. Covers substrate prep, mortar mixing, layout, and pointing techniques for a flawless finish.

Understanding the Mason's Mark Profile
Installing Mason's Mark stone veneer requires managing deep-relief profiles and irregular ashlar shapes that standard flat veneers do not present. Characterized by heavily chiseled faces, pronounced raked edges, and varying thicknesses (often ranging from 2.0 to 3.5 inches at the high points), this specific manufactured stone profile demands a rigorous approach to substrate preparation, mortar hydration, and jointing. Failure to accommodate the deep shadows and heavy weight of the Mason's Mark profile results in void-driven moisture intrusion, efflorescence, and structural delamination.
This guide details the exact specifications, material ratios, and installation sequences required for a permanent, code-compliant exterior application on wood-framed substrates.
Material and Tool Specifications
Do not substitute masonry cement for Portland/lime blends when setting high-relief veneer. The flexural bond strength must exceed 70 psi to support the cantilevered weight of the chiseled stone faces.
- Mortar: Type S mortar compliant with ASTM C270. Pre-blended polymer-modified veneer mortar (e.g., SPEC MIX Veneer Stone Mortar) is acceptable if it meets the 70 psi flexural bond requirement.
- Lath: 2.5 lb/yd² self-furring galvanized welded wire lath (ASTM C847). Do not use non-self-furring lath on flat sheathing.
- Fasteners: 1-inch or 1.5-inch galvanized roofing nails or corrosion-resistant staples, penetrating a minimum of 1 inch into the framing studs.
- WRB: Two layers of Grade D building paper or a high-performance fluid-applied weather-resistive barrier.
Substrate Preparation and Lath Application
The longevity of Mason's Mark stone veneer relies entirely on the drainage plane and mechanical keying. Wood-based sheathings (OSB or plywood) expand and contract at different rates than the masonry veneer. The lath and scratch coat must bridge this differential movement.
| Substrate Component | Specification | Installation Requirement |
|---|---|---|
| Weather Barrier | Grade D paper or fluid-applied | Two layers, shingled with 2-inch horizontal overlaps |
| Wire Lath | 2.5 lb/yd² self-furring galvanized | Horizontal application, 1-inch vertical overlap, 2-inch horizontal overlap |
| Fastener Spacing | Galvanized nails/screws | Every 6 inches on center along studs, 16 inches max vertical spacing |
| Corner Detailing | Lath wrap | Wrap lath a minimum of 16 inches around all inside and outside corners |
For comprehensive moisture management strategies behind adhered veneers, refer to the enclosure design principles outlined by the Building Science Corporation. Ensuring a continuous drainage plane behind the scratch coat is non-negotiable for preventing trapped moisture from degrading the sheathing.
Applying the Scratch Coat
The scratch coat provides the structural bed for the heavy Mason's Mark stones. It must be thick enough to encapsulate the lath completely and provide a uniform surface for the setting mortar.
- Mix the Mortar: Combine 1 part Portland cement, 1/2 part hydrated lime, and 4.5 parts clean, washed masonry sand. Add water gradually until the mixture reaches a stiff, workable consistency (similar to wet beach sand). It should hold its shape when formed into a ball.
- Apply to Lath: Using a flat trowel, press the mortar firmly into the lath to ensure complete encapsulation. The total thickness of the scratch coat should be 3/8 to 1/2 inch.
- Scarify the Surface: Before the mortar sets, use a coarse comb or a notched trowel to score the surface with horizontal lines. Horizontal scoring prevents the heavy veneer stones from sliding down the wall during the final installation phase.
- Cure Time: Allow the scratch coat to cure for a minimum of 24 to 48 hours. In hot, dry climates, mist the scratch coat lightly with water twice a day to prevent rapid drying and shrinkage cracking.
Dry Layout and Setting the Veneer
Because Mason's Mark stones feature irregular, non-modular dimensions, a dry layout is critical to avoid repetitive patterns and ensure proper joint spacing.
The Dry Layout Process
Clear a 10x10 foot area on the ground and arrange the stones from multiple pallets simultaneously. Mix corner pieces and flat pieces to ensure color and texture consistency. Aim for a randomized ashlar pattern, avoiding continuous vertical joints (stacking) and ensuring that no single stone is smaller than 4 inches in length to prevent a "patchwork" appearance.
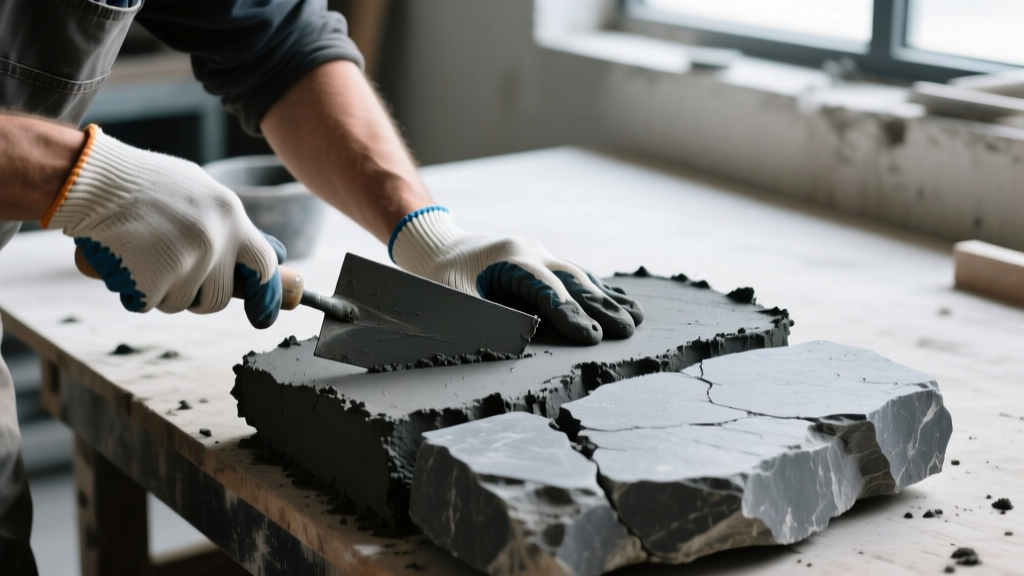
Due to the deep chiseled relief of the Mason's Mark profile, applying mortar only to the wall will leave voids behind the stone. You must "back-butter" every single piece. Apply a 1/2-inch layer of fresh mortar to the back of the stone, mounding it slightly in the center. When pressed against the scratch coat, the mortar should squeeze out slightly around the edges, ensuring 100% contact and eliminating air pockets where water could freeze and expand.
Installation Sequence
Always begin installation at the bottom and work upward. Install all corner pieces first, extending them out from the corner to establish the wall plane. Then, fill in the field (flat) stones. Maintain a joint width of 1/2 inch to 1 inch, which is the aesthetic standard for the Mason's Mark profile. Use a 4-foot level frequently to ensure the horizontal sight lines remain true, even as the individual stones vary in height.
Pointing, Jointing, and Cleanup
The jointing technique dramatically alters the final appearance of Mason's Mark stone veneer. For this profile, a wide, raked joint or a flush joint with a lightly brushed face is standard.
- Raked Joints: Once the mortar has set enough to be thumbprint-hard (usually 30 to 60 minutes depending on humidity), use a jointing tool or a piece of copper pipe to press the mortar back 1/4 inch from the stone face. This emphasizes the deep shadows of the chiseled edges.
- Brushing: After raking, use a stiff, dry masonry brush to sweep the joints. This creates a slightly textured, historical mortar appearance and removes loose crumbs.
- Cleanup: Never use acid washes on manufactured stone veneer; it will etch the cementitious face and cause permanent discoloration. If mortar smears onto the stone face, allow it to dry completely, then knock it off with a stiff dry brush. For stubborn spots, use a specialized, non-acidic masonry cleaner.
Climate-Specific Mortar Adjustments
Environmental conditions dictate the chemistry of your mortar mix. Adhering to standard practices outside of the 40°F to 90°F range will result in joint failure.
Hot and Dry Weather (Above 90°F)
High temperatures cause rapid moisture evaporation, leading to weak, crumbly mortar joints and poor bond strength. Store mortar bags in the shade. Use cold water for mixing. You may add a commercially approved mortar retarder to extend working time, but never exceed the manufacturer's dosage. Mist the scratch coat with water immediately before applying the setting mortar to prevent the dry scratch coat from sucking moisture out of the fresh setting bed.
Cold Weather (Below 40°F)
Freezing temperatures destroy uncured mortar. Heat the mixing water to between 120°F and 140°F. Use an accelerating admixture specifically formulated for masonry. Never use calcium chloride as an accelerator; it causes severe efflorescence and corrodes the galvanized lath. If temperatures are forecast to drop below freezing within 24 hours of installation, enclose the wall with insulated tarps and use indirect heaters to maintain an ambient temperature above 40°F during the initial cure.
White, powdery efflorescence is caused by water-soluble salts migrating to the surface. To prevent this on Mason's Mark installations, ensure the wall has proper overhangs, flashing, and weep screeds at the base. Do not install veneer below grade or where it will be subjected to continuous soil splash-back. Consult the Masonry Society guidelines for proper flashing integration at the foundation sill plate.
2026 Cost and Labor Estimates
Budgeting for a Mason's Mark stone veneer project requires accounting for the increased labor time associated with back-buttering irregular, high-relief stones. Standard flat veneers can be installed at a rate of 10-12 square feet per hour per mason; Mason's Mark profiles typically yield 6-8 square feet per hour.
| Cost Category | Low Range (Per Sq. Ft.) | High Range (Per Sq. Ft.) | Notes |
|---|---|---|---|
| Material (Stone) | $8.50 | $14.00 | Varies by color blend and regional freight |
| Mortar, Lath & WRB | $2.25 | $3.75 | Includes fasteners and corner bead |
| Professional Labor | $18.00 | $28.00 | Higher rate reflects deep-profile back-buttering |
| Total Installed | $28.75 | $45.75 | Excludes scaffolding for heights over 8 feet |
By strictly adhering to the ASTM C270 mortar standards, enforcing the back-buttering mandate, and managing joint widths to complement the chiseled profile, the resulting Mason's Mark installation will achieve both the intended historical aesthetic and a multi-decade structural lifespan.
Written by
Sarah WhitfieldSarah Whitfield is a chartered quantity surveyor (MRICS) and construction cost analyst with 15 years of experience in material pricing, procurement strategy, and project budgeting. She earned her degree in Construction Management from the University of Reading (UK) and has worked on projects ranging from $2M custom homes to $180M mixed-use developments across North America and Europe. Sarah currently leads cost estimating for BuildMat Insight, maintaining a proprietary database of 4,000+ material price points updated quarterly. She is a frequent contributor to RSMeans cost data panels and has presented at the International Cost Engineering Council (ICEC) congress. Based in Denver, CO, Sarah is an avid trail runner and volunteer mentor for Women in Construction.
More from Sarah Whitfield
View all
Wood & Lumber
What Are the Different Types of Wood? A Builder's Guide
Compare structural softwoods, finish hardwoods, and engineered lumber. Analyze Janka ratings, MOE values, and 2026 pricing for construction.
Aug 4, 2026

Walls & Panels
Steel Framing vs Wood Framing: Corrosion and Moisture Defense
Compare steel framing vs wood framing for moisture resistance. Learn about galvanized coatings, condensation risks, and corrosion protection strategies.
Jul 21, 2026

Stone & Masonry
How to Cut Stone Veneer: Wet Saw vs Grinder Comparison
Compare the best tools for cutting stone veneer. We review wet saws, angle grinders, and chop saws to help you achieve clean, chip-free cuts.
Jul 21, 2026