Mastering Grouting Stone Veneer: Pro Installation Steps
Learn professional techniques for grouting stone veneer. Discover the best mortars, mixing ratios, tooling methods, and cleanup tips for a flawless finish.

Why Proper Grouting Dictates Veneer Longevity
The visual appeal of natural or manufactured stone veneer is immediately apparent, but its structural survival depends entirely on what happens in the joints. Grouting stone veneer is not merely an aesthetic finishing touch; it is the primary defense against moisture intrusion, freeze-thaw spalling, and wind-driven rain penetration. When mortar joints fail, water bypasses the weather-resistant barrier (WRB), leading to sheathing rot and interior mold.
According to the Masonry Veneer Manufacturers Association (MVMA), the majority of veneer callbacks stem from improper joint tooling and incorrect mortar selection rather than stone adhesion failures. Mastering the technique requires understanding material science, timing, and precise physical execution.
Selecting the Right Mortar for Your Veneer Profile
The days of using a single mortar mix for all masonry applications are over. The mortar used for grouting stone veneer must be slightly softer and more flexible than the stone itself. If the mortar is harder (higher compressive strength) than the stone, thermal expansion and structural settling will cause the stone to crack instead of the mortar joint. The following matrix outlines the standard mortar types based on ASTM C270 specifications.
| Mortar Type | Compressive Strength | Best Application | Est. Cost (80lb Bag) |
|---|---|---|---|
| Type N | 750 psi | Interior veneer, soft natural stone (sandstone, limestone), non-load-bearing. | $14 - $18 |
| Type S | 1,800 psi | Exterior veneer, high-wind zones, freeze-thaw climates, manufactured stone. | $18 - $24 |
| Polymer-Modified (MVIS) | 2,500+ psi (High Bond) | High-efficiency installs, zero-slump vertical joints, premium manufactured profiles. | $35 - $48 |
For most exterior residential projects, a high-quality Type S mix (like SPEC MIX Mason Mortar) or a dedicated polymer-modified system (such as the LATICRETE MVIS system) provides the optimal balance of adhesion, flexibility, and weather resistance.
Essential Tools and Material Preparation
Attempting to grout stone veneer with tile floats or standard trowels will result in excessive smearing and wasted material. Assemble the following specific tools before mixing your first batch:
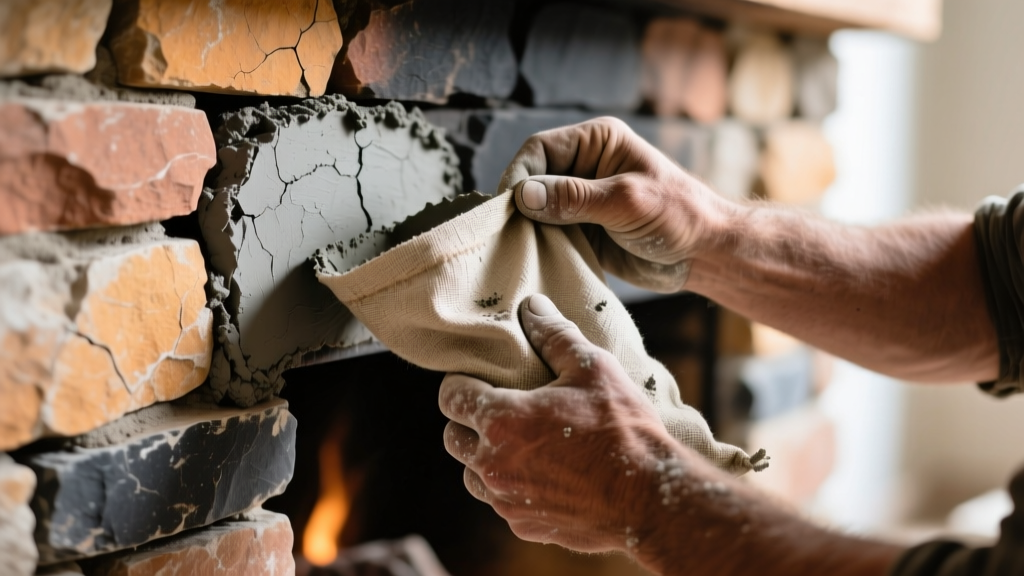
- Canvas Grout Bag: Use a heavy-duty, 18-inch canvas bag with a 3/8-inch or 1/2-inch metal tip. Avoid plastic bags, which lack the tactile feedback needed to control mortar flow.
- Pointing Trowel: A 3/8-inch or 1/2-inch wide margin/pointing trowel with a rounded nose for compacting mortar into the joint.
- Joint Striker (Sled Runner): A 3/8-inch concave sled runner jointer for exterior applications to create a water-shedding profile.
- Stiff Bristle Brush: A natural tampico or stiff nylon brush (never wire, which leaves rust-staining metal fibers embedded in the mortar).
- Masonry Whisk and Heavy-Duty Drill: A 1/2-inch variable speed drill (minimum 600 RPM, high torque) paired with a helical masonry paddle.
Step-by-Step Grouting Stone Veneer Execution
Timing and consistency are the two variables that separate professional masons from amateur DIYers. Follow this sequence to ensure structural integrity and aesthetic consistency.
Step 1: Dampening the Substrate and Stone
Both the scratch coat and the stone edges will aggressively pull moisture from your fresh mortar if they are bone dry. Lightly mist the stone edges and scratch coat with a garden sprayer 30 minutes before grouting. The surface should be damp (SSD - saturated surface dry) but have no standing water or glossy sheen. This prevents 'flash setting' and ensures proper hydration of the Portland cement.
Step 2: Mixing to the 'Peanut Butter' Consistency
Add clean, potable water to your mixing bucket before adding the dry mortar. Mix for 3 to 5 minutes until the consistency resembles thick peanut butter. The mortar must hold its shape on a trowel held vertically without sliding off.
Step 3: Loading and Applying the Grout Bag
Fill the canvas bag no more than two-thirds full. Twist the top tightly to build pressure. Apply the mortar into the joints, starting with vertical (head) joints, then moving to horizontal (bed) joints. Overfill the joint by roughly 1/4 inch above the stone surface. Keep the bag tip angled at 45 degrees and pull it steadily toward you to maintain an even flow.
Step 4: Tooling and Striking the Joints
Do not tool the joint immediately. Wait until the mortar is 'thumbprint hard'—meaning you can press your thumb into it and it leaves a clear print without sticking or smearing. In 70°F (21°C) weather with 50% humidity, this typically takes 30 to 45 minutes. Once ready, use your pointing trowel to push the mortar deep into the void, eliminating air pockets, then finish with a sled runner jointer to compact and smooth the face.
Troubleshooting Common Grouting Defects
Even experienced installers encounter environmental variables that alter mortar behavior. Use this decision matrix to diagnose and correct issues on the fly.
| Symptom | Root Cause | Corrective Action |
|---|---|---|
| Mortar shrinks and cracks down the center of the joint. | Mix was too wet, or joint was overfilled without proper compaction during tooling. | Rake out cracked mortar while green and repack. Ensure stiffer mix and aggressive trowel pressure. |
| White, powdery residue on stone faces (Efflorescence). | Water-soluble salts migrating to the surface due to excess moisture in the scratch coat or mortar. | Allow to dry completely. Dry-brush the stone. Treat with a dedicated efflorescence cleaner (e.g., PROSOCO Sure Klean). |
| Mortar smears and won't brush off the stone face. | Tooling the joint before it reached 'thumbprint hard' stage, or using a wet brush. | Stop immediately. Allow mortar to fully cure (24 hours) and use a diluted muriatic acid or specialized masonry cleaner. |
Curing, Sealing, and Final Cleanup
Portland cement requires continuous moisture to achieve its design strength. If the ambient temperature exceeds 85°F (29°C) or wind speeds are high, mist the grouted joints lightly with water twice a day for the first 48 hours to prevent rapid moisture evaporation. Full chemical curing takes 28 days.
Once the mortar has cured for a minimum of 14 to 28 days, apply a breathable, penetrating silane/siloxane water repellent (such as PROSOCO Siloxane PD). Never use film-forming acrylic sealers on exterior stone veneer. Acrylics trap moisture vapor inside the wall assembly, which will eventually cause the sealer to blister and the stone to spall during freezing temperatures. According to guidelines published by the National Park Service, masonry must be allowed to 'breathe' to expel internal moisture vapor, making vapor-permeable siloxanes the only viable choice for long-term preservation.
Frequently Asked Questions
Can I use sanded tile grout for grouting stone veneer?
No. Sanded tile grout (typically designed for 1/8-inch to 1/2-inch joints) lacks the structural compressive strength and weather-resistant properties of masonry mortar. Furthermore, tile grout is formulated to adhere to glazed or dense ceramic edges, not the porous, irregular edges of natural or manufactured stone. Always use ASTM C270 compliant masonry mortar.
How do I achieve a 'dry-stack' look while still grouting?
To achieve the illusion of a dry-stack (mortarless) installation while maintaining weatherproofing, use a 'butter and back-butter' technique during the stone setting phase, applying mortar only to the back and extreme edges of the stone so it oozes slightly into the joint. Alternatively, use a dark gray or charcoal-colored Type S mortar, recess the joint 1/2 inch back from the face, and use a stiff brush to roughen the mortar surface before it fully sets, hiding the joint in the shadows.
What is the ideal joint width for standard manufactured stone veneer?
Most manufacturers specify a 1/2-inch joint width. This provides enough mass for the mortar to bond effectively to both stones while allowing sufficient depth (minimum 1/2 inch) for proper tooling and compaction. Joints wider than 1 inch require specialized admixtures to prevent sagging and shrinkage cracking.
Written by
Marcus ChenMarcus Chen is a licensed structural engineer (PE) and building materials analyst with over 12 years of experience across residential, commercial, and industrial construction. He holds a Master of Science in Civil Engineering from UC Berkeley and spent six years at Thornton Tomasetti before transitioning to independent consulting and technical writing. Marcus specializes in material selection for seismic-prone regions, concrete reinforcement strategies, and lifecycle cost analysis. His work has been cited by the American Concrete Institute (ACI) and the Structural Engineers Association of California (SEAOC). When he is not on a job site or at his desk, you will find him hiking the Sierra Nevada or restoring a 1920s craftsman bungalow in Oakland, CA.
More from Marcus Chen
View all
Construction Cost
How Much Did the Eiffel Tower Cost to Build?
How much did the Eiffel Tower cost to build in 1889? We adjust for inflation and compare its budget to modern skyscraper construction.
Aug 4, 2026

Fire Resistance
What Is a Fire Resistant Material? Testing & Certification Guide
Discover what is a fire resistant material through ASTM and UL testing. Learn how fire ratings, certifications, and assemblies work in construction.
Aug 4, 2026

Construction Cost
How Much Did the Burj Khalifa Cost to Build?
How much did the Burj Khalifa cost to build? We break down the $1.5B project and extract 5 money-saving strategies for your next build.
Jul 30, 2026