Indoor Stone Veneer Panels: Types, Costs, and Installation Guide
Explore our complete guide to indoor stone veneer panels. Compare polyurethane and cementitious types, 2026 costs, and step-by-step installation methods.

Defining Indoor Stone Veneer Panels
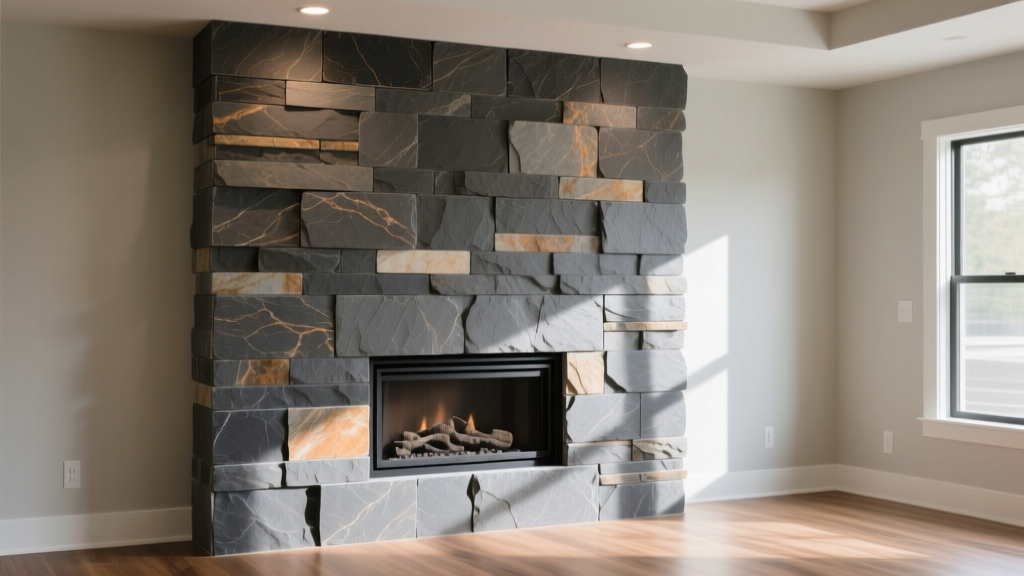
Indoor stone veneer panels are lightweight, manufactured architectural cladding systems designed to replicate the texture, color variation, and dimensional profile of full-bed natural stone. Unlike traditional masonry, which requires structural reinforcement, wet trades, and specialized masons, modern interior veneer panels are engineered for rapid installation over standard framing substrates. These panels bridge the gap between high-end aesthetic demands and practical interior construction constraints, offering exact stone replication without the massive dead load of quarried limestone or granite.
Core Material Compositions
The performance, weight, and installation methodology of interior stone panels depend entirely on their base matrix. The market is currently dominated by three distinct manufacturing processes.
1. High-Density Polyurethane (PU)
Polyurethane panels are cast in molds taken directly from natural stone surfaces. The closed-cell PU foam structure yields an exceptionally lightweight product, typically weighing between 1.0 and 1.5 pounds per square foot. These panels feature interlocking shiplap or puzzle-joint edges that conceal fasteners and create seamless visual transitions. PU is highly resistant to moisture absorption and requires no sealing or curing time post-installation.
2. Cementitious Manufactured Stone
Composed of Portland cement, lightweight aggregates (like expanded shale or pumice), and iron oxide pigments, cementitious panels offer the most authentic tactile feel and thermal mass. Weighing 10 to 15 pounds per square foot, they require a scratch coat, metal lath, and Type S mortar or specialized masonry adhesives for installation. While heavier, they provide superior impact resistance and acoustic dampening compared to foam alternatives.
3. Fiberglass-Resin Composites
Less common in residential applications, fiberglass-reinforced panels are utilized in commercial interiors where ultra-lightweight cladding is required over suspended ceilings or non-load-bearing partition walls. They weigh under 1.0 pound per square foot but lack the thermal insulation properties of closed-cell polyurethane.
Material Comparison Matrix
| Property | Polyurethane (PU) | Cementitious | Fiberglass-Resin |
|---|---|---|---|
| Weight (per sq. ft.) | 1.0 - 1.5 lbs | 10.0 - 15.0 lbs | 0.5 - 0.9 lbs |
| Substrate Requirement | Drywall, OSB, Plywood | Cement board, Lath + Scratch Coat | Drywall, Metal Studs |
| Fastening Method | Construction Adhesive + Brad Nails | Type S Mortar or Masonry Adhesive | Silicone + Mechanical Clips |
| Fire Rating (ASTM E84) | Class A (with fire-retardant core) | Class A (Non-combustible) | Class B or C (Varies by resin) |
| Thermal Insulation (R-Value) | R-3.5 to R-4.5 | R-0.5 | Negligible |
2026 Cost Analysis: Materials and Labor
Pricing for interior stone veneer systems has stabilized following the supply chain adjustments of the early 2020s. The total installed cost varies drastically based on the material matrix and the required substrate preparation.
- Polyurethane Panels: Material costs range from $11.50 to $16.00 per square foot. Because installation requires only adhesive and finish nails, labor rates are low, typically $3.00 to $5.00 per square foot. Total Installed: $14.50 - $21.00 / sq. ft.
- Cementitious Veneer: Material costs range from $8.00 to $13.00 per square foot. However, the necessity of installing a moisture barrier, metal lath, applying a scratch coat, and setting stones with mortar drives labor costs to $14.00 - $22.00 per square foot. Total Installed: $22.00 - $35.00 / sq. ft.
- Trim and Corner Pieces: Always budget an additional 15% to 20% for specialized corner returns, outlet box extenders, and transition moldings, which are priced per linear foot rather than square footage.
Substrate Compatibility & Preparation
The longevity of indoor stone veneer panels relies entirely on substrate stability. Adhesive failure almost always traces back to improper substrate preparation.
Standard Drywall (Gypsum Board)
Polyurethane panels can be applied directly to painted drywall, but the surface must be deglossed. Sand glossy paint with 80-grit sandpaper and wipe with a TSP (trisodium phosphate) solution to ensure the polyurethane construction adhesive achieves a mechanical bond. Never apply cementitious mortar directly to drywall; the moisture will degrade the gypsum core and cause catastrophic structural failure.
Cement Backer Board
For interior wet areas (e.g., shower surrounds, steam rooms) or when using heavy cementitious veneers, 1/2-inch cement backer board (such as Durock or HardieBacker) is mandatory. Tape and mud the seams with alkali-resistant fiberglass mesh tape and thin-set mortar before applying the veneer.
Step-by-Step Installation Framework: Polyurethane Panels
Polyurethane systems represent the most common DIY and rapid-commercial-installation choice. Follow this precise sequence to prevent joint separation and adhesive delamination.
- Acclimation: Store the panels in the installation room for 48 hours prior to installation. PU foam expands and contracts with temperature fluctuations; acclimating prevents post-installation joint gapping.
- Layout Planning: Snap chalk lines every 16 inches to align with wall studs. Stagger vertical seams by at least 12 inches between adjacent rows to avoid a repetitive, synthetic visual pattern.
- Adhesive Application: Use a high-quality, polyurethane-based construction adhesive (e.g., Loctite PL Premium 3X or Liquid Nails Fuze*It Max). Apply a continuous 3/8-inch bead in a zig-zag pattern across the back of the panel. Do not use water-based acrylic adhesives, as they lack the initial grab strength and can warp the foam.
- Positioning and Fastening: Press the panel firmly into the substrate. While the adhesive cures, secure the panel using an 18-gauge brad nailer. Drive 1.5-inch brad nails through the interlocking shiplap edges and into the wall studs. The nails hold the panel flush while the adhesive sets.
- Cutting and Fitting: Cut PU panels using a standard miter saw equipped with a 60-tooth carbide-tipped blade. For outlet cutouts, use a jigsaw with a fine-tooth metal blade to prevent melting or tearing the foam edges.
- Seam Concealment: Use the manufacturer's proprietary color-matched caulk or touch-up kit to fill any micro-gaps at the interlocking joints and inside corners.
Troubleshooting Common Failure Modes
Even premium interior stone panels will fail if environmental and chemical variables are ignored. Recognize these edge cases before they compromise the installation.
- Thermal Joint Separation: If PU panels are installed tightly against each other and against the ceiling without a 1/8-inch expansion gap, seasonal HVAC temperature swings will cause the foam to expand and buckle outward. Always leave a 1/8-inch gap at the top and bottom courses, concealed by baseboards and crown molding.
- Adhesive Bleed-Through: Applying excessive adhesive too close to the panel edges causes the compound to squeeze out into the stone profile. Once cured, polyurethane adhesive cannot be easily removed from the textured surface without solvents that may strip the panel's acrylic paint finish. Maintain a 2-inch border from the panel edges when applying adhesive.
- Efflorescence on Cementitious Veneer: White, powdery salt deposits can appear on interior cementitious stone if the wall assembly traps moisture. This occurs when a vapor barrier is incorrectly placed on the warm-in-winter side of the wall, trapping condensation inside the cement matrix. Ensure the wall cavity is properly ventilated and vapor-permeable paints are used on adjacent surfaces.
Design Applications and Spatial Guidelines
Indoor stone veneer panels manipulate spatial perception. In high-traffic commercial lobbies and hospitality environments, cementitious panels are preferred for their acoustic mass and impact resistance against luggage and carts. In residential applications, PU panels are ideal for basement finishing, media rooms, and fireplace surrounds where added insulation (R-value) and rapid installation are prioritized.
According to interior design guidelines tracked by the National Association of Home Builders, limiting stone veneer to a single focal wall per room prevents the space from feeling visually heavy or cavernous. When cladding a fireplace surround, always verify the specific panel's maximum heat tolerance; while cementitious stone is entirely non-combustible, PU panels typically require a minimum 12-inch clearance from direct flame sources and open fireboxes, and must be paired with a non-combustible hearth extension.
For current product availability, dimensional specifications, and regional pricing baselines, contractors and homeowners can reference major building material distributors like the Home Depot Stone Veneer Catalog to cross-reference manufacturer SKUs and verify stock levels for large-scale interior renovations.
Written by
Elena RodriguezElena Rodriguez is a civil engineer and technical writer specializing in concrete technology, masonry systems, and ASTM/ACI compliance. She earned her B.S. in Civil Engineering from Texas A&M University and spent a decade at a materials testing laboratory, performing over 2,000 concrete compressive strength tests and masonry prism evaluations. Elena is an ACI-certified Field Testing Technician (Grade I) and a member of ASTM Committee C12 on Natural Building Stone. She currently consults on forensic engineering cases involving concrete failures and moisture intrusion. Based in San Antonio, TX, Elena is a proud member of the Society of Women Engineers (SWE) and coaches her daughter's FIRST Robotics team.
More from Elena Rodriguez
View all
Walls & Panels
Cost Analysis: Light Gauge Steel Framing Advantages and Disadvantages
Evaluate light gauge steel framing advantages and disadvantages through a strict cost analysis lens, comparing material, labor, and lifecycle expenses.
Aug 4, 2026

Walls & Panels
Gypsum Board Types: Exact Specifications, Thickness & Dimensions
Compare standard, Type X, and moisture-resistant gypsum board types. Get exact specifications, thicknesses, dimensions, and ASTM standards for your project.
Aug 4, 2026

Fire Resistance
Best Fire-Resistant Outdoor Decking Materials: 2026 Buyer Guide
Discover the best fire-resistant outdoor decking materials for 2026. Compare Class A PVC, aluminum, and hardwood options for WUI compliance and safety.
Aug 4, 2026