Thinset Stone Veneer Guide: Selection, Mixing, and Installation
Master thinset stone veneer installation. Learn ANSI mortar standards, substrate prep matrices, mixing protocols, and troubleshooting for durable walls.

The Shift to Thinset Stone Veneer Systems
Historically, adhered stone veneer required a labor-intensive scratch coat, brown coat, and traditional Type S or Type N masonry mortar bed. Today, modern thinset stone veneer systems utilize polymer-modified Portland cement adhesives to bond manufactured and thin natural stone directly to properly prepared substrates. This method reduces wall thickness, cuts installation time by up to 40%, and provides superior freeze-thaw durability when executed to current ANSI standards. However, treating thinset for stone like standard tile adhesive is a primary cause of system failure. Stone veneer demands specific rheological properties, substrate preparations, and application protocols that differ fundamentally from ceramic tile installations.
Decoding ANSI Mortar Standards for Stone
Selecting the correct thinset requires understanding the chemical classifications established by the Tile Council of North America (TCNA) and the American National Standards Institute (ANSI). Not all modified thinsets are engineered for the weight and porosity of stone veneer.
- ANSI A118.1 (Unmodified): A basic Portland cement and sand blend. Rarely used for stone veneer except over properly cured, unpainted concrete masonry units (CMU) where polymer flexibility is not required.
- ANSI A118.4 (Modified): Contains latex or acrylic polymers for improved bond strength and flexibility. Suitable for lightweight manufactured stone veneer over cementitious backer boards.
- ANSI A118.15 (Improved Modified): The gold standard for stone veneer. Features higher polymer content, extended open times, and superior non-sag characteristics. Required for heavy natural stone, exterior applications, and installations over substrates subject to minor deflection.
Substrate Compatibility and Preparation Matrix
Thinset stone veneer is only as strong as the substrate it bonds to. According to technical guidelines from manufacturers like LATICRETE, substrate deflection and surface contamination are the leading causes of bond failure. Use the matrix below to determine viability and preparation requirements.
| Substrate Type | Preparation Required | Recommended Mortar | Viability |
|---|---|---|---|
| Cement Backer Board | Tape seams with alkali-resistant mesh; wipe down dust. | A118.4 or A118.15 | Excellent (Interior/Exterior) |
| Concrete / CMU Block | Scarify smooth surfaces; apply masonry primer if highly porous. | A118.1 or A118.4 | Excellent |
| Exterior Plywood (EGP) | Must be covered with a weather-resistive barrier, metal lath, and a scratch coat. | Apply over scratch coat | Good (Requires Lath) |
| Standard Drywall | None. Must be removed and replaced with cement board. | N/A | Unacceptable (High Failure Risk) |
| Painted Surfaces | Sandblast or mechanically abrade to bare substrate. | N/A | Poor (Bond relies on paint) |
The Secret Weapon: Large and Heavy Tile (LHT) Mortars
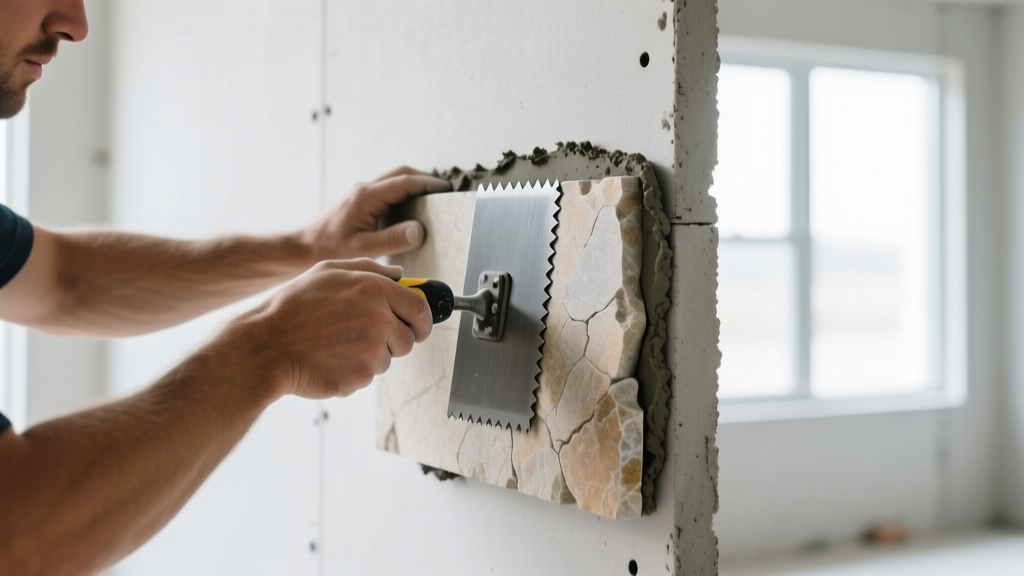
Standard thinset mortars are designed to be applied at a maximum thickness of 3/16-inch. Stone veneer pieces, particularly natural fieldstone or thick manufactured ledgestone, often require a thicker mortar bed to accommodate varying stone depths and uneven substrates. If standard thinset is applied too thickly, it shrinks significantly as it cures, pulling the stone away from the wall and causing cracking.
For any stone veneer piece weighing more than 5 lbs per square foot or featuring a thickness variation greater than 1/4-inch, you must use an ANSI A118.15 Large and Heavy Tile (LHT) mortar. Formerly known as medium-bed mortars, LHT products like MAPEI Ultraflex LFT or Custom ProLite contain larger aggregate particles and specialized rheology modifiers. These additives allow the mortar to be applied up to 3/4-inch thick without shrinking, sagging, or slumping, effectively locking heavy stones in place immediately upon contact.
Step-by-Step Application Protocol
Proper installation relies on precise mixing and mechanical keying. Fine Homebuilding experts emphasize that the physical technique of mortar application is just as critical as the chemical composition of the product.
- Precision Mixing and Slaking: Measure water precisely according to the manufacturer's data sheet. Mix with a low-speed drill (under 300 RPM) and a spiral paddle to prevent whipping air into the mixture. Allow the mortar to 'slake' (rest) for exactly 10 minutes. This resting period is non-negotiable; it allows the Portland cement to fully wet out and the polymers to activate. Remix briefly without adding water before use.
- Substrate Combing: Using the flat side of the trowel, forcefully key the mortar into the substrate to ensure maximum mechanical bond. Then, comb the mortar in a single, horizontal direction using a 1/2-inch x 1/2-inch square-notch trowel. Horizontal ridges allow air to escape from the sides of the stone as it is pressed into place.
- The Back-Buttering Mandate: Natural stone is highly variable in porosity. Some pieces will rapidly suck moisture out of the thinset, starving the bond line. Always 'back-butter' every stone piece by using the flat side of the trowel to scrape a thin, 1/16-inch layer of mortar directly onto the back of the stone. This ensures 100% coverage and equalizes the suction rate.
- Setting and Beating: Press the stone firmly into the combed mortar, twisting slightly to collapse the ridges. Use a rubber mallet or a beating block to strike the face of the stone, ensuring full embedment and a uniform plane.
Troubleshooting Common Thinset Failures
Even with premium materials, environmental and procedural errors can compromise the installation. Recognizing these failure modes early prevents costly tear-outs.
Symptom: Stone Sagging or Slipping
Cause: Using standard A118.4 thinset for heavy stones, applying mortar too thickly, or failing to use a ledger board at the base of the wall.
Fix: Switch to an LHT (A118.15) mortar. Install temporary ledger boards every 24 inches vertically to support the weight of the stones while the thinset achieves its initial 24-hour cure. Do not stack more than 3 feet of stone in a single day.
Symptom: White Efflorescence Bleed-Through
Cause: Moisture trapped within the thinset or the stone itself is migrating to the surface, carrying soluble salts. This is exacerbated by sealing the stone too early or using a non-breathable impregnating sealer on the face before the mortar has fully cured.
Fix: Allow the installation to cure for a minimum of 14 to 28 days before applying any penetrating sealers. If efflorescence appears, dry-brush the surface and clean with a specialized, pH-neutral efflorescence remover. Never use muriatic acid on manufactured stone or limestone, as it will etch the calcium carbonate and permanently ruin the veneer.
Symptom: Hollow Sounds and Delamination
Cause: Skinning of the thinset. If the combed mortar sits exposed to air for more than 15-20 minutes (depending on ambient temperature and humidity) before the stone is placed, a plastic skin forms on the ridges. The stone bonds to this weak skin rather than the wet mortar beneath it.
Fix: Work in small sections. If you run your finger over a mortar ridge and it comes away clean or the ridge feels hard, scrape it off and reapply fresh mortar. In hot, dry environments, use a mortar with an extended open time or mist the substrate lightly with water before combing.
2026 Material Cost and Yield Breakdown
Budgeting accurately requires understanding the coverage rates of thinset when applied to irregular stone profiles. Unlike flat tile, the undulating backs of stone veneer consume significantly more mortar.
- Premium LHT Thinset (50 lb bag): $45.00 - $75.00 per bag. Yields approximately 35 to 45 square feet of coverage when back-buttering and using a 1/2-inch notch.
- Manufactured Stone Veneer: $8.00 - $16.00 per square foot (materials only).
- Natural Thin Veneer (Limestone/Slate): $14.00 - $28.00 per square foot (materials only).
- Specialized Masonry Labor: $18.00 - $35.00 per square foot, heavily dependent on the complexity of the profile, corner pieces, and scaffolding requirements.
When calculating material orders, always factor in a 10% to 15% waste factor for stone cuts and an additional 15% overage for thinset mortar to account for the deep crevices and uneven backs characteristic of stacked stone profiles.
Written by
Priya KapoorPriya Kapoor is a real estate market analyst and construction economics researcher with expertise in housing affordability, development feasibility, and infrastructure investment. She holds a Master of Regional Planning from Cornell University and previously worked as a senior analyst at CBRE's Investment Properties group, where she modeled returns for $4B in mixed-use development pipelines. Priya now runs an independent research practice advising developers, municipalities, and REITs on construction cost forecasting and market timing. She publishes the quarterly "BuildMat Market Pulse" report tracking material price indices across 12 commodity categories. Based in Austin, TX, Priya serves on the board of Habitat for Humanity Austin and is a marathon runner.
More from Priya Kapoor
View all
Construction Cost
Cost to Build a 1600 Sq Ft Home in 2026: Full Breakdown
Accurate 2026 cost to build a 1600 sq ft home—material, labor, and regional pricing breakdowns included. Plan your budget with real-time estimates.
Aug 11, 2026

Wood & Lumber
Name the Types of Wood for Pressure Treatment and Preservation
Learn how to name the types of wood best suited for pressure treatment. Compare species treatability, chemical retention levels, and 2026 preservation costs.
Aug 4, 2026

Stone & Masonry
Stone Veneer Suppliers Lindenhurst: 2026 Cost Analysis
Analyze 2026 stone veneer costs in Lindenhurst, NY. Compare local supplier pricing, delivery fees, and Suffolk County installation labor rates.
Aug 4, 2026