Installing Fireplace Surround Stone Veneer: Step-by-Step Guide
Learn how to install fireplace surround stone veneer with this pro-level guide. Covers substrate prep, mortar mixing, layout, and grouting.

Substrate Preparation and Firebox Clearances
Installing a fireplace surround stone veneer requires a rigid, non-combustible, and properly prepared substrate. Drywall or greenboard alone will not support the weight of stone veneer, which typically ranges from 8 to 15 pounds per square foot. For interior wood-framed chimney chases, you must first strip the existing wall covering down to the studs.
Before installing any material around a firebox, consult the manufacturer's manual and local building codes. According to NFPA 211 standards, unlisted masonry fireplaces require a minimum 6-inch clearance to combustible materials. Manufactured zero-clearance fireboxes have specific listed clearances (often allowing non-combustible veneer to abut the metal flange). Never cover manufacturer ventilation louvers or access panels with stone veneer.
Prepare the substrate by applying a Grade D weather-resistant barrier (like 15-lb asphalt felt) over the studs, overlapping horizontal seams by 2 inches and vertical seams by 6 inches. Next, screw 1/2-inch cement backer board (such as USG Durock or James Hardie HardieBacker) to the studs using corrosion-resistant cement board screws placed every 8 inches along the framing. Tape the seams with alkali-resistant fiberglass mesh tape and thinset mortar.
Essential Tools and Material Specifications
Using the correct mortar is critical for vertical applications. Standard brick mortar lacks the non-sag properties required for heavy veneer. Use a polymer-modified stone veneer mortar (e.g., Sakrete Stone Veneer Mortar or Custom Building Products ProLite) or a Type S masonry cement mixed with a liquid latex/acrylic fortifier.
- Metal Lath: 2.5 lb self-furring galvanized diamond mesh lath.
- Fasteners: 1-1/2 inch galvanized roofing nails or lath screws with washers.
- Mortar: Polymer-modified veneer mortar (approx. 1 bag per 30 sq ft for scratch coat and setting).
- Grout: Type N or Type S mortar, or a dedicated sanded grout for 1/2-inch+ joints.
- Trowels: 1/2-inch x 1/2-inch square-notched trowel, margin trowel, and pointing trowel.
- Cutting Tools: 10-inch wet tile saw with a diamond masonry blade, or a 4.5-inch angle grinder with a continuous rim diamond blade.
Step-by-Step Installation Process
Step 1: Attaching the Metal Lath
Unroll the galvanized metal lath horizontally across the cement board. The lath must overlap at all seams by a minimum of 1 inch horizontally and 2 inches vertically. Fasten the lath every 6 inches along the studs, penetrating the cement board and biting into the wood framing by at least 1 inch. Ensure the lath feels tight and rigid; any flexing will cause the scratch coat to crack. Around the firebox opening, maintain the required clearance and cut the lath cleanly using aviation snips.
Step 2: Applying the Scratch Coat
Mix the veneer mortar to a consistency similar to thick peanut butter. Allow it to slake (rest) for 10 minutes, then remix without adding water. Using a flat trowel, force the mortar completely through the lath mesh to create a mechanical lock against the cement board. Then, build the mortar out to a uniform thickness of 1/2 inch. While the mortar is still wet, use a masonry rake or a notched trowel to score horizontal lines into the surface. This 'scratch coat' provides a mechanical key for the setting mortar. Allow the scratch coat to cure for 24 to 48 hours, misting it lightly with water if the ambient temperature exceeds 80°F to prevent rapid drying and shrinkage cracks.
Step 3: Dry Layout and Stone Selection
Stone veneer is sold in randomized boxes. To avoid noticeable color banding or repeating patterns, open 3 to 4 boxes simultaneously and blend the stones on the floor. Dry-fit the corner pieces first, as they dictate the layout of the field stones. Alternate long and short returns on the corners to mimic natural stacked masonry. If your design includes a mantel or a hearth cap, install these structural elements before setting the veneer.
Step 4: Setting the Stone Veneer
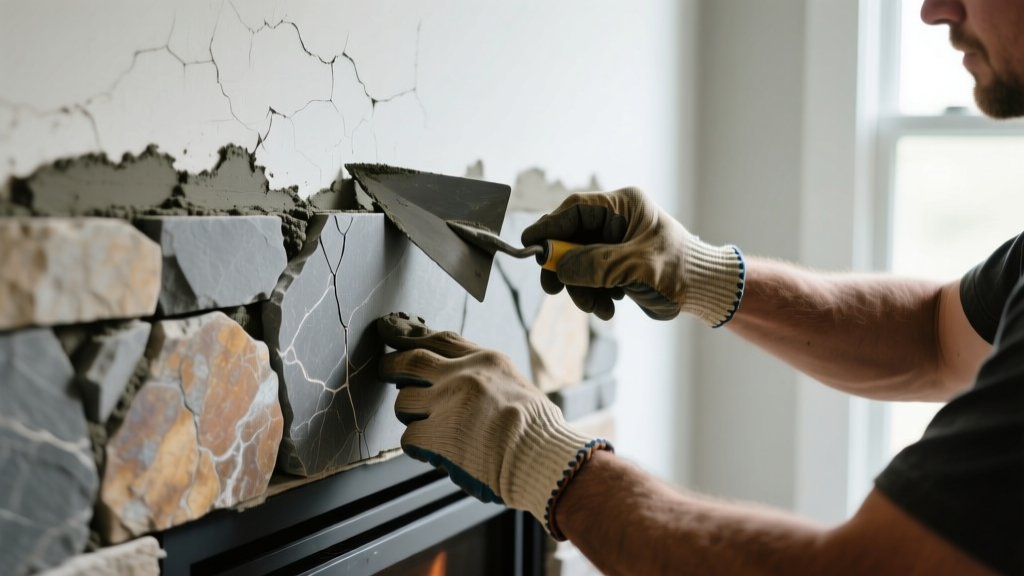
Begin installation at the bottom corners and work your way up and inward. Dampen the back of the stone and the scratch coat with a wet masonry brush—this prevents the dry stone from sucking moisture out of the setting mortar too quickly.
- Apply a 1/2-inch to 1-inch layer of mortar to the back of the stone (back-buttering) using a margin trowel.
- Mound the mortar slightly higher in the center of the stone to create a suction cup effect when pressed.
- Press the stone firmly into the scratch coat and give it a slight 1/4-inch twist to collapse the mortar ridges and squeeze out excess mortar at the edges.
- Maintain a consistent joint width (typically 1/2 inch for stacked profiles, or up to 1 inch for fieldstone profiles). Use wood spacers or specialized plastic joint spacers if necessary.
According to the Boral Cultured Stone Installation Guide, back-buttering is mandatory for 100% of the stones to ensure complete adhesion and prevent hollow spots that can lead to delamination over time.
Step 5: Grouting and Joint Striking
Once the stones are set and the mortar has firmed up (usually 1 to 2 hours), fill the joints using a mortar bag. Snip the tip of the bag to match your joint width. Fill the joints slightly proud of the stone surface. Wait for the grout to become 'thumbprint hard' (firm enough to press a thumb into without sticking, usually 30 to 60 minutes). Use a pointing trowel or a stiff bristle brush to strike and compact the joints. Brushing the joints creates a natural, weathered texture and removes loose mortar crumbs. Never use a wet sponge to clean manufactured stone veneer, as it will smear mortar onto the stone face and cause permanent staining.
Mortar Curing and Environmental Requirements
| Condition / Phase | Specification | Action Required |
|---|---|---|
| Ambient Temperature | 40°F to 90°F (4°C - 32°C) | Do not install if freezing within 48 hours. |
| Scratch Coat Cure | 24 to 48 hours | Mist with water in high heat to prevent cracking. |
| Mortar Pot Life | 60 to 90 minutes | Discard mortar once it begins to stiffen; never retemper with water. |
| Joint Striking Time | 30 to 60 minutes after bagging | Strike when thumbprint hard; do not strike when wet. |
Troubleshooting Common Installation Failures
Failure Mode: Stone Delamination
Cause: Failing to back-butter the stones, applying mortar to a dusty/dry substrate, or installing in direct sunlight which flash-dries the mortar before a chemical bond forms.
Fix: Always dampen the scratch coat and the stone back. Ensure 100% mortar coverage on the back of every piece. If a stone falls off, chip away the old mortar, clean the substrate, and reset using fresh polymer-modified mortar.
Failure Mode: Efflorescence (White Powdery Staining)
Cause: Water-soluble salts migrating to the surface. This is common if the mortar was mixed too wet, or if moisture is penetrating from behind the veneer due to missing weather barriers.
Fix: For interior fireplaces, efflorescence is rare unless the chimney chase has a roof leak. If it appears, dry-brush the area with a stiff nylon brush. For stubborn deposits, use a specialized efflorescence cleaner (diluted phosphoric acid) following the Brick Industry Association Technical Notes guidelines, but test on an inconspicuous area first to ensure it does not etch the stone face.
Sealing and Long-Term Maintenance
Interior fireplace surrounds do not strictly require sealing, but applying a breathable, penetrating silane/siloxane sealer (such as Aqua Mix Sealer's Choice Gold) will protect the stone from soot, smoke, and accidental spills. Do not use film-forming acrylic sealers on interior stone, as they trap moisture, create an unnatural glossy sheen, and can yellow when exposed to the heat radiating from the firebox. Apply the sealer 30 days after installation to allow all residual moisture in the mortar and grout to fully evaporate. Maintain the surround by dusting with a dry microfiber cloth; avoid harsh chemical degreasers which can break down the sealer and stain the porous grout joints.
Written by
Elena RodriguezElena Rodriguez is a civil engineer and technical writer specializing in concrete technology, masonry systems, and ASTM/ACI compliance. She earned her B.S. in Civil Engineering from Texas A&M University and spent a decade at a materials testing laboratory, performing over 2,000 concrete compressive strength tests and masonry prism evaluations. Elena is an ACI-certified Field Testing Technician (Grade I) and a member of ASTM Committee C12 on Natural Building Stone. She currently consults on forensic engineering cases involving concrete failures and moisture intrusion. Based in San Antonio, TX, Elena is a proud member of the Society of Women Engineers (SWE) and coaches her daughter's FIRST Robotics team.
More from Elena Rodriguez
View all
Walls & Panels
Cost Analysis: Light Gauge Steel Framing Advantages and Disadvantages
Evaluate light gauge steel framing advantages and disadvantages through a strict cost analysis lens, comparing material, labor, and lifecycle expenses.
Aug 4, 2026

Walls & Panels
Gypsum Board Types: Exact Specifications, Thickness & Dimensions
Compare standard, Type X, and moisture-resistant gypsum board types. Get exact specifications, thicknesses, dimensions, and ASTM standards for your project.
Aug 4, 2026

Fire Resistance
Best Fire-Resistant Outdoor Decking Materials: 2026 Buyer Guide
Discover the best fire-resistant outdoor decking materials for 2026. Compare Class A PVC, aluminum, and hardwood options for WUI compliance and safety.
Aug 4, 2026