How Do You Install Stone Veneer on a Fireplace? Buyer's Guide
Learn exactly how to install stone veneer on a fireplace. This 2026 buyer's guide covers material selection, mortar types, clearances, and cost breakdowns.

Selecting the Right Stone Veneer for Fireplace Applications
Understanding how do you install stone veneer on a fireplace begins with selecting a material engineered to withstand thermal cycling. Fireplaces subject surrounding materials to rapid temperature fluctuations, which can cause inferior adhesives to fail and low-density stones to crack. When evaluating options for a hearth or chimney chase, buyers must weigh weight limitations, heat tolerance, and installation methodology.
| Material Type | Weight (per sq ft) | Avg. Material Cost (2026) | Heat Tolerance | Installation Method |
|---|---|---|---|---|
| Manufactured Stone Veneer (MSV) | 8 - 12 lbs | $7.50 - $14.00 | Excellent (Concrete base) | Type S Mortar / Veneer Mortar |
| Natural Stone (Fieldstone/Ledge) | 15 - 25+ lbs | $14.00 - $28.00 | Superior (Quarried rock) | Type S Mortar + Mechanical Ties |
| Interlocking / Mortarless Panels | 5 - 9 lbs | $11.00 - $18.00 | Good (Check clearances) | Polyurethane Adhesive / Screws |
For most interior fireplace surrounds, Manufactured Stone Veneer (MSV) offers the optimal balance of authentic texture, manageable weight, and thermal stability. If your existing fireplace chase is framed with standard 2x4 wood studs, MSV prevents the need for structural reinforcement required by heavier natural stones.
Substrate Preparation: The Foundation of a Lasting Install
The most common cause of stone veneer delamination on fireplaces is improper substrate preparation. You cannot apply mortar directly to drywall, painted brick, or standard wood sheathing. The immense weight of the stone, combined with the heat from the firebox, will cause drywall paper to separate, bringing the stone down with it.
Never apply cementitious mortar directly over green board or standard gypsum drywall. The moisture from the scratch coat will degrade the gypsum core before it cures, and the subsequent weight load exceeds the drywall's structural shear capacity.
Required Substrate Stack-Up:
- Wood/Metal Studs: Standard 16-inch on-center framing.
- Sheathing: 1/2-inch OSB or plywood (if exterior chase) or direct to studs (interior).
- Moisture Barrier: Two layers of Grade D building paper or 6-mil polyethylene sheeting. This protects the framing from the moisture in the mortar.
- Backer Board (Alternative): 1/2-inch cement backer board (e.g., Durock or HardieBacker) screwed to studs every 8 inches. If using cement board, a moisture barrier behind it is still required.
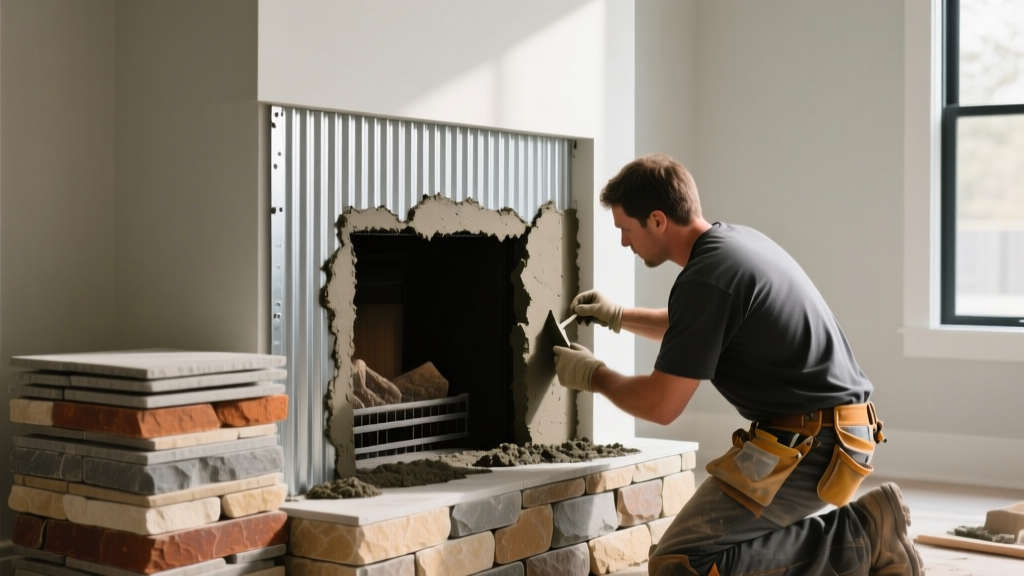
The 4-Step Installation Process
Once the substrate is prepped, the physical installation follows a strict masonry sequence. Rushing the curing times between steps is a primary failure point in DIY fireplace projects.
Step 1: Attaching the Metal Lath
Use 2.5 lb self-furring galvanized diamond mesh lath. Do not use chicken wire or 1.0 lb lath, as they lack the rigidity to hold the scratch coat. Overlap horizontal seams by 1 inch and vertical seams by 2 inches. Secure the lath using galvanized roofing nails or staples with 1-inch crowns, penetrating the studs by at least 3/4 inch. Fasten every 6 inches vertically and 16 inches horizontally. Ensure the 'dimples' on the self-furring lath face outward to create a gap for the mortar to key into.
Step 2: Applying the Scratch Coat
Mix a Type S masonry mortar or a polymer-modified veneer stone mortar (such as Custom Building Products Veneer Stone Mortar). Type S is mandatory because its higher tensile bond strength (minimum 180 psi) outperforms Type N under thermal stress. Apply a 1/2-inch thick layer of mortar over the lath using a masonry trowel. Before it fully sets (usually within 45-60 minutes), use a raking tool or coarse brush to score horizontal lines into the surface. This 'scratch' provides a mechanical grip for the setting bed. Cure time: Allow the scratch coat to cure for a minimum of 48 hours before proceeding.
Step 3: Setting the Stone
Always begin installation at the corners. Corner pieces anchor the visual profile and provide structural interlocking for the flat stones. Apply a 1/2-inch layer of mortar to the back of the stone (buttering) and press it firmly into a fresh 1/2-inch mortar bed on the wall. Twist the stone slightly to squeeze out excess mortar, ensuring full contact. Maintain a 1/2-inch to 1-inch joint gap between stones if using a standard profile, or push them tight for a dry-stack look. Work from the bottom up, supporting the first course on a temporary ledger board if the hearth is not perfectly level.
Step 4: Grouting and Tooling
Once the stones are set and the mortar has firmed up (typically 30-45 minutes), fill the joints using a grout bag. Avoid smearing mortar on the face of the stone, as acid washing manufactured stone can etch the surface pigments. When the joint mortar becomes thumbprint-hard, use a jointing tool to compress and smooth the joints. This compression increases the density and weather-resistance of the grout lines.
Fireplace Clearances and Heat Tolerance (NFPA 211)
When researching how do you install stone veneer on a fireplace, safety clearances are non-negotiable. The National Fire Protection Association (NFPA 211 Standard for Chimneys, Fireplaces, Vents, and Solid Fuel-Burning Appliances) dictates strict clearance-to-combustible rules.
- Firebox Opening: Stone veneer and mortar are non-combustible and can be applied directly up to the edge of the metal firebox flange. However, you must leave the manufacturer's expansion gap (usually 1/4 inch) between the metal firebox and the stone, filling it with high-temperature silicone caulk, not rigid mortar.
- Mantel Clearances: If installing a wood mantel above the veneer, NFPA 211 requires a minimum clearance of 12 inches from the top of the firebox opening. Furthermore, for every 1/8 inch the mantel projects outward from the wall, you must add 1 inch of vertical clearance. A mantel projecting 1 inch requires a 20-inch clearance from the firebox.
2026 Cost Breakdown: Material vs. Professional Installation
Budgeting for a fireplace veneer project requires separating material costs from specialized masonry labor. The data below reflects national averages for a standard 50-square-foot fireplace surround (including 10% waste factor).
| Cost Category | DIY / Material Only | Professional Installation (Turnkey) |
|---|---|---|
| Manufactured Stone Veneer (50 sq ft) | $450 - $700 | $450 - $700 |
| Substrate (Backer board, lath, barrier) | $120 - $180 | $150 - $220 |
| Mortar, Grout, and Consumables | $80 - $130 | $100 - $150 |
| Masonry Labor (Prep, Install, Grout) | $0 | $800 - $1,500 |
| Total Estimated Project Cost | $650 - $1,010 | $1,500 - $2,570 |
Troubleshooting Common Fireplace Veneer Failures
Even with premium materials, environmental factors specific to fireplaces can cause installation failures. Understanding these edge cases ensures long-term durability.
Cause: Water-soluble salts within the mortar or concrete stone migrate to the surface when exposed to the heat of the fireplace, which accelerates moisture evaporation.
Fix: Do not use water or acid washes, which drive salts deeper. Use a stiff, dry nylon brush to remove the powder. Ensure your scratch coat was fully cured before setting the stone, trapping excess moisture behind the veneer.
Cause: Applying stone directly over a painted brick fireplace without mechanical preparation, or using Type N mortar instead of Type S.
Fix: If applying over existing brick, the brick must be unpainted. If painted, sandblast or grind the brick to expose the porous masonry, or furr out the wall with studs and cement board. Always verify the mortar mix design conforms to Portland Cement Association specifications for Type S masonry mortar.
Mastering how do you install stone veneer on a fireplace requires strict adherence to masonry fundamentals: proper substrate isolation, correct mortar chemistry, and patience during the curing phases. By selecting thermally stable manufactured stone and respecting NFPA clearance standards, homeowners can achieve a high-end, durable hearth upgrade that anchors the living space for decades.
Written by
Elena RodriguezElena Rodriguez is a civil engineer and technical writer specializing in concrete technology, masonry systems, and ASTM/ACI compliance. She earned her B.S. in Civil Engineering from Texas A&M University and spent a decade at a materials testing laboratory, performing over 2,000 concrete compressive strength tests and masonry prism evaluations. Elena is an ACI-certified Field Testing Technician (Grade I) and a member of ASTM Committee C12 on Natural Building Stone. She currently consults on forensic engineering cases involving concrete failures and moisture intrusion. Based in San Antonio, TX, Elena is a proud member of the Society of Women Engineers (SWE) and coaches her daughter's FIRST Robotics team.
More from Elena Rodriguez
View all
Walls & Panels
Cost Analysis: Light Gauge Steel Framing Advantages and Disadvantages
Evaluate light gauge steel framing advantages and disadvantages through a strict cost analysis lens, comparing material, labor, and lifecycle expenses.
Aug 4, 2026

Walls & Panels
Gypsum Board Types: Exact Specifications, Thickness & Dimensions
Compare standard, Type X, and moisture-resistant gypsum board types. Get exact specifications, thicknesses, dimensions, and ASTM standards for your project.
Aug 4, 2026

Fire Resistance
Best Fire-Resistant Outdoor Decking Materials: 2026 Buyer Guide
Discover the best fire-resistant outdoor decking materials for 2026. Compare Class A PVC, aluminum, and hardwood options for WUI compliance and safety.
Aug 4, 2026