How to Install Stone Veneer Interior Wall: Step-by-Step Cost Guide
Learn how to install stone veneer interior wall with our detailed cost breakdown. Compare DIY vs. pro labor, material prices, and hidden budget traps.

The True Cost of Interior Stone Veneer Installation
Understanding how to install stone veneer interior wall systems requires more than just masonry skills; it demands a precise grasp of material yields, labor rates, and substrate preparation costs. For a standard 50-square-foot interior accent wall or fireplace surround, total project costs typically range from $650 to $1,100 for a DIY installation, and $1,600 to $2,800 when hiring a professional mason. The variance is driven primarily by the choice between manufactured and natural stone, the condition of the existing drywall, and regional labor rates.
- DIY Total: $650 - $1,100 ($13 - $22 per sq. ft.)
- Professional Total: $1,600 - $2,800 ($32 - $56 per sq. ft.)
- Most Common Material: Manufactured Stacked Stone ($8 - $14 per sq. ft.)
Material Costs: Natural vs. Manufactured Stone Veneer
The single largest line item in your budget will be the stone itself. Manufactured stone veneer (MSV) is a Portland cement-based product cast in molds from real stone, while natural thin veneer is sliced from quarried rock. Both require similar installation methods, but their cost structures and waste factors differ significantly.
| Material Type | Cost Per Sq. Ft. | Weight Per Sq. Ft. | Waste Factor | Best Interior Application |
|---|---|---|---|---|
| Manufactured (e.g., Cultured Stone, Eldorado) | $7.50 - $14.00 | 10 - 12 lbs | 5% - 10% | Fireplace surrounds, full-height accent walls |
| Natural Thin Veneer (e.g., ThinCut Limestone) | $14.00 - $28.00 | 13 - 18 lbs | 15% - 20% | High-end feature walls, wine cellars |
| Interlocking Faux Panels (Polyurethane) | $9.00 - $16.00 | 1 - 2 lbs | 5% | Low-budget rentals, temporary staging |
According to installation guidelines published by Eldorado Stone, manufactured veneer weighs roughly 10 to 12 pounds per square foot, which is generally light enough to be supported by standard interior wood framing without structural reinforcement. Natural stone can exceed 15 pounds per square foot, requiring you to verify floor joist deflection limits if installing on a second-story suspended floor.
Step-by-Step Installation Process & Associated Costs
Learning how to install stone veneer interior wall surfaces properly means adhering to strict masonry codes. Skipping the scratch coat or moisture barrier to save money will result in delamination and catastrophic failure within 12 to 18 months.
Step 1: Substrate Preparation and Moisture Barrier
Stone veneer cannot be applied directly to painted drywall or bare gypsum. The paper facing of drywall will absorb moisture from the mortar, causing the stone to detach. You must install a weather-resistive barrier (WRB) and metal lath.
- Materials: Grade D asphalt-impregnated paper ($15 per roll) and 2.5 lb galvanized expanded metal lath ($18 per 8 sq. ft. sheet).
- Cost Impact: Adds $1.80 to $2.50 per square foot to the project.
- Pro Tip: Use 1-inch roofing nails or staples to secure the lath directly into the wall studs, not just the drywall, ensuring a rigid mechanical base.
Step 2: The Scratch Coat Application
A scratch coat is a 1/2-inch layer of mortar applied to the metal lath and scored horizontally to provide a mechanical key for the final setting bed. This must cure for 24 to 48 hours before stone placement begins.
- Materials: Type S Masonry Cement (e.g., QUIKRETE Type S) mixed with masonry sand, or pre-blended polymer-modified veneer mortar (e.g., Sakrete Stone Veneer Mortar).
- Cost Impact: Pre-blended bags cost roughly $22 per 60-lb bag, covering about 25 square feet at 1/2-inch thickness. Budget $0.90 per square foot.
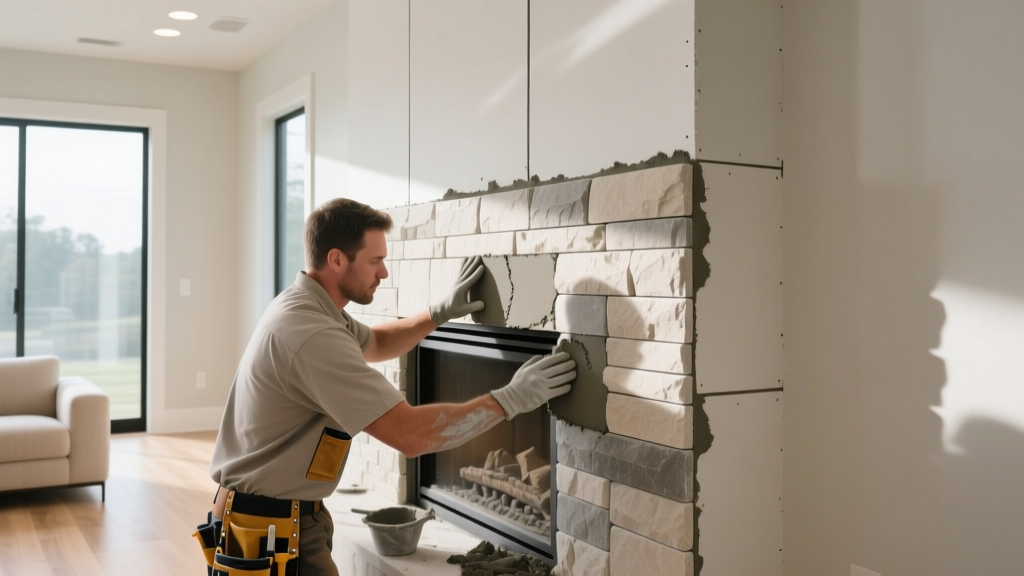
Step 3: Mortar Application and Stone Placement
Apply a 1/2-inch layer of mortar to the wall, then 'butter' the back of each stone with an additional 1/4-inch of mortar. Press the stone firmly into the wall bed, squeezing out excess mortar at the joints. Do not use mastic or construction adhesive for interior wet-set masonry applications; they lack the compressive strength and vapor permeability required for thick stone assemblies.
Step 4: Grouting and Tooling
Once the stones are set, fill the joints using a mortar bag (similar to a pastry bag). Tool the joints with a pointing trowel or jointing tool once the mortar becomes thumbprint-hard (usually 30 to 45 minutes). According to the Home Depot Masonry Guide, brushing the finished joints with a stiff bristle brush after tooling removes excess cement paste and exposes the natural aggregate texture.
Hidden Costs and Common Budget Traps
Contractors and DIYers frequently underestimate the peripheral expenses required to complete a stone veneer project. Factor these hidden costs into your initial budget to avoid mid-project stalls.
Many buyers calculate their square footage based solely on flat wall area and forget that outside corners require specialized interlocking corner pieces to wrap the wall edge realistically. Corner pieces are sold by the linear foot, not the square foot, and typically cost 30% to 50% more per linear foot than flat pieces cost per square foot. For a standard fireplace with two outside corners, expect to add $150 to $250 to your material total just for corner units.
- Sealer Requirements: Interior stone, especially around fireplaces or in kitchens, requires a breathable, non-film-forming penetrating sealer (e.g., Miracle Sealants 511 Impregnator). A quart covers 200 square feet and costs roughly $45.
- Subfloor Reinforcement: If installing heavy natural stone over a bouncy floor, you may need to sister the floor joists or add a layer of 3/4-inch AdvanTech subflooring to prevent grout cracking. This can add $300 to $600 in structural lumber and fasteners.
- Dust Containment: Cutting manufactured stone generates massive amounts of silica dust. You must rent a HEPA-filtered dust extractor ($65/day) or use a continuous water-feed wet saw to remain compliant with OSHA silica regulations and protect your home's HVAC system.
Tool Rental and Equipment Expenses
Unless you already own a masonry toolkit, tool acquisition will consume a notable portion of a DIY budget. Professional masons amortize these costs over dozens of jobs, but a DIYer must absorb them for a single weekend project.
| Tool / Equipment | Purchase Cost | Rental Cost (Daily) | Necessity Level |
|---|---|---|---|
| 10-inch Wet Tile/Masonry Saw | $350 - $800 | $55 - $85 | Mandatory |
| Mortar Mixing Drill & Paddle | $120 - $200 | $35 | Mandatory |
| Mortar Hawk & Pointing Trowels | $45 (Purchase only) | N/A | Mandatory |
| Grout Bag & Jointing Tools | $25 (Purchase only) | N/A | Mandatory |
| Heavy-Duty Scaffolding (Interior) | $400+ | $40 - $60 | Optional (for walls > 8 ft) |
Data from HomeGuide's masonry cost estimator indicates that tool rental and material delivery fees typically add 12% to 15% to the base material cost of a veneer project. Always confirm whether your local masonry supplier includes forklift unloading and threshold delivery in their quoted pallet price; curbside delivery of a 1,500-pound pallet of stone will require you to manually haul materials into the house, adding hours of uncompensated labor.
DIY vs. Professional Installation: ROI Analysis
Deciding whether to install the veneer yourself or hire a certified mason depends on your risk tolerance and the visibility of the installation area. Professional masons charge between $14 and $28 per square foot for labor alone. For a 50-square-foot wall, labor costs range from $700 to $1,400.
A professional crew will complete the substrate prep, scratch coat, and stone setting in 2 to 3 days, leveraging specialized mortar admixtures that accelerate curing times and reduce efflorescence (the white, powdery salt deposits that plague amateur installations). If you are installing high-end natural stone costing upwards of $25 per square foot, the financial risk of a DIY error—such as improper mortar hydration leading to stone pop-offs—far outweighs the $1,000 saved on labor. Reserve DIY installation for manufactured stone in low-traffic, easily accessible areas like basement media rooms or single-plane accent walls where cutting complexities are minimized.
Written by
Priya KapoorPriya Kapoor is a real estate market analyst and construction economics researcher with expertise in housing affordability, development feasibility, and infrastructure investment. She holds a Master of Regional Planning from Cornell University and previously worked as a senior analyst at CBRE's Investment Properties group, where she modeled returns for $4B in mixed-use development pipelines. Priya now runs an independent research practice advising developers, municipalities, and REITs on construction cost forecasting and market timing. She publishes the quarterly "BuildMat Market Pulse" report tracking material price indices across 12 commodity categories. Based in Austin, TX, Priya serves on the board of Habitat for Humanity Austin and is a marathon runner.
More from Priya Kapoor
View all
Construction Cost
Cost to Build a 1600 Sq Ft Home in 2026: Full Breakdown
Accurate 2026 cost to build a 1600 sq ft home—material, labor, and regional pricing breakdowns included. Plan your budget with real-time estimates.
Aug 11, 2026

Wood & Lumber
Name the Types of Wood for Pressure Treatment and Preservation
Learn how to name the types of wood best suited for pressure treatment. Compare species treatability, chemical retention levels, and 2026 preservation costs.
Aug 4, 2026

Stone & Masonry
Stone Veneer Suppliers Lindenhurst: 2026 Cost Analysis
Analyze 2026 stone veneer costs in Lindenhurst, NY. Compare local supplier pricing, delivery fees, and Suffolk County installation labor rates.
Aug 4, 2026