How to Put Stone Veneer on a Fireplace: Design & Installation Guide
Learn how to put stone veneer on a fireplace with our design showcase and technical installation guide, covering MSV profiles, mortar specs, and costs.

Transforming a standard drywall fireplace surround into a striking architectural focal point requires bridging high-end aesthetic curation with strict masonry protocols. Understanding exactly how to put stone veneer on a fireplace involves more than just applying mortar; it demands a strategic approach to material weight, substrate preparation, and joint styling to achieve a professional, lasting finish.
Curating the Aesthetic: Fireplace Stone Veneer Styles
The visual weight and texture of your stone veneer dictate the entire atmosphere of the room. Selecting the right profile ensures the fireplace complements your interior architecture rather than overwhelming it.
| Design Style | Recommended Stone Profile | Mortar Joint Technique | Best Architectural Pairing |
|---|---|---|---|
| Modern Minimalist | Ledgestone / Smooth Limestone | Dry-Stack (No visible mortar) | Linear gas fireplaces, floating hearths, monochromatic rooms |
| Rustic & Traditional | Fieldstone / River Rock | Overgrout / Flush joint | Wood-burning masonry fireboxes, exposed timber beams, cabin interiors |
| Transitional | Ashlar / Cut Stone | 1/2-inch raked joint | Standard raised-hearth fireplaces, painted shiplap surrounds, built-in cabinetry |
Color Blending and Layout Strategy
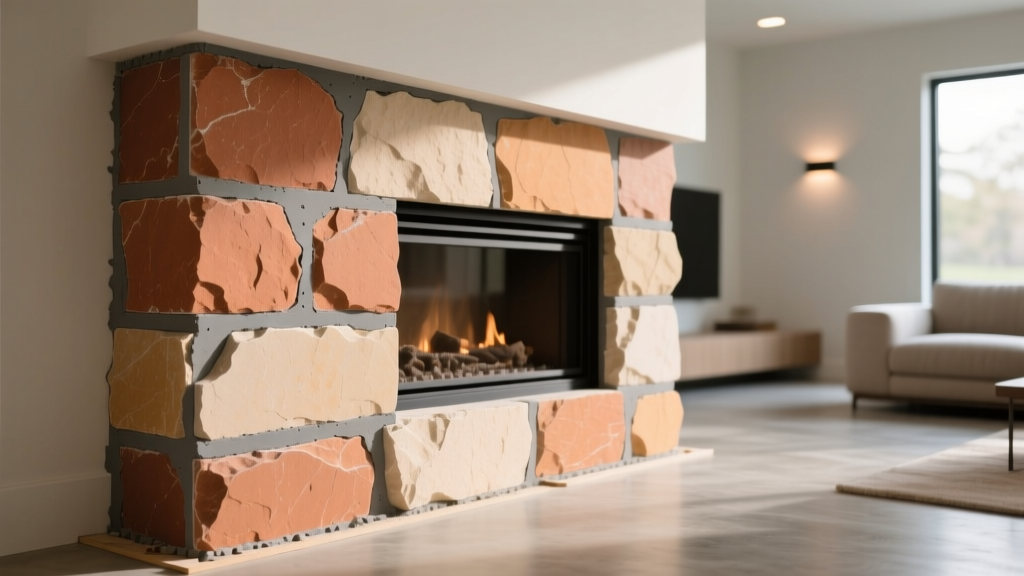
Never install stone directly from a single box. Manufactured Stone Veneer (MSV) is packaged with color variations distributed across multiple crates. For a natural appearance, blend pieces from at least three different boxes simultaneously. Dry-lay the stones on the floor in front of the fireplace to map out your pattern, ensuring no two identical shapes or dominant colors sit adjacent to one another. This prevents the 'stair-step' or 'picture-frame' effect that immediately signals an amateur installation.
Material Selection: Natural Stone vs. Manufactured Stone Veneer (MSV)
While natural stone offers unparalleled geological authenticity, MSV dominates the interior fireplace market due to its engineered weight and cost efficiency.
Weight & Structural Limits: Natural stone veneer typically weighs 25 to 40 lbs per square foot. Standard wood-framed chimney chases are rarely engineered to support this dead load without structural reinforcement. Manufactured Stone Veneer (MSV) weighs between 10 and 12 lbs per square foot, allowing it to be installed directly over standard cement board substrates without requiring a structural footing or additional wall framing.
For interior fireplace facades, high-density MSV profiles from manufacturers like Eldorado Stone or Boral offer exceptional durability and color-fastness at roughly 40% less cost than quarried natural stone. MSV is cast from molds of real stone, capturing the exact micro-textures and fissures of the original geological formations.
How to Put Stone Veneer on a Fireplace: Step-by-Step Installation
- Substrate Preparation: Remove all existing drywall or plaster down to the studs. Install a 1/2-inch or 5/8-inch cement backer board (such as USG Durock or James Hardie HardieBacker) using corrosion-resistant cement board screws spaced every 8 inches along the studs. Tape the seams with alkali-resistant fiberglass mesh tape and thin-set mortar.
- Weather Barrier & Metal Lath: Overlap the cement board with a layer of Grade D building paper or house wrap. Next, attach 18-gauge galvanized metal lath. The lath must wrap around all corners and edges by at least 2 inches. Fasten the lath every 6 inches using 1-1/4-inch galvanized roofing nails or staples driven directly into the wood or metal studs—never just into the cement board.
- The Scratch Coat: Mix Type S masonry mortar to a thick, peanut-butter consistency. Using a notched trowel, apply a 1/2-inch thick scratch coat over the metal lath, forcing the mortar through the mesh. Before it sets, use a raking tool to score horizontal lines into the mortar to provide a mechanical key for the setting bed. Allow the scratch coat to cure for 24 to 48 hours, misting it lightly with water to prevent rapid drying and cracking.
- Mortar Selection & Setting: For the setting bed, use a polymer-modified veneer mortar (such as Custom Building Products Natural Stone and Large Tile Mortar) or a standard Type N mortar. Apply a 1/2-inch to 1-inch layer of mortar to the substrate and 'butter' the back of each stone with a thin layer of mortar. Press the stone firmly into place, squeezing out excess mortar to ensure full contact without air pockets.
- Grouting & Jointing: For profiles requiring mortar joints, use a grout bag to fill the gaps, avoiding smearing mortar on the stone face. Once the mortar becomes thumbprint-hard (usually 30-45 minutes), use a jointing tool to compress and shape the joints. Brush away excess crumbs with a stiff-bristle brush. Never use a wire brush on MSV, as it can expose the aggregate core.
Design & Installation Failures to Avoid
Even premium materials will fail if installation nuances are ignored. Watch for these specific edge cases:
- Efflorescence Bloom: White, powdery deposits on the stone surface are caused by trapped moisture migrating through the mortar and carrying soluble salts to the surface. Prevent this by ensuring the scratch coat is fully cured before setting the stone, and avoid using excessive water when mixing mortar. If efflorescence occurs on MSV, clean it with a specialized efflorescence remover—never use muriatic acid, which will permanently burn the cementitious coloring of manufactured stone.
- Lath Delamination: If the metal lath is not wrapped around the corners and nailed directly into the studs, the sheer weight of the stone and mortar will pull the lath away from the cement board, resulting in catastrophic failure of the lower courses.
- Ignoring the Hearth Extension: The veneer must seamlessly integrate with the hearth. If you are tiling or stoning the hearth extension, ensure the vertical wall veneer overlaps the horizontal hearth stone by at least 1/2 inch to shed water and hide the expansion gap. Refer to InterNACHI's fireplace inspection guidelines for proper hearth extension dimensions based on firebox opening sizes.
Cost Breakdown: Standard 4x8 Fireplace Facade
The following estimates reflect current market pricing for a standard 32-square-foot fireplace facade (accounting for a 10-square-foot firebox opening, leaving roughly 22 square feet of veneer coverage, plus 10% waste).
| Cost Category | Material Specification | Estimated Cost (Per Sq. Ft.) | Total for 25 Sq. Ft. Project |
|---|---|---|---|
| Stone Veneer (MSV) | Premium Ledgestone / Ashlar Profile | $9.00 - $14.00 | $225 - $350 |
| Substrate & Lath | 1/2' Cement Board, 18ga Lath, Fasteners | $2.50 - $4.00 | $62 - $100 |
| Mortar & Grout | Type S Scratch, Polymer-Modified Setting Mortar | $1.50 - $2.50 | $37 - $62 |
| Professional Labor | Licensed Masonry Contractor (2-3 Days) | $15.00 - $25.00 | $375 - $625 |
| Total Project Cost | Materials + Professional Installation | $28.00 - $45.50 | $699 - $1,137 |
For homeowners opting for a DIY approach, eliminating the labor cost reduces the total project expense to approximately $325 to $515. However, the complexity of mixing mortar, managing open times, and executing clean jointing requires significant masonry experience to achieve a professional-grade aesthetic.
Mastering the installation of stone veneer transforms a utilitarian heating element into a custom architectural statement. By rigorously adhering to substrate preparation standards, respecting fire safety clearances, and thoughtfully curating your stone profile and joint styling, you ensure the fireplace remains a durable, high-impact design feature for decades.
Written by
Marcus ChenMarcus Chen is a licensed structural engineer (PE) and building materials analyst with over 12 years of experience across residential, commercial, and industrial construction. He holds a Master of Science in Civil Engineering from UC Berkeley and spent six years at Thornton Tomasetti before transitioning to independent consulting and technical writing. Marcus specializes in material selection for seismic-prone regions, concrete reinforcement strategies, and lifecycle cost analysis. His work has been cited by the American Concrete Institute (ACI) and the Structural Engineers Association of California (SEAOC). When he is not on a job site or at his desk, you will find him hiking the Sierra Nevada or restoring a 1920s craftsman bungalow in Oakland, CA.
More from Marcus Chen
View all
Construction Cost
How Much Did the Eiffel Tower Cost to Build?
How much did the Eiffel Tower cost to build in 1889? We adjust for inflation and compare its budget to modern skyscraper construction.
Aug 4, 2026

Fire Resistance
What Is a Fire Resistant Material? Testing & Certification Guide
Discover what is a fire resistant material through ASTM and UL testing. Learn how fire ratings, certifications, and assemblies work in construction.
Aug 4, 2026

Construction Cost
How Much Did the Burj Khalifa Cost to Build?
How much did the Burj Khalifa cost to build? We break down the $1.5B project and extract 5 money-saving strategies for your next build.
Jul 30, 2026