How to Install Stone Veneer for Fireplace Wall Surrounds
Learn how to install stone veneer for fireplace wall surrounds with this pro guide. Covers substrate prep, mortar mixing, layout, and grouting techniques.

The Anatomy of a Fail-Proof Fireplace Veneer Installation
Installing stone veneer for fireplace wall surrounds is a high-impact upgrade, but it is unforgiving of poor preparation. Industry data shows that over 80% of veneer failures—such as delamination, cracking, and efflorescence—originate from improper substrate preparation and moisture management, not the stone itself. Whether you are using manufactured stone veneer (MSV) or natural thin stone, the structural principles remain identical. This guide details the exact material specifications, mortar chemistry, and application techniques required for a permanent interior fireplace installation.
Phase 1: Substrate and Moisture Management
Never apply stone veneer directly to drywall, greenboard, or painted surfaces. The paper facing on drywall absorbs moisture from the mortar, degrading the bond and causing the stone to pull away from the wall. You must strip the fireplace surround down to the studs and build a proper masonry substrate.
Step 1: Weather Barrier and Lath
- Moisture Barrier: Staple 15-lb asphalt felt or Grade D building paper directly to the wood studs. Lap horizontal joints by 2 inches and vertical joints by 6 inches. This prevents mortar moisture from rotting the framing.
- Metal Lath: Install 2.5 lb self-furring galvanized diamond mesh metal lath. Use 1-inch galvanized roofing nails or staples spaced every 6 inches along the studs.
- The Corner Wrap (Critical): Never stop the lath at a corner. Wrap the lath at least 16 inches past every outside and inside corner. If lath seams meet exactly at the corner, the corner stones will inevitably crack and detach due to structural stress.
Step 2: Cement Backer Board (Alternative to Lath)
For interior applications, many professionals bypass metal lath and use 1/2-inch cement backer board, such as James Hardie HardieBacker 500. Fasten the board to studs using corrosion-resistant cement board screws every 8 inches. Tape the seams with alkali-resistant fiberglass mesh tape and embed it in a polymer-modified thin-set mortar. This provides a rigid, moisture-resistant base that eliminates the need for a scratch coat.
Phase 2: Mortar Selection and the Scratch Coat
If you are using metal lath, a scratch coat is mandatory. The scratch coat provides the mechanical key that holds the heavy stone to the wall.
| Mortar Type | Composition | Best Application | Cure Time |
|---|---|---|---|
| Type S Masonry Cement | 1 part Type S cement to 2.25-3 parts masonry sand | Traditional scratch coats and setting beds | 24-48 hours |
| Polymer-Modified Veneer Mortar | Pre-blended Portland cement, sand, and latex polymers | Setting stone (buttering) and cement board applications | 12-24 hours |
| Type N Mortar | Lower compressive strength, higher lime content | Grouting and pointing joints (not for setting) | 24 hours |
Applying the Scratch Coat: Mix Type S mortar to a thick, peanut-butter consistency. Using a flat trowel, apply a 1/2-inch thick layer over the metal lath. While the mortar is still wet, use a coarse rake or notched trowel to score horizontal lines every 2 to 3 inches deep. These horizontal grooves prevent the mortar from sliding down the wall and create a physical lock for the setting mortar. Allow this coat to cure for a minimum of 24 hours, misting it lightly with water if the room temperature exceeds 75°F to prevent rapid drying.
Phase 3: Layout, Blending, and Dry Fitting
Manufactured and natural stone veneers exhibit natural color and texture variations. Pulling stones sequentially from a single box will result in obvious "color banding" on your fireplace wall.
Pro Layout Rule: Open at least four boxes of stone and one box of corner pieces. Dry-fit the stones on the floor in front of the fireplace. Blend stones from different boxes to distribute color variations, sizes, and textures evenly across the entire surround. Never place two identically shaped or identically colored stones adjacent to one another.
Setting the Corners First
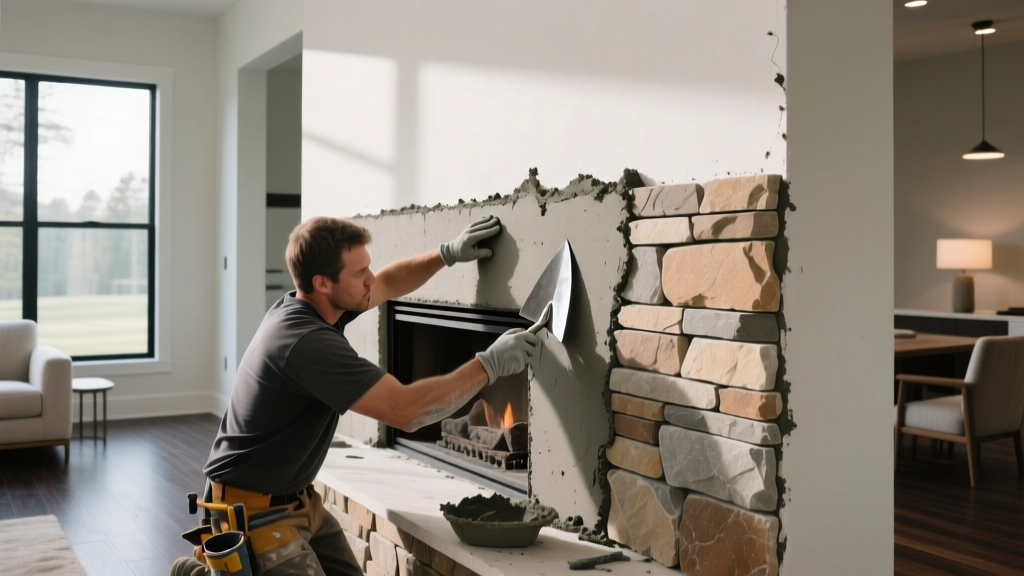
Always begin your installation with the corner pieces. Corners dictate the sightlines for the entire wall. Apply a 1/2-inch layer of polymer-modified mortar to the back of the corner stone (the "buttering" method). Press it firmly into the scratch coat with a slight twisting motion until mortar squeezes out the edges. Use a level to ensure the corner stones are perfectly plumb. Alternate the long and short legs of the corner pieces as you move up the wall to mimic natural masonry bonding patterns.
Phase 4: Field Stone Application Techniques
Once the corners are established, work from the bottom of the fireplace hearth upward, filling in the field stones between the corners.
- The Butter Method: Never apply mortar to the wall and press the stone into it (the "spot-bonding" method). Mortar skins over quickly, creating a false bond that will fail within months. Always apply a 1/2-inch continuous layer of mortar to the entire back perimeter and center of the stone.
- Joint Widths: For traditional fieldstone or river rock, maintain a 1/2-inch to 1-inch joint width. Use wooden spacers or nails to hold the stones in place while the mortar sets. For ledgestone or dry-stack profiles, fit the stones tightly together with zero visible mortar joints.
- Cutting Stone: Use a 4-inch angle grinder equipped with a continuous-rim diamond masonry blade for precision cuts around the firebox opening and mantel supports. Always cut from the back of the stone to prevent chipping the visible face.
Phase 5: Grouting and Tooling the Joints
Wait until the setting mortar is "thumbprint hard" (usually 30 to 60 minutes, depending on humidity) before grouting. If you grout too early, the stones will shift; if you wait too long, the grout won't bond to the setting bed.
- Load a canvas mortar bag with Type N grout (or a pre-mixed veneer jointing mortar).
- Squeeze the grout into the joints, slightly overfilling them.
- Allow the grout to firm up for about 15 minutes until it feels like stiff clay.
- Use a pointing trowel or a convex jointing tool to compress and smooth the grout. Compressing the grout increases its density and water resistance.
- Immediately brush away excess grout from the stone faces using a dry, stiff-bristle masonry brush. Never use water or a wet sponge to clean the stone during installation. Water drives cement pigments into the porous stone face, causing permanent staining.
Troubleshooting Common Fireplace Veneer Failures
Failure Mode: Efflorescence (White Powdering)
Cause: Soluble salts within the mortar or stone are drawn to the surface by migrating moisture, leaving a white, powdery residue. This is common in new installations where the mortar has not fully cured and dried out.
The Fix: Do not use water or acid washes, which can exacerbate the problem. Allow the fireplace environment to fully dry (run the fireplace to bake out moisture). Once dry, remove the efflorescence using a dry, stiff nylon brush. If it persists after 30 days, apply a breathable, siloxane-based masonry sealer to block moisture migration while allowing vapor transmission.
2026 Cost Breakdown: 50 Sq. Ft. Fireplace Surround
The following cost matrix reflects current material and labor rates for a standard 50-square-foot interior fireplace surround (e.g., 5 feet wide by 10 feet high, minus the firebox opening).
| Material / Service | Manufactured Stone Veneer (MSV) | Natural Thin Stone Veneer |
|---|---|---|
| Veneer Material | $350 - $600 ($7-$12/sq ft) | $750 - $1,250 ($15-$25/sq ft) |
| Substrate (Cement Board, Lath, Felt) | $120 - $180 | $120 - $180 |
| Mortar, Grout, and Fasteners | $80 - $120 | $80 - $120 |
| Professional Labor (if hired) | $600 - $1,000 ($12-$20/sq ft) | $900 - $1,500 ($18-$30/sq ft) |
| Total DIY Cost | $550 - $900 | $950 - $1,550 |
| Total Pro-Installed Cost | $1,150 - $1,900 | $1,850 - $3,050 |
For comprehensive technical specifications regarding mortar mixes and clearances, always consult the Cultured Stone Installation Guide or the guidelines provided by the Portland Cement Association. Proper adherence to these manufacturer tolerances ensures your fireplace veneer remains structurally sound and aesthetically flawless for decades.
Written by
Elena RodriguezElena Rodriguez is a civil engineer and technical writer specializing in concrete technology, masonry systems, and ASTM/ACI compliance. She earned her B.S. in Civil Engineering from Texas A&M University and spent a decade at a materials testing laboratory, performing over 2,000 concrete compressive strength tests and masonry prism evaluations. Elena is an ACI-certified Field Testing Technician (Grade I) and a member of ASTM Committee C12 on Natural Building Stone. She currently consults on forensic engineering cases involving concrete failures and moisture intrusion. Based in San Antonio, TX, Elena is a proud member of the Society of Women Engineers (SWE) and coaches her daughter's FIRST Robotics team.
More from Elena Rodriguez
View all
Walls & Panels
Cost Analysis: Light Gauge Steel Framing Advantages and Disadvantages
Evaluate light gauge steel framing advantages and disadvantages through a strict cost analysis lens, comparing material, labor, and lifecycle expenses.
Aug 4, 2026

Walls & Panels
Gypsum Board Types: Exact Specifications, Thickness & Dimensions
Compare standard, Type X, and moisture-resistant gypsum board types. Get exact specifications, thicknesses, dimensions, and ASTM standards for your project.
Aug 4, 2026

Fire Resistance
Best Fire-Resistant Outdoor Decking Materials: 2026 Buyer Guide
Discover the best fire-resistant outdoor decking materials for 2026. Compare Class A PVC, aluminum, and hardwood options for WUI compliance and safety.
Aug 4, 2026