How to Install Mortarless Stone Veneer Siding: Step-by-Step
Learn how to install mortarless stone veneer siding with our step-by-step pro guide. Covers prep, interlocking panels, flashing, and corner details.

Material Science: HDPU vs. Interlocking Concrete
When contractors and DIYers refer to mortarless stone veneer siding, they are typically discussing one of two distinct material systems: High-Density Polyurethane (HDPU) panels or interlocking lightweight concrete boards. Understanding the physical properties of your chosen material dictates your fastening schedule, cutting tools, and expansion gap tolerances.
| Feature | HDPU Panels (e.g., GenStone, Evolve) | Interlocking Concrete (e.g., ClipStone) |
|---|---|---|
| Weight | ~1 lb per sq. ft. | ~10-12 lbs per sq. ft. |
| Substrate Requirement | OSB, Plywood, or existing flat siding | Structural sheathing + metal lath (often) |
| Cutting Tools | Tin snips, jigsaw, or fine-tooth wood blade | Diamond-tipped masonry blade, angle grinder |
| Thermal Expansion | High (~1/8" per 10 ft per 40°F swing) | Negligible |
This guide focuses primarily on the HDPU interlocking systems, which represent over 80% of the modern mortarless residential siding market due to their rapid installation times and lack of required masonry skills.
Tool Loadout and Material Calculations
Do not rely on standard drywall screws or interior adhesives for exterior veneer applications. The following loadout ensures structural integrity and weather resistance:
- Fasteners: 1.5-inch to 2-inch hot-dipped galvanized roofing nails or exterior-grade star-drive screws. (Staples are not permitted by most building codes for structural siding attachment).
- Adhesive: Polyurethane-based exterior construction adhesive (e.g., Loctite PL Premium 3x). Plan for one 10oz tube per 50 square feet of coverage.
- Weather Barrier: House wrap (e.g., Tyvek) and 6-inch self-adhering flashing tape for all penetrations.
- Leveling: 4-foot torpedo level and a chalk line for establishing the starter baseline.
Step 1: Substrate and Weather-Resistive Barrier (WRB)
Mortarless stone veneer siding is not a waterproof barrier; it is a water-shedding cladding. Proper water management behind the panels is non-negotiable. According to building science principles outlined by the Building Science Corporation, managing bulk water intrusion requires a continuous drainage plane.
WRB Installation Protocol
- Strip the exterior down to the structural sheathing (OSB or plywood). Repair any rotted wood and ensure the surface is flat within 1/4 inch over a 10-foot span.
- Apply a code-approved Weather-Resistive Barrier (WRB). Overlap horizontal seams by a minimum of 6 inches and vertical seams by 12 inches.
- Integrate self-adhering flashing tape around all windows, doors, and penetrations. The Department of Energy mandates that flashing must direct water down and out over the WRB, not behind it.
- Install a weep screed at the base of the wall, extending at least 4 inches below the wood framing line to allow any trapped moisture to escape.
Step 2: Starter Track and Flashing Integration
The first row of panels dictates the alignment for the entire elevation. A 1/16-inch error at the bottom will compound into a 1/2-inch error by the time you reach the soffit.
- Snap a level chalk line exactly 1/2 inch above the top lip of your weep screed. This gap is critical for capillary break drainage.
- If your specific mortarless system utilizes a proprietary metal or PVC starter track, fasten it to the wall studs every 16 inches using 2-inch galvanized nails.
- If the system is self-starting (where the first panel's bottom edge is trimmed flush), ensure Z-flashing is installed above any horizontal transitions or trim boards before the first panel is placed.
Where the mortarless siding meets a roofline (such as a side-wall dormer), you must install kick-out flashing. The EPA's moisture control guidelines highlight missing kick-out flashing as a leading cause of catastrophic wall rot. Ensure the flashing diverts water into the gutter, not behind the veneer panels.
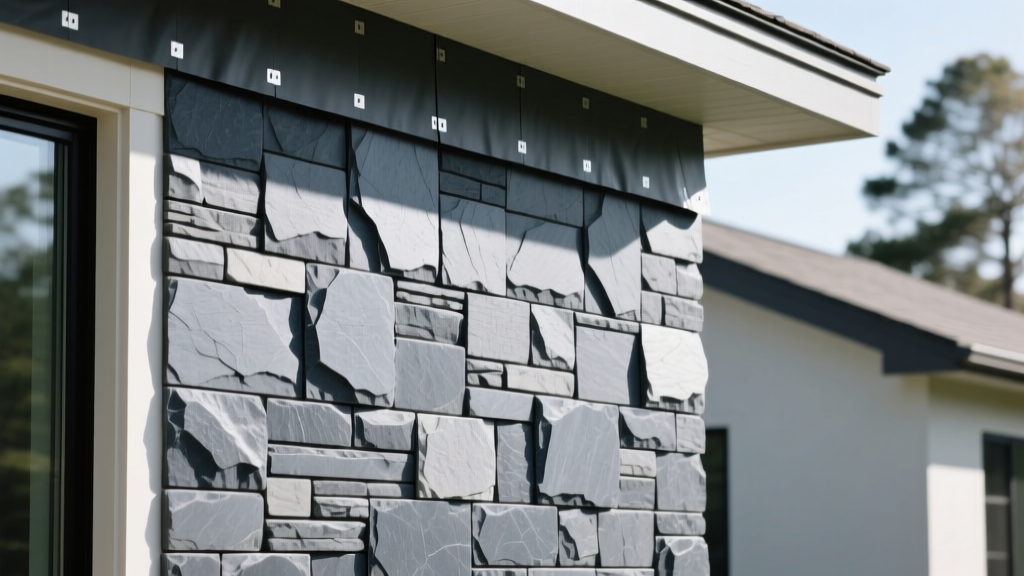
Step 3: Panel Alignment, Adhesive, and Fastening
While the panels are "mortarless" and interlock mechanically, relying solely on the interlocking lips for wind-load resistance is a critical failure point in high-wind zones.
The "Snap and Glue" Method
- Apply Adhesive: Run a continuous 1/4-inch bead of polyurethane construction adhesive along the top interlocking groove and the side shiplap edges of the panel before mating it to the adjacent piece.
- Interlock: Slide the panel into the previously installed piece at a 45-degree angle, then press flat against the WRB until the mechanical lips snap together.
- Fasten: Drive galvanized nails through the designated nailing flanges at the top of the panel. Crucial: You must hit the underlying wall studs (typically 16" or 24" on center). Do not fasten only into the OSB sheathing. Leave the nail head flush with the flange—do not overdrive and crush the HDPU material.
- Stagger Joints: Offset vertical seams by at least 12 inches between adjacent rows to prevent water channeling and create a randomized, natural stone aesthetic.
Step 4: Cutting, Penetrations, and Expansion Gaps
HDPU mortarless stone veneer expands and contracts significantly with temperature fluctuations. If you install panels tight against rigid penetrations in 90°F heat, they will buckle when winter temperatures drop.
- Window/Door Casings: Cut panels leaving a strict 1/4-inch expansion gap between the veneer edge and the window casing. Fill this gap with a color-matched, exterior-grade polyurethane sealant (not silicone, which does not adhere well to polyurethane foam).
- Electrical Boxes: Turn off power, remove the receptacle cover, and use a jigsaw with a fine-tooth blade to cut the panel opening 1/8-inch larger than the electrical box. Install an exterior-grade weatherproof extension ring to bring the outlet flush with the new 1-inch thickness of the stone veneer.
- Inside/Outside Corners: Do not attempt to miter-cut panels for corners. Use the manufacturer's proprietary corner posts, which are designed to overlap the field panels and hide the cut edges while accommodating thermal movement.
Cost Analysis: Mortarless vs. Traditional Masonry
Understanding the financial implications helps justify the material choice to clients or evaluate DIY ROI. The following table reflects average national costs for 2026 residential applications.
| Cost Factor | Mortarless HDPU Veneer | Traditional Mortared Natural Stone |
|---|---|---|
| Material Cost (per sq. ft.) | $9.00 - $14.00 | $15.00 - $28.00 |
| Labor Cost (per sq. ft.) | $2.50 - $5.00 (or DIY) | $18.00 - $30.00 (Mason required) |
| Structural Reinforcement | $0 (Standard framing) | $500 - $2,000+ (Footings/angles) |
| Total Installed (1,000 sq ft) | $11,500 - $19,000 | $38,000 - $60,000+ |
Troubleshooting Common Installation Failures
Cause: Nails driven too tightly into the nailing flange, pinning the panel and preventing thermal expansion, or panels installed with zero gaps at the ends during peak summer heat.
Fix: Remove the affected panels. Re-install using the "slip-fit" technique, leaving a 1/16-inch gap at end joints, and ensure nail heads are resting just on the surface of the flange, not compressing it.
Cause: Failing to interlock the shiplap edges fully before nailing, or substrate irregularities pushing the panel outward.
Fix: Use a rubber mallet to gently tap the interlocking seams flush before fastening. If the wall is out of plumb, apply shims behind the WRB (not between the WRB and the panel) to create a flat plane.
Final Inspection and Maintenance
Once the mortarless stone veneer siding is fully installed, conduct a water test using a garden hose on a low-pressure setting. Spray upward at the bottom seams and window flashings to verify that the interlocking lips and Z-flashing are effectively shedding water outward. Annually, inspect the polyurethane sealant at all penetrations and corner posts, re-caulking any areas where UV degradation has caused cracking. With proper WRB integration and adherence to expansion tolerances, an HDPU mortarless system will maintain its structural and aesthetic integrity for decades without the efflorescence or mortar-joint deterioration common in traditional masonry.
Written by
Sarah WhitfieldSarah Whitfield is a chartered quantity surveyor (MRICS) and construction cost analyst with 15 years of experience in material pricing, procurement strategy, and project budgeting. She earned her degree in Construction Management from the University of Reading (UK) and has worked on projects ranging from $2M custom homes to $180M mixed-use developments across North America and Europe. Sarah currently leads cost estimating for BuildMat Insight, maintaining a proprietary database of 4,000+ material price points updated quarterly. She is a frequent contributor to RSMeans cost data panels and has presented at the International Cost Engineering Council (ICEC) congress. Based in Denver, CO, Sarah is an avid trail runner and volunteer mentor for Women in Construction.
More from Sarah Whitfield
View all
Wood & Lumber
What Are the Different Types of Wood? A Builder's Guide
Compare structural softwoods, finish hardwoods, and engineered lumber. Analyze Janka ratings, MOE values, and 2026 pricing for construction.
Aug 4, 2026

Walls & Panels
Steel Framing vs Wood Framing: Corrosion and Moisture Defense
Compare steel framing vs wood framing for moisture resistance. Learn about galvanized coatings, condensation risks, and corrosion protection strategies.
Jul 21, 2026

Stone & Masonry
How to Cut Stone Veneer: Wet Saw vs Grinder Comparison
Compare the best tools for cutting stone veneer. We review wet saws, angle grinders, and chop saws to help you achieve clean, chip-free cuts.
Jul 21, 2026