Interior Design Guide: Styling Glue On Stone Veneer
Discover how to elevate modern interiors using glue on stone veneer. Explore design styles, adhesive specs, and room-by-room installation showcases.

The Engineering Behind the Aesthetic
The transition from traditional mud-set masonry to chemical-bond applications has fundamentally altered interior architecture. Glue on stone veneer is no longer a mere DIY shortcut; it is a specified architectural finish that allows designers to clad vertical surfaces, curved columns, and cantilevered islands without the structural burden of full-bed stone. Modern mortarless systems rely on advanced polymer adhesives to create a shear bond that exceeds the tensile strength of the stone itself.
When specifying these materials, weight is the primary engineering constraint. Natural thin veneer (NTV) typically weighs between 10 and 15 pounds per square foot. Manufactured architectural stone veneer (ASV) ranges from 8 to 12 pounds per square foot, while high-density polyurethane faux stone panels weigh a mere 1 to 2 pounds per square foot. According to guidelines published by the Masonry Society, manufactured veneer must adhere to ASTM C1670 standards, ensuring dimensional stability and freeze-thaw durability even when installed in semi-conditioned transitional spaces like enclosed sunrooms.
2026 Design Styles & Veneer Pairings
Current interior design movements heavily favor tactile, organic surfaces that contrast with sleek digital environments. Here is how leading designers are integrating mortarless veneer into dominant aesthetic frameworks.
Japandi & Soft Minimalism
The Japandi aesthetic demands clean sightlines and muted palettes. Designers are moving away from chaotic, multi-colored ledger stone and instead specifying honed limestone or smooth cast-stone panels in warm greys and taupes. By utilizing large-format, glue-on veneer panels (often 24x48 inches), installers can minimize grout lines or use color-matched polyurethane sealants to create a near-monolithic wall. The adhesive application allows these heavy panels to be mounted flush to the ceiling without the need for visible metal ledger supports.
Biophilic Maximalism
Biophilic design seeks to connect occupants with nature through raw textures. Stacked slate and rugged sandstone veneers are being used to create 'living walls' that integrate with preserved moss panels and integrated LED grow lighting. Because glue on stone veneer does not require a thick mortar bed, it can be applied directly over specialized waterproofing membranes, allowing for seamless integration with adjacent indoor water features and humidifier systems without risking mortar degradation.
Industrial Loft & Raw Textures
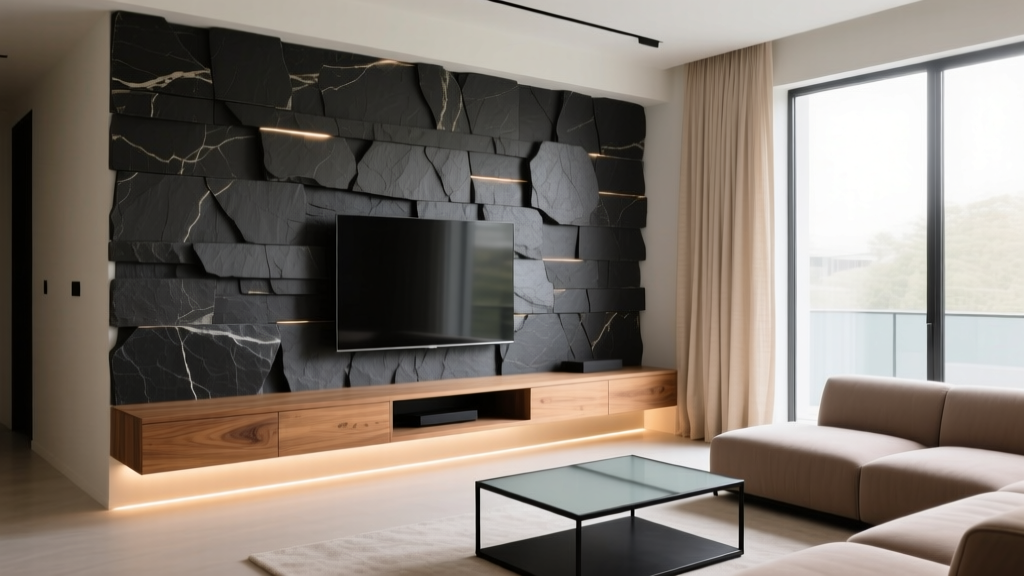
For commercial spaces and urban lofts, designers are utilizing dark charcoal and oxidized iron-toned manufactured veneers. The mortarless application is critical here, as these stones are often applied to existing painted brick or concrete block. A high-grab hybrid polymer adhesive bridges the gap between the non-porous painted substrate and the stone, eliminating the need for costly and messy mechanical lath and scratch coats.
Never apply heavy natural thin veneer (over 5 lbs/sq ft) directly to standard 1/2-inch drywall using construction adhesive. The paper face of the drywall will delaminate under the sheer weight, causing catastrophic wall failure. Always use 1/2-inch cement backer board (e.g., Durock, HardieBacker) or reinforce the wall framing to 16-inch on-center studs before application.
Technical Matrix: Matching Adhesives to Veneer Types
Selecting the correct adhesive is the single most critical factor in preventing long-term failure. The chemistry of the glue must match both the porosity of the stone and the substrate material.
| Adhesive Chemistry | Top Product Example | Ideal Veneer Type | Substrate Compatibility | Open Time | Shear Strength |
|---|---|---|---|---|---|
| Polyurethane | Loctite PL Premium 3x | Natural Thin Veneer (NTV), Heavy ASV | Cement Board, Plywood, OSB | 15-20 Minutes | High (Expands slightly to fill voids) |
| Hybrid Polymer | SikaBond Construction Adhesive | Manufactured ASV, Painted Surfaces | Drywall (lightweight only), Painted Brick | 10-15 Minutes | Very High (Immediate grab) |
| Epoxy / Mastic | LATICRETE 310 Epoxy | Wet Area Stone, Glass-Backed Veneer | Waterproofed Cement Board, Kerdi-Board | 30-45 Minutes | Maximum (Waterproof bond) |
Room-by-Room Execution Guide
The Kitchen Island Waterfall
Creating a seamless 'waterfall' edge on a kitchen island using stone veneer requires precision mitering. Because mortarless veneer lacks the structural thickness of full-bed stone, fabricators use diamond-tipped wet saws to cut 45-degree bevels on the edges of thin veneer panels. The pieces are then joined using a color-matched, high-strength epoxy (such as Akemi Akepox) rather than standard construction adhesive. Recent spatial trends highlighted by the National Kitchen & Bath Association (NKBA) indicate a strong preference for these textured, organic island bases to contrast with ultra-smooth quartz or porcelain countertops.
The Bathroom Spa Niche
Wet environments demand rigorous moisture management. Before applying any glue on stone veneer in a shower or steam room, the substrate must be treated with a liquid-applied waterproofing membrane (like Custom Building Products RedGard) or a sheet membrane (like Schluter Kerdi). Standard polyurethane adhesives can break down under constant steam exposure. Instead, specify a 100% solids epoxy adhesive. Apply the epoxy using a 1/4-inch x 1/4-inch square-notch trowel to ensure 95% coverage on the back of the stone, preventing water from pooling in voids behind the veneer, which can lead to efflorescence and mold growth.
Cost & ROI: Budgeting for High-End Looks
Understanding the financial breakdown of a mortarless stone project helps designers and homeowners allocate budgets effectively. While the material costs can be high, the labor savings compared to traditional masonry are substantial.
- Material Costs: High-quality manufactured architectural stone veneer ranges from $9 to $16 per square foot. Premium natural thin veneer (like quarried slate or limestone) ranges from $18 to $35 per square foot.
- Adhesive & Prep Costs: A standard 28 oz tube of premium polyurethane adhesive costs $9 to $14 and covers approximately 12 to 15 square feet. Cement backer board and waterproofing membranes add $2.50 to $4.00 per square foot.
- Labor Savings: Traditional mud-set masonry requires a skilled mason, metal lath, a scratch coat, and a mortar bed, often costing $25 to $40 per square foot in labor. Glue-on installation can be executed by skilled carpenters or tile setters at $12 to $20 per square foot, reducing overall project labor costs by up to 45%.
Failure Modes & Prevention Strategies
Even the most expensive stone will fail if the installation parameters are ignored. The three most common failure modes in glue on stone veneer applications include:
- Adhesive Starvation: Applying adhesive in small 'dabs' rather than continuous beads or full trowel coverage. This creates hollow voids behind the stone. If the stone is impacted, it will crack or pop off. Always use the manufacturer-recommended trowel notch or continuous zig-zag bead pattern.
- Substrate Deflection: If the underlying wall framing flexes (common in multi-story wood-framed homes), the rigid stone and adhesive bond will crack. Ensure wall framing meets L/360 deflection limits before installing cement board and veneer.
- Thermal Expansion Mismatch: Installing stone veneer over large expanses without expansion joints. Stone and wood/metal studs expand and contract at different rates. Incorporate soft, color-matched polyurethane caulk joints at inside corners and where the stone meets the ceiling to absorb lateral movement.
When working with highly porous natural stones like sandstone or tufa, the substrate and the stone can absorb the moisture from the adhesive too quickly, causing it to skin over before a proper bond forms. Always 'back-butter' the stone by applying a thin, flat layer of adhesive to the back of the veneer piece before pressing it into the notched adhesive bed on the wall. This ensures immediate, 100% contact and maximum shear strength.
By treating glue on stone veneer as a precision architectural system rather than a simple cosmetic overlay, designers can achieve breathtaking, durable interiors that stand the test of time. The key lies in respecting the chemistry of the adhesives, preparing the substrates rigorously, and selecting stone profiles that amplify the intended design narrative.
Written by
Elena RodriguezElena Rodriguez is a civil engineer and technical writer specializing in concrete technology, masonry systems, and ASTM/ACI compliance. She earned her B.S. in Civil Engineering from Texas A&M University and spent a decade at a materials testing laboratory, performing over 2,000 concrete compressive strength tests and masonry prism evaluations. Elena is an ACI-certified Field Testing Technician (Grade I) and a member of ASTM Committee C12 on Natural Building Stone. She currently consults on forensic engineering cases involving concrete failures and moisture intrusion. Based in San Antonio, TX, Elena is a proud member of the Society of Women Engineers (SWE) and coaches her daughter's FIRST Robotics team.
More from Elena Rodriguez
View all
Walls & Panels
Cost Analysis: Light Gauge Steel Framing Advantages and Disadvantages
Evaluate light gauge steel framing advantages and disadvantages through a strict cost analysis lens, comparing material, labor, and lifecycle expenses.
Aug 4, 2026

Walls & Panels
Gypsum Board Types: Exact Specifications, Thickness & Dimensions
Compare standard, Type X, and moisture-resistant gypsum board types. Get exact specifications, thicknesses, dimensions, and ASTM standards for your project.
Aug 4, 2026

Fire Resistance
Best Fire-Resistant Outdoor Decking Materials: 2026 Buyer Guide
Discover the best fire-resistant outdoor decking materials for 2026. Compare Class A PVC, aluminum, and hardwood options for WUI compliance and safety.
Aug 4, 2026