How to Lay Stone Veneer Fireplace Surrounds: Pro Guide
Master how to lay stone veneer fireplace surrounds. This pro guide covers substrate prep, Type S mortar mixing, back-buttering, and grouting techniques.

The Substrate: Where 90% of Fireplace Veneer Fails
Learning how to lay stone veneer fireplace surrounds successfully begins long before you mix mortar. The most common cause of veneer failure—stones detaching and falling onto the hearth—is improper substrate preparation. Stone veneer, whether natural or manufactured, is heavy and the mortar requires a porous, rigid, and non-combustible surface to cure and bond correctly.
Direct-to-Board vs. Lath and Scratch Coat
Do not install stone veneer over drywall, greenboard, or painted surfaces. The paper face of drywall will delaminate under the weight and moisture of the mortar. You have two code-compliant pathways for interior fireplace surrounds:
- Direct Application (Preferred for Modern Veneer): Install 1/2-inch cement backer board (e.g., USG Durock or James Hardie HardieBacker) directly to the wall studs using corrosion-resistant screws spaced 6 inches apart on the edges and 8 inches in the field. Tape the seams with alkali-resistant fiberglass mesh tape and embed it in a polymer-modified thinset. Once cured, you can apply veneer mortar directly to the board.
- Lath and Scratch Coat (Required for Natural Fieldstone): If you are installing heavy, irregular natural stone over a masonry block or brick fireplace, attach 2.5 lb self-furring galvanized metal lath using masonry nails or concrete screws. Apply a 1/2-inch scratch coat of Type S mortar, scoring it horizontally with a coarse broom to create a mechanical key. Let this cure for 48 hours before setting the stone.
Material and Tool Specification Matrix
Using the wrong mortar is a critical error. Standard brick mortar (Type N) lacks the tensile and adhesive strength required for vertical, non-load-bearing veneer applications. Always use a polymer-modified Type S veneer stone mortar, such as QUIKRETE Veneer Stone Mortar, which is specifically engineered with polymers to prevent sagging and improve bond strength.
| Category | Specification / Product | Purpose |
|---|---|---|
| Substrate | 1/2' Cement Backer Board | Non-combustible, moisture-resistant base |
| Mortar | Polymer-Modified Type S | High-tensile vertical adhesion |
| Trowel | 1/2' x 1/2' Square Notch | Ensures consistent mortar thickness |
| Jointing | Canvas Grout Bag & Jointing Tool | Precise mortar placement without staining |
| Cleaning | Stiff Bristle Brush (Non-Wire) | Removes excess mortar without scratching |
| Sealer | Siloxane-Based Penetrating Sealer | Prevents efflorescence and water ingress |
Step 1: Dry-Fitting the Hearth and Corners
Never pull stones directly from the box and stick them to the wall. Manufactured and natural stones vary wildly in color and thickness. Open 3 to 4 boxes and lay the stones out on the floor in front of the fireplace. Blend the pieces to ensure a natural distribution of colors and sizes, avoiding 'color banding' where all dark or light stones cluster together.
Identify your corner pieces first. Corners dictate the layout of the entire surround. If your fireplace has an outside corner returning to the side wall, dry-fit the corner stones to ensure they wrap naturally. Measure the height of your firebox and plan your horizontal joint lines so you do not end up with a thin, awkward sliver of stone at the top or bottom of the surround.
Step 2: Mixing and Applying the Scratch Coat
If your substrate requires a scratch coat (or if you are applying a base layer to cement board for extra grip), mix your Type S mortar to a consistency resembling thick peanut butter. It should hold its shape on a trowel held at a 90-degree angle without sliding off.
After mixing the mortar with water, let it 'slake' (rest) for 10 minutes. This allows the polymers and Portland cement to fully hydrate. After 10 minutes, remix the batch with your drill and paddle without adding any more water. Adding water after slaking breaks the chemical bond and drastically reduces the mortar's adhesive strength.
Using the flat side of your margin trowel, press the mortar firmly into the substrate to fill any voids, then comb it horizontally with the notched side. For direct-to-board applications, you can skip the full scratch coat and move directly to setting the stone, provided the board is clean and dust-free.
Step 3: Setting the Stone (The Back-Butter Method)
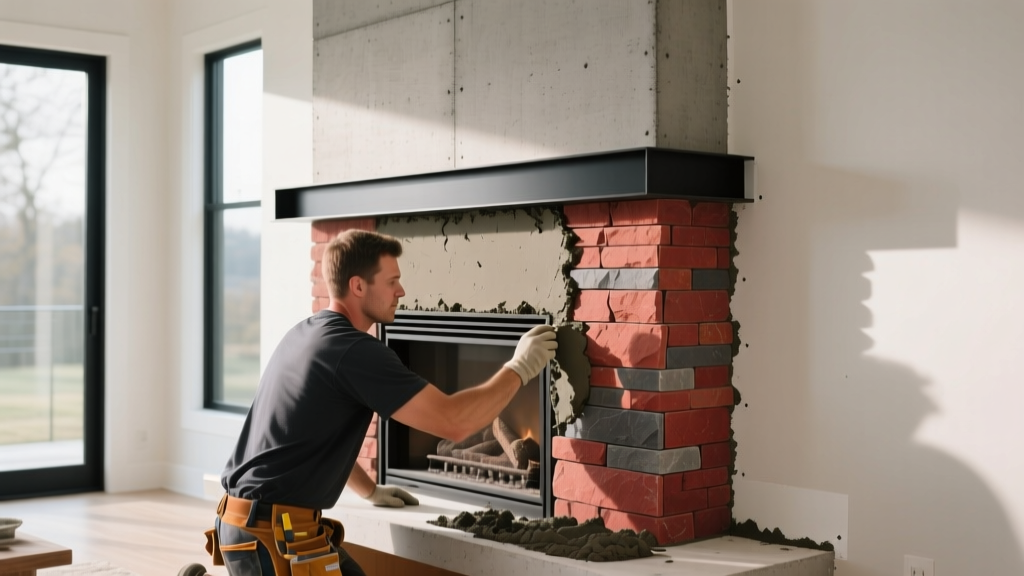
Always start installing from the bottom up. If your fireplace has a hearth extension, lay the hearth stones first to establish a level baseline. From there, install the corner pieces, and then fill in the flat field stones between them.
The Back-Buttering Technique
For natural stone, back-buttering is mandatory. For manufactured veneer, it is highly recommended to ensure a 100% bond. Using your trowel, apply a 1/2-inch to 1-inch layer of mortar to the back of the stone, sloping the edges slightly inward to prevent mortar from squeezing out into the joints when pressed. Press the stone firmly into the wall substrate with a slight twisting motion until the mortar squeezes out slightly at the edges. Maintain a consistent joint width—typically 1/2-inch to 1-inch for standard fieldstone, or tight-stack (zero joint) for ledgestone profiles.
While stone veneer and mortar are non-combustible, the substrate behind them and the mantel above them may not be. According to NFPA 211 (Standard for Chimneys, Fireplaces, Vents, and Solid Fuel-Burning Appliances), combustible mantels and trim must maintain a minimum clearance of 12 inches from the top of the firebox opening. Always verify local building codes, as some municipalities require greater clearances or the installation of a non-combustible heat shield.
Step 4: Grouting and the 'Thumbprint' Test
Once the stones are set and the mortar has begun to firm up, it is time to grout the joints. Do not rush this step. If you grout too early, the mortar will smear across the face of the stone, creating a haze that is incredibly difficult to remove, especially on porous natural stones like limestone or sandstone.
Perform the thumbprint test: press your thumb firmly into the mortar joint. If it leaves a clean impression without sticking to your skin or slumping, it is ready to tool. Load a canvas grout bag with mortar and pipe it into the joints, slightly overfilling them. Wait 15 to 30 minutes for the grout in the joints to stiffen further, then use a convex jointing tool to compress and smooth the joints. This compression increases the density and water-resistance of the grout line. Finally, use a stiff, non-wire bristle brush to knock off any excess mortar crumbs from the stone faces.
Troubleshooting Common Installation Failures
Even experienced masons encounter issues when working with stone veneer. Here is how to diagnose and fix the most common problems, referencing guidelines from the Natural Stone Institute.
- Efflorescence (White Powdery Staining): This occurs when water-soluble salts within the mortar or stone migrate to the surface and crystallize as water evaporates. Fix: Dry-brush the deposits. To prevent future occurrences, ensure the fireplace chase is properly sealed from exterior moisture and apply a breathable, siloxane-based penetrating sealer to the finished veneer. Never use a film-forming acrylic sealer, which traps moisture inside the wall cavity.
- Mortar Haze on Stone Faces: Caused by grouting before the mortar has sufficiently stiffened, or using a wet sponge to clean the joints. Fix: For natural stone, a diluted solution of muriatic acid (1 part acid to 10 parts water) can dissolve the haze. Always test on an inconspicuous area first. Never use acid on manufactured stone veneer, as it will strip the iron-oxide pigments and ruin the color.
- Hollow Sounding Stones: Tapping the stone yields a hollow sound, indicating a lack of bond. Fix: This is caused by 'front-buttering' (applying mortar only to the wall) or failing to press the stone firmly enough to collapse the trowel ridges. The stone must be carefully pried off, the old mortar chipped away, and the piece reset using the proper back-buttering technique.
- Sagging on Vertical Runs: Stones slide down the wall before the mortar cures. Fix: Your mortar mix is too wet, or you are using unmodified Type N mortar. For tall fireplace surrounds, install a temporary ledger board screwed into the studs to support the bottom row of stones while the mortar cures for 24 hours, then remove the board and fill the gap.
By strictly adhering to substrate requirements, utilizing polymer-modified Type S mortar, and respecting the curing timelines of the thumbprint test, your stone veneer fireplace surround will achieve a permanent, structural bond that rivals professional masonry standards.
Written by
David NakamuraDavid Nakamura is a licensed architect (AIA) and construction technology writer focused on sustainable building methods, mass timber engineering, and high-performance building envelopes. He holds a Master of Architecture from the University of Washington and is a certified Passive House Consultant (CPHC). David spent eight years at the Seattle firm Mithun, where he led the design of three LEED Platinum projects, before founding his own practice specializing in net-zero residential design. He serves on the editorial advisory board of GreenBuilder Magazine and has authored peer-reviewed papers on cross-laminated timber (CLT) connections for the Journal of Structural Engineering. In his spare time, David teaches woodworking at Pratt Fine Arts Center and kayaks the Puget Sound.
More from David Nakamura
View all
Construction Cost
Labor Cost to Build a Deck Per Sq Ft: 2026 Installation Guide
Discover the exact labor cost to build a deck per sq ft in 2026. This installation guide breaks down contractor rates, complexity factors, and hidden fees.
Aug 4, 2026

Construction Cost
How Much Does It Cost to Build a 3 Bedroom House? Financing Guide
Learn exactly how much it costs to build a 3 bedroom house and explore 2026 financing options, construction loan types, and budget frameworks for your build.
Aug 4, 2026

Construction Cost
Cost to Build a Tennis Court: 2026 Guide
How much does it cost to build a tennis court in 2026? Breakdowns for asphalt, concrete, and synthetic surfaces plus fencing and lighting.
Jul 30, 2026