Can You Put Stone Veneer Over Brick? 3 Methods Compared
Learn if you can put stone veneer over brick. Compare direct bond, metal lath, and furring strip methods, plus 2026 costs and structural limits.

The Short Answer: Yes, But the Substrate Dictates the Method
Can you put stone veneer over brick? The short answer is yes. Brick provides an exceptionally stable, rigid masonry substrate that is ideal for supporting the weight of both natural thin stone veneer and manufactured stone products. However, the condition of the existing brick—specifically whether it is painted, sealed, structural, or a veneer itself—dictates the exact preparation and installation method required to prevent catastrophic failure.
Applying stone veneer directly to a compromised or improperly prepared brick facade is a leading cause of delamination, efflorescence, and moisture entrapment. According to guidelines published by the International Masonry Institute (IMI), the bond strength between the veneer mortar and the underlying substrate must exceed the tensile weight of the stone assembly. This guide compares the three primary installation methods for overlaying brick with stone veneer, detailing the structural prerequisites, material specifications, and 2026 cost expectations for each.
Comparing the Three Installation Methods Over Brick
The correct installation method is not a matter of preference; it is dictated by the surface condition of the existing brick. Below is a comparison matrix of the three standard approaches used by professional masons.
| Method | Best Use Case | Material Requirements | Added Thickness |
|---|---|---|---|
| 1. Direct Adhesive Bond | Unpainted, unsealed, clean structural brick with flush mortar joints. | Polymer-modified veneer mortar (ANSI A118.4 or A118.15). | 1 to 1.5 inches |
| 2. Metal Lath & Scratch Coat | Painted brick, sealed brick, or deeply raked mortar joints. | 2.5 lb galvanized self-furring lath, masonry screws, Type S mortar. | 1.5 to 2.5 inches |
| 3. Furring & Cement Board | Severely uneven brick, interior remodels, or when adding rigid insulation. | Pressure-treated furring strips, 1/2" cement board, thin-set. | 2.5 to 4 inches |
Method 1: Direct Adhesive Bond (The Bare Brick Route)
This method is only viable if the brick is raw, unpainted, and free of any silane/siloxane water repellents. The mortar must achieve a direct mechanical and chemical bond with the porous clay of the brick. If the brick has been painted, the paint acts as a bond-breaker. While a high-end polymer thin-set might stick to the paint, the weight of the stone (typically 10 to 15 lbs per square foot) will eventually pull the paint layer off the brick, causing the entire wall to delaminate.
Method 2: Metal Lath & Scratch Coat (The Industry Standard)
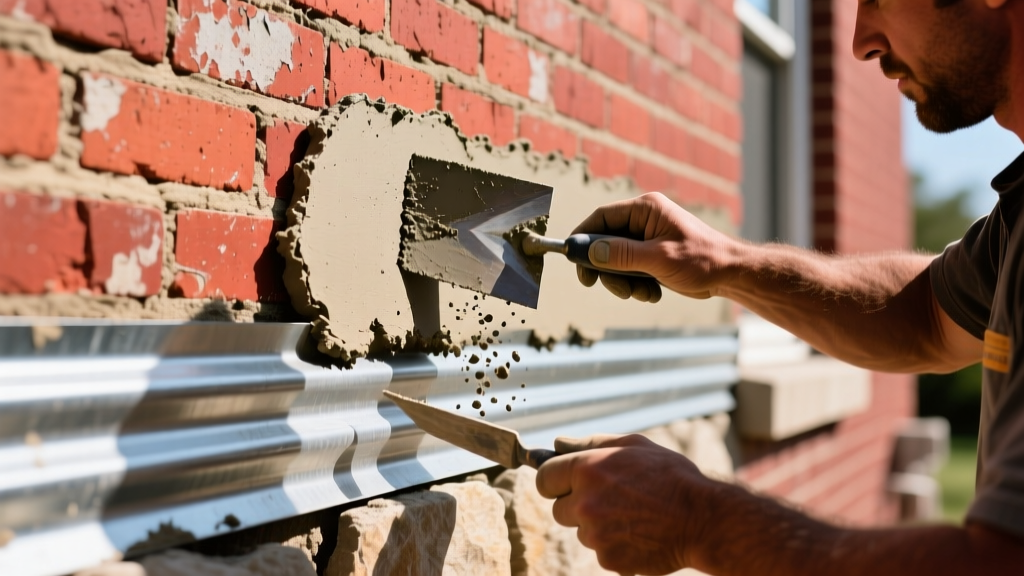
When dealing with painted brick or older masonry with deeply raked (recessed) mortar joints, mechanical fastening is mandatory. This involves anchoring 2.5 lb self-furring galvanized metal lath directly into the brick using masonry screws, followed by a 3/8-inch scratch coat of Type S mortar. This creates a new, uniform, and highly porous substrate that guarantees a permanent bond for the stone veneer.
Method 3: Furring Strips & Cement Board (The True-Up Route)
If the existing brick wall is severely out of plumb, bowed, or if you are upgrading the thermal envelope by adding exterior rigid foam insulation, furring strips are required. Pressure-treated 1x3 or 2x4 furring strips are anchored to the brick, followed by a layer of 1/2-inch fiber cement board (such as HardieBacker or Durock). The stone is then applied to the cement board using standard veneer mortar.
Structural Limits: Brick Veneer vs. Structural Brick
A critical, often overlooked factor when asking 'can you put stone veneer over brick' is determining whether the existing brick is structural or a veneer.
- Structural Brick: Typically consists of two or more wythes (layers) of brick bonded together. This can easily support the additional 12-15 lbs/sq ft dead load of stone veneer without structural reinforcement.
- Brick Veneer: A single wythe of brick tied to a wood or steel framed wall via corrugated metal ties. Adding stone veneer over brick veneer increases the load on the brick ties and the foundation shelf (brick ledge). According to the Masonry Society, standard brick ties are engineered for the dead load of the brick alone. Adding 1,500 lbs of stone to a 100-square-foot wall may exceed the shear capacity of the existing ties, requiring an engineer's evaluation to install supplemental helical ties or angle iron supports at the foundation.
Step-by-Step Framework: The Metal Lath & Scratch Coat Route
Because painted and sealed brick are the most common scenarios in residential renovations, the metal lath and scratch coat method is the most frequently utilized. Here is the exact professional specification for execution.
- Substrate Preparation: Pressure wash the brick at 1,500 PSI to remove dirt, chalking paint, and biological growth. Allow 48 hours to dry. If the brick is heavily painted, score the paint with a wire brush to allow masonry screws to bite cleanly.
- Flashing and Weep Hole Management: Install a weep hole screed or diverter flashing above the existing brick weep holes. This ensures the cavity continues to drain while providing a clean, straight ledger line for the bottom course of stone.
- Lath Installation: Roll out 2.5 lb self-furring galvanized metal lath horizontally. Overlap horizontal seams by 1 inch and vertical seams by 2 inches. Fasten using 3/16" x 1-1/4" Tapcon masonry screws with 1-inch galvanized washers. Space fasteners every 6 inches on center, penetrating at least 1 inch into the solid brick (never anchor solely into the mortar joints).
- The Scratch Coat: Mix Type S masonry mortar (not Type N; Type S offers 1,800 PSI compressive strength and superior flexural bond). Trowel a 3/8-inch layer of mortar completely embedding the lath. While the mortar is thumbprint-hard (usually 45-60 minutes), use a notched trowel to score horizontal lines into the surface. This scoring provides the mechanical tooth for the final stone application.
- Curing: Mist the scratch coat lightly with water and allow it to cure for a minimum of 24 to 48 hours before applying the stone veneer.
Expert Tip: When selecting stone, opt for high-quality manufactured products like Cultured Stone or Eldorado Stone. Manufactured stone is cast from molds of real stone but weighs up to 30% less than natural thin veneer, significantly reducing the shear stress on the underlying brick ties and lath fasteners.
2026 Cost Breakdown: Stone Veneer Over Brick
Overlaying brick is significantly more cost-effective than demolishing the existing brick facade, hauling away the masonry debris, and installing new sheathing and weather barriers. Below is a comparative cost analysis for a standard 500-square-foot exterior facade upgrade.
| Project Scope | Material Cost (per sq ft) | Labor Cost (per sq ft) | Total Estimated Cost (500 sq ft) |
|---|---|---|---|
| Overlay: Manufactured Stone (Lath Method) | $8.50 - $13.00 | $12.00 - $18.00 | $10,250 - $15,500 |
| Overlay: Natural Thin Veneer (Lath Method) | $16.00 - $26.00 | $14.00 - $22.00 | $15,000 - $24,000 |
| Demolition & Full Rebuild (Framing + Siding) | $12.00 - $20.00 | $25.00 - $40.00 | $18,500 - $30,000 |
Note: Labor rates vary significantly by region. Urban centers and high-cost-of-living areas will push masonry labor toward the upper end of the spectrum, often exceeding $22 per square foot for complex scratch coat and veneer applications.
Common Failure Modes and How to Avoid Them
Even when the correct installation method is chosen, stone veneer over brick can fail if specific environmental and chemical factors are ignored.
1. Efflorescence and Salt Migration
Older brick walls often contain high levels of soluble salts. When moisture moves through the brick and into the new mortar scratch coat, it carries these salts to the surface, leaving a white, powdery residue on the stone veneer. The Fix: Apply a penetrating silane/siloxane masonry sealer to the raw brick before installing the metal lath. This creates a hydrophobic barrier that stops moisture migration from the old brick into the new mortar assembly.
2. Freeze-Thaw Spalling
If the stone veneer is installed without a proper capstone or coping at the top of the wall, water will infiltrate behind the stone. In freezing climates, this trapped water expands, popping the stone off the scratch coat. The Fix: Always install a metal or precast concrete coping with a minimum 1.5-inch drip edge over the top course of the stone veneer to shed water away from the facade.
3. Mortar Incompatibility
Using Type N mortar or standard tile thin-set for the scratch coat is a frequent DIY error. Type N lacks the flexural bond strength required to hold heavy stone on a vertical exterior wall subjected to wind loads and thermal expansion. The Fix: Strictly adhere to ASTM C270 specifications for Type S mortar for all scratch coats and setting beds in exterior veneer applications.
Final Verdict
You can absolutely put stone veneer over brick, and doing so preserves the structural integrity of the existing wall while dramatically updating the aesthetic. The key to a lasting installation lies in honest substrate assessment: bare brick allows for direct bonding, while painted or sealed brick demands the mechanical security of galvanized metal lath and a Type S mortar scratch coat. By respecting the load limits of brick veneer ties and managing cavity moisture through proper flashing, a brick-to-stone overlay will easily match the 50-year lifespan of a ground-up masonry build.
Written by
David NakamuraDavid Nakamura is a licensed architect (AIA) and construction technology writer focused on sustainable building methods, mass timber engineering, and high-performance building envelopes. He holds a Master of Architecture from the University of Washington and is a certified Passive House Consultant (CPHC). David spent eight years at the Seattle firm Mithun, where he led the design of three LEED Platinum projects, before founding his own practice specializing in net-zero residential design. He serves on the editorial advisory board of GreenBuilder Magazine and has authored peer-reviewed papers on cross-laminated timber (CLT) connections for the Journal of Structural Engineering. In his spare time, David teaches woodworking at Pratt Fine Arts Center and kayaks the Puget Sound.
More from David Nakamura
View all
Construction Cost
Labor Cost to Build a Deck Per Sq Ft: 2026 Installation Guide
Discover the exact labor cost to build a deck per sq ft in 2026. This installation guide breaks down contractor rates, complexity factors, and hidden fees.
Aug 4, 2026

Construction Cost
How Much Does It Cost to Build a 3 Bedroom House? Financing Guide
Learn exactly how much it costs to build a 3 bedroom house and explore 2026 financing options, construction loan types, and budget frameworks for your build.
Aug 4, 2026

Construction Cost
Cost to Build a Tennis Court: 2026 Guide
How much does it cost to build a tennis court in 2026? Breakdowns for asphalt, concrete, and synthetic surfaces plus fencing and lighting.
Jul 30, 2026