Nail On Stone Veneer Maintenance and Long-Term Care
Essential maintenance for nail on stone veneer. Discover cleaning techniques, fastener inspection, and repair steps for mortarless interlocking panels.

The Reality of 'Maintenance-Free' Nail On Stone Veneer
Nail on stone veneer systems—often marketed as mortarless, interlocking, or clip-based stone—have revolutionized exterior and interior cladding by eliminating the need for masons, wet mortar, and extensive curing times. Brands like Versetta Stone, Novik, and GenStone utilize high-density polyurethane or manufactured concrete panels that mechanically fasten directly to wall sheathing or studs using nails or screws. While manufacturers frequently advertise these products as 'maintenance-free,' this is a structural half-truth. The absence of mortar simply shifts the maintenance burden away from joint repointing and onto the mechanical fastening hardware, the weather-resistive barrier (WRB), and the precision of the interlocking joints.
Because nail on stone veneer relies entirely on physical overlapping and metal fasteners to resist wind uplift and water intrusion, a proactive maintenance protocol is non-negotiable. Failure to inspect the hidden mechanical components can lead to cascading panel detachment, trapped moisture, and severe structural rot behind the cladding. This guide details the exact inspection intervals, cleaning protocols, and repair methodologies required to maximize the lifespan of mortarless stone systems in 2026 and beyond.
Critical Inspection Checklist for Mechanical Fasteners
The most vulnerable component of any nail on stone veneer installation is the fastener itself. Unlike traditional mortar, which chemically bonds to a scratch coat, interlocking panels rely on the sheer strength and corrosion resistance of nails or screws driven through a nailing flange into the structural framing.
Identifying Fastener Degradation
During your bi-annual exterior inspection (ideally in early spring and late autumn), look for the following failure indicators:
- Rust Weeping (Streaking): Brown or orange streaks originating from the top flange of the panels and running down the stone face. This indicates that electro-galvanized or standard steel nails were used instead of code-required corrosion-resistant fasteners.
- Panel Fluttering: Gently press against the panels. If you hear a clicking sound or feel lateral movement exceeding 1/8 inch, the fasteners have either backed out of the studs or the nailing flange has fractured due to thermal expansion and contraction.
- Flange Blowout: Inspect the bottom edges of the panels. If the interlocking lip is cracked, it is often a secondary symptom of a fastener that was over-driven (pneumatic nail guns set to too high a PSI) during installation, fracturing the manufactured stone or polyurethane flange.
Water Management and Flashing Integrity
Mortarless stone veneer systems are designed as 'drainage cladding.' They are not waterproof; rather, they are engineered to shed the bulk of rainwater while allowing any moisture that breaches the overlapping joints to drain down the WRB and exit through weep holes at the base track. If the drainage plane is compromised, the nail on stone veneer becomes a moisture trap.
| Symptom | Root Cause | Corrective Action |
|---|---|---|
| Water pooling behind bottom course | Weep holes clogged with dirt, spider webs, or landscaping mulch. | Clear weep holes using a soft-bristle brush or compressed air. Maintain a 6-inch clearance between soil/mulch and the starter track. |
| Interior drywall staining near baseboards | Missing or improperly lapped kick-out flashing at roof-to-wall intersections. | Remove adjacent panels, install code-compliant kick-out flashing, and integrate with the WRB using compatible flashing tape. |
| Efflorescence on panel edges | Capillary action drawing ground moisture up through unsealed concrete-based panels. | Apply a breathable, siloxane-based penetrating sealer to the bottom two courses of manufactured stone panels. |
Cleaning Mortarless Interlocking Panels Safely
The most common mistake homeowners make when maintaining nail on stone veneer is using high-pressure power washers. Because there is no mortar sealing the joints, a pressure washer set above 800 PSI will easily force water past the overlapping mechanical lips, driving it directly behind the veneer and onto the WRB. Over time, this leads to OSB sheathing rot and mold growth.
The 400-PSI Cleaning Protocol
- Pre-Wet the Surface: Use a standard garden hose to thoroughly wet the veneer. This prevents cleaning solutions from absorbing too rapidly into the pores of manufactured concrete or polyurethane stone.
- Apply Alkaline Cleaner: For general dirt and biological growth, apply a diluted solution of Prosoco Sure Klean Vana Trol or a mild, non-acidic detergent. Never use muriatic acid or harsh acidic masonry cleaners on mortarless systems, as the acid can degrade the metallic nailing flanges and corrode the hidden fasteners.
- Agitate Gently: Use a soft-bristle nylon brush on an extension pole to agitate the surface. Avoid wire brushes, which will leave behind metallic particles that will quickly rust and stain the stone face.
- Low-Pressure Rinse: Rinse the panels using a pressure washer fitted with a 40-degree white nozzle tip, keeping the pressure strictly below 400 PSI. Maintain a minimum distance of 12 inches from the wall, and always spray at a downward angle to prevent water from being driven up into the horizontal interlocking joints.
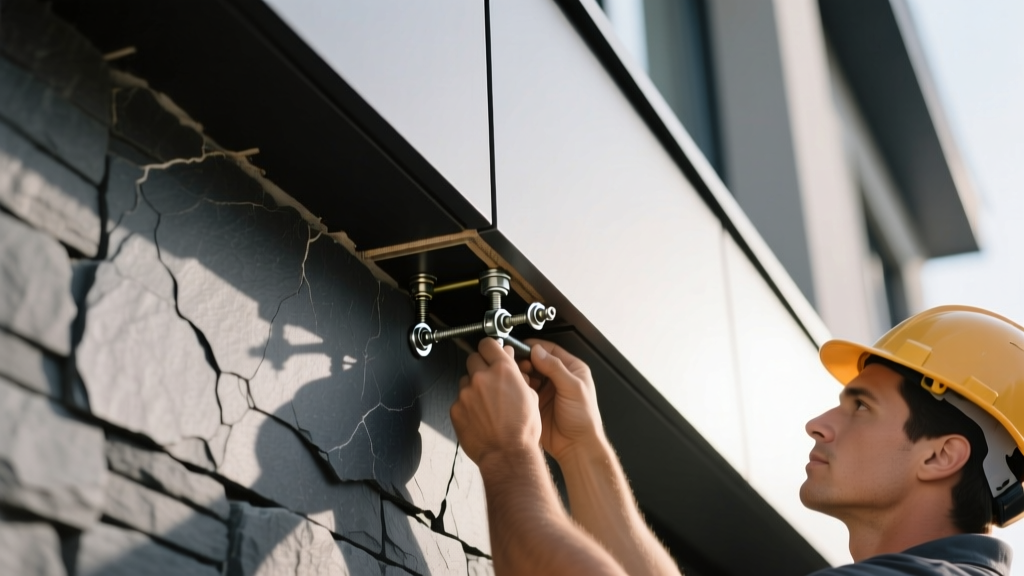
Panel Replacement: Swapping a Damaged Interlocking Stone
Despite their durability, individual panels can be cracked by impact from landscaping equipment, stray baseballs, or severe hail. Replacing a single panel in a nail on stone veneer system is complex because the panels are mechanically chained together from the bottom up. You cannot simply pry out a single middle panel without breaking the interlocking lip of the panel directly above it.
Step-by-Step Extraction and Replacement
If a panel in the middle of a wall run is damaged, follow this extraction sequence to maintain the integrity of the surrounding weather barrier:
- Score the Top Flange: Using an oscillating multi-tool with a bi-metal blade, carefully cut through the nailing flange of the damaged panel just below the interlocking lip of the panel above it. This severs the mechanical lock without damaging the face of the upper panel.
- Remove Fasteners: Use a flat pry bar to gently lift the bottom lip of the damaged panel, exposing the nails or screws holding it to the sheathing. Extract the fasteners using a drill or cat's paw.
- Extract the Panel: Slide the damaged panel downward and out of the wall plane.
- Prep the Replacement: Using a masonry saw or fine-toothed handsaw, cut off the top interlocking lip of the new replacement panel. This allows it to slide behind the existing upper panel.
- Secure and Seal: Slide the new panel into place, ensuring the bottom lip locks into the panel below. Fasten it through the exposed nailing flange using 2.5-inch stainless steel screws. Finally, apply a bead of high-quality, paintable polyurethane exterior sealant (such as OSI Quad Max) along the top cut edge to re-establish the water shed line.
Frequently Asked Questions
Can I install nail on stone veneer directly over existing brick?
No. Nail on stone veneer requires fasteners to penetrate a minimum of 1 inch into solid wood or metal studs to achieve the necessary wind-uplift resistance. Brick and CMU (concrete masonry units) do not provide adequate holding power for the specific nails used in these systems. If installing over brick, you must first attach pressure-treated furring strips using masonry Tapcon screws, and then fasten the stone veneer to the furring strips.
How do I fix a panel that has bowed outward due to heat?
Polyurethane-based faux stone panels can occasionally bow or 'oil-can' if installed without the manufacturer-specified 1/8-inch expansion gap between panels, or if the fasteners were driven too tightly, restricting natural thermal movement. To fix this, loosen the fasteners on the bowed panel and the panels immediately adjacent to it. Ensure the interlocking joints are seated flat, and re-drive the fasteners so they are snug but not over-tightened, allowing the panel to float slightly during temperature fluctuations.
Is it necessary to seal manufactured concrete nail on stone veneer?
While the Westlake Royal Building Products technical guidelines note that high-quality manufactured stone is inherently colorfast, applying a breathable, silane/siloxane penetrating sealer every 5 to 7 years is highly recommended in freeze-thaw climates. This prevents water absorption into the concrete matrix, mitigating the risk of spalling and freeze-thaw cracking during harsh winters.
Written by
David NakamuraDavid Nakamura is a licensed architect (AIA) and construction technology writer focused on sustainable building methods, mass timber engineering, and high-performance building envelopes. He holds a Master of Architecture from the University of Washington and is a certified Passive House Consultant (CPHC). David spent eight years at the Seattle firm Mithun, where he led the design of three LEED Platinum projects, before founding his own practice specializing in net-zero residential design. He serves on the editorial advisory board of GreenBuilder Magazine and has authored peer-reviewed papers on cross-laminated timber (CLT) connections for the Journal of Structural Engineering. In his spare time, David teaches woodworking at Pratt Fine Arts Center and kayaks the Puget Sound.
More from David Nakamura
View all
Construction Cost
Labor Cost to Build a Deck Per Sq Ft: 2026 Installation Guide
Discover the exact labor cost to build a deck per sq ft in 2026. This installation guide breaks down contractor rates, complexity factors, and hidden fees.
Aug 4, 2026

Construction Cost
How Much Does It Cost to Build a 3 Bedroom House? Financing Guide
Learn exactly how much it costs to build a 3 bedroom house and explore 2026 financing options, construction loan types, and budget frameworks for your build.
Aug 4, 2026

Construction Cost
Cost to Build a Tennis Court: 2026 Guide
How much does it cost to build a tennis court in 2026? Breakdowns for asphalt, concrete, and synthetic surfaces plus fencing and lighting.
Jul 30, 2026