What to Expect From Your Stone Veneer Contractor During Installation
Learn the exact installation steps a qualified stone veneer contractor follows, from WRB prep and lath to mortar selection and sealing.

The Pre-Installation Phase: Moisture Management and Flashing
A professional stone veneer contractor knows that the longevity of a manufactured or natural stone veneer system relies entirely on what happens behind the stone. Before any mortar is mixed, the substrate must be prepared to manage moisture. For exterior wood-frame construction, this begins with a Weather-Resistive Barrier (WRB).
According to industry standards outlined by the The Masonry Society, a minimum of two layers of Grade D building paper (ASTM D226) or a high-performance fluid-applied membrane must be installed over the sheathing. The first layer acts as a drainage plane, while the second layer protects the first from the alkaline environment of the mortar scratch coat.
Your contractor must install a corrosion-resistant weep screed at the base of the wall. Building codes strictly require a minimum clearance of 4 inches above finished earth grade, or 2 inches above paved surfaces like concrete driveways. If your contractor buries the weep screed in soil or concrete, capillary action will wick moisture directly into the wall assembly, guaranteeing premature failure.
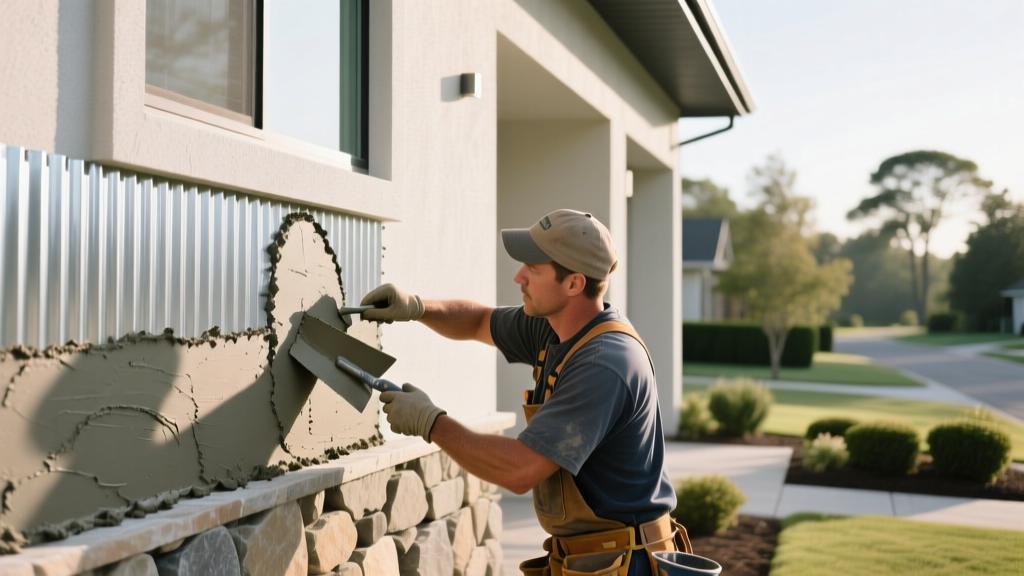
Step 1: Metal Lath Application and Fastening Protocols
Once the WRB and weep screed are secured, the contractor will install metal lath. This is not a step where shortcuts are acceptable. The required material is 2.5 lb/yd² self-furring galvanized steel lath (ASTM C847). The 'self-furring' dimples are critical; they hold the lath away from the WRB, allowing the scratch coat mortar to envelop the wire completely.
- Fastening Schedule: Lath must be fastened every 6 inches on center into the wall studs (not just the sheathing) using corrosion-resistant nails or staples with a minimum 1-inch penetration into the framing.
- Overlaps: Horizontal joints must overlap by at least 1 inch, and vertical end joints must overlap by 2 inches.
- Corners: The lath must wrap around all exterior and interior corners by a minimum of 16 inches to prevent corner cracking.
Step 2: The Scratch Coat and Curing Timeline
After the lath is inspected, the contractor applies the scratch coat. This is a 1/2-inch-thick layer of Type S mortar that is pressed forcefully through the lath to create a mechanical lock. Before the mortar sets, the surface is scored horizontally with a heavy rake or stiff brush. Horizontal scoring provides a mechanical key for the setting bed mortar applied in the next phase.
A qualified stone veneer contractor will never rush the curing process. The scratch coat requires a minimum of 24 to 48 hours of curing time, depending on ambient temperature and humidity. During hot or windy conditions, the contractor must mist the scratch coat with water to prevent rapid moisture loss, which leads to shrinkage cracking and compromised bond strength.
Step 3: Mortar Selection and Dry-Fitting
Not all mortars are created equal. While some DIYers attempt to use standard brick mortar or tile mastic, a professional contractor will specify a high-performance mortar designed specifically for veneer applications. The Eldorado Stone Installation Guide and other major manufacturers mandate the use of mortars that meet ASTM C270 standards for Type S or polymer-modified veneer mortars.
| Mortar Type | Compressive Strength | Best Application | Contractor Verdict |
|---|---|---|---|
| Type N | 750 PSI | Interior, non-load-bearing | Avoid for exterior veneer |
| Type S | 1,800 PSI | Exterior/Interior veneer | Industry Standard (Minimum) |
| Polymer-Modified | 2,500+ PSI | High-wind, seismic, or freeze-thaw zones | Premium Choice (Highly Recommended) |
Before mixing mortar, the contractor should perform a 'dry-fit' layout on the ground. This involves arranging corner pieces and varying stone sizes to blend color tones and avoid repetitive patterns. Manufactured stone often comes in repeating molds; a skilled installer will rotate pieces and chip edges with a mason's hammer to create a natural, randomized aesthetic.
Step 4: Stone Placement and the Back-Buttering Mandate
The actual installation of the stone begins with the corners. Corner pieces are installed first to establish the plumb lines and depth of the wall. Once corners are set, the flat pieces are applied from the bottom up.
A 1/2-inch layer of mortar is applied to the wall (the setting bed), but the contractor must also 'back-butter' the back of every individual stone with a thin layer of mortar before pressing it into place. This ensures 100% mortar coverage and eliminates air pockets behind the stone, which are the primary cause of freeze-thaw spalling and stone detachment.
For grouted joint profiles, the contractor will use a mortar bag to fill the joints, then strike them with a jointing tool once the mortar becomes 'thumbprint hard.' For tight-stack or dry-stack profiles, the stones are placed flush against one another, and the setting bed mortar must be carefully managed to prevent squeeze-out on the stone faces.
Step 5: Cleanup and Sealing Protocols
Cleanup must happen continuously during the installation. If mortar smears onto the face of the stone, it must be brushed off with a dry, stiff-bristle brush immediately. Using water or acid washes to clean manufactured stone veneer is a critical error; it drives cementitious residue into the pores of the stone, causing permanent white hazing known as efflorescence.
Sealing is not always mandatory, but in high-moisture environments or areas subjected to heavy soil splashback, a breathable sealer is recommended. The contractor should use a silane/siloxane penetrating sealer rather than a film-forming acrylic. Penetrating sealers repel liquid water while allowing water vapor inside the wall cavity to escape, preventing trapped moisture and blistering.
Red Flags: Identifying an Unqualified Stone Veneer Contractor
When vetting bids, watch out for these critical warning signs that indicate a contractor lacks specialized masonry veneer training:
- Proposing Tile Mastic or Adhesive: Organic mastics and thinsets designed for ceramic tile do not have the structural properties or vapor permeability required for stone veneer.
- Skipping the Scratch Coat: Applying stone directly to the lath without a cured scratch coat results in a weak bond and uneven wall planes.
- No Weep Screed in the Bid: If the line item for a weep screed and WRB flashing is missing, they plan to trap moisture against your sheathing.
- Using a Wire Wheel on the Stone Face: Cleaning the finished wall with a motorized wire brush will strip the colored oxide layer off manufactured stone, exposing the gray concrete core.
Frequently Asked Questions
How long does a typical exterior stone veneer installation take?
For an average 500-square-foot exterior facade, expect the project to take 5 to 7 days. This accounts for one day of WRB and lath, one day for the scratch coat, 48 hours of curing, and two to three days for stone placement and jointing.
Can stone veneer be installed directly over painted brick or concrete block?
Yes, but the paint must be removed via sandblasting or high-pressure water blasting to expose the porous masonry substrate. If the paint cannot be fully removed, the contractor must install furring strips, sheathing, and a full WRB/lath assembly over the painted surface to ensure a proper mechanical bond.
Written by
David NakamuraDavid Nakamura is a licensed architect (AIA) and construction technology writer focused on sustainable building methods, mass timber engineering, and high-performance building envelopes. He holds a Master of Architecture from the University of Washington and is a certified Passive House Consultant (CPHC). David spent eight years at the Seattle firm Mithun, where he led the design of three LEED Platinum projects, before founding his own practice specializing in net-zero residential design. He serves on the editorial advisory board of GreenBuilder Magazine and has authored peer-reviewed papers on cross-laminated timber (CLT) connections for the Journal of Structural Engineering. In his spare time, David teaches woodworking at Pratt Fine Arts Center and kayaks the Puget Sound.
More from David Nakamura
View all
Construction Cost
Labor Cost to Build a Deck Per Sq Ft: 2026 Installation Guide
Discover the exact labor cost to build a deck per sq ft in 2026. This installation guide breaks down contractor rates, complexity factors, and hidden fees.
Aug 4, 2026

Construction Cost
How Much Does It Cost to Build a 3 Bedroom House? Financing Guide
Learn exactly how much it costs to build a 3 bedroom house and explore 2026 financing options, construction loan types, and budget frameworks for your build.
Aug 4, 2026

Construction Cost
Cost to Build a Tennis Court: 2026 Guide
How much does it cost to build a tennis court in 2026? Breakdowns for asphalt, concrete, and synthetic surfaces plus fencing and lighting.
Jul 30, 2026