Mastering Slate Roofing Material Installation: Step-by-Step
Learn how to properly install slate roofing material with this expert guide covering underlayment, nailing techniques, headlap, and flashing details.

Structural Assessment and Deck Preparation
Natural slate is exceptionally heavy, weighing between 800 and 1,000 pounds per square (100 square feet) for standard 3/16-inch thickness. Before unloading any slate roofing material, verify the structural framing can support the dead load plus regional snow loads. A structural engineer must evaluate trusses and rafters, which typically need to be 2x6 or larger spaced no more than 24 inches on center.
The roof deck must consist of solid wood sheathing. Historically, 1x4 or 1x6 tongue-and-groove boards spaced with a 1/4-inch gap were used to allow the slate to 'breathe' and prevent moisture trapping. If using modern panel sheathing, minimum 5/8-inch CDX plywood is required, though solid dimensional lumber remains the gold standard for longevity. Never install slate over oriented strand board (OSB) or spaced skip-sheathing, as the localized point-loads of slate will cause deflection and cracking.
Material Grading and Essential Tooling
Not all slate is equal. When procuring your slate roofing material, demand certification that it meets ASTM C406 standards. You must specify S1 Grade slate, which has a tested life expectancy of over 75 years. S2 (40-75 years) and S3 (20-40 years) are unacceptable for primary residential or commercial roofs.
Never use galvanized or electroplated nails. The slate will outlive the zinc coating in 30 years, leading to rust jacking and shattered shingles. Use only solid copper (minimum 16-gauge) or 304/316 stainless steel ring-shank slating nails. Nail length must equal twice the slate thickness plus the sheathing thickness (typically 1.5 to 2 inches).
Specialized tools are non-negotiable for a clean installation:
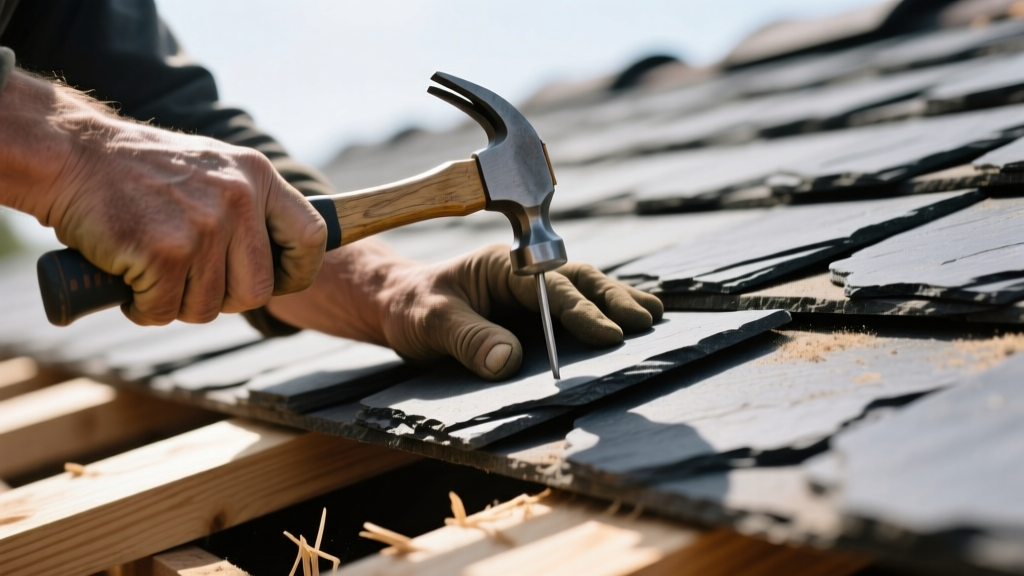
- Slate Hammer: Features a sharp pick for punching nail holes and a square head for driving nails.
- Slate Ripper: A flat, hooked tool used to slide under installed slates and extract nails during repairs.
- Slate Cutter/Guillotine: For trimming edges and cutting valleys. A carbide-tipped scoring tool and breaking stake work for minor field adjustments.
Underlayment and Flashing Integration
The underlayment acts as a secondary water barrier during wind-driven rain. According to guidelines maintained by the Slate Roofing Contractors Association (SRCA), use a minimum of ASTM D226 Type II (#30) organic felt or a high-temperature rated synthetic underlayment. Standard synthetic underlayments can degrade under the high heat trapped beneath dense slate.
Install a self-adhering ice and water protective membrane along the eaves (extending at least 24 inches past the interior heated wall line), in all valleys, and around all penetrations (chimneys, skylights, vent pipes).
For valleys, an open valley system using 16-ounce or 20-ounce copper sheeting (minimum 18 inches wide) is vastly superior to closed woven valleys. Slate is too rigid to weave, and cutting it to a centerline exposes fasteners to direct water flow.
The Mathematics of Exposure and Headlap
Proper water shedding relies entirely on the headlap—the distance the slate in the second course above overlaps the top of the slate in the current course. The National Park Service preservation guidelines mandate strict headlap minimums based on roof pitch.
| Roof Pitch | Minimum Headlap | Standard Exposure (for 24" Slate) |
|---|---|---|
| 4:12 to 8:12 | 3 inches | 10.5 inches |
| 3:12 to 4:12 | 4 inches | 10 inches |
| 2:12 to 3:12 | Not Recommended | N/A |
Exposure Formula: Exposure = (Slate Length - Headlap) / 2.
Snap horizontal chalk lines for every course based on your calculated exposure. Do not snap vertical lines; slate widths vary, and vertical lines will highlight irregularities.
Step-by-Step Field Installation and Nailing Technique
The most common cause of premature slate failure is improper nailing. Slate must be hung on the nail, not pinned to the deck.
1. Punching the Nail Holes
Always punch nail holes from the back (face down) of the slate using the pick of your slate hammer. This creates a blowout bevel on the top (face) side of the slate, allowing the nail head to sit perfectly flush without protruding and puncturing the overlapping slate above. Place holes 1/3 of the way down from the top edge, and 1 inch in from each side.
2. The Starter Course
Install a continuous metal drip edge at the eaves. The starter course is installed upside down (weather face against the deck) to provide a solid, flat base for the first exposed course, preventing a downward slope at the eaves that would snap the first row of slate.
3. Driving the Nails
Drive the copper or stainless steel nail until the head just rests on the slate. Do not drive it tight. Leave a 1/16-inch gap between the nail head and the slate surface. If driven tight, thermal expansion and deck deflection will crack the slate. If left too proud, the nail head will act as a fulcrum, cracking the slate in the course directly above it.
4. Staggering the Joints
Maintain a minimum 3-inch offset between vertical joints in adjacent courses. Never allow a 'three-point joint' where the corners of three slates meet. Use a slate ripper to trim random widths to maintain the stagger pattern.
Ridge, Hips, and Final Flashing Details
For hips and ridges, use slates that are wider at the top and tapered, or utilize specialized ridge slates. Each ridge slate requires two nail holes. Flash the underside of the ridge with copper step flashing or a continuous copper saddle to prevent wind-driven snow from entering the hip intersection.
Where the slate meets vertical walls (chimneys, dormers), use copper step flashing interwoven with each course of slate. Counter-flashing must be regleted (cut into the masonry mortar joint) and sealed. Never rely on surface-applied caulking or tar; these will fail within a decade, whereas properly integrated copper flashing will last the life of the S1 slate.
Common Installation Failures to Avoid
| Failure Mode | Root Cause | Correction |
| Slates cracking horizontally | Nails driven too tight or deck deflection | Hang slates loose; reinforce roof framing |
| Slates slipping out of place | Galvanized nails rusted through | Replace with copper/stainless using a ripper and bib flashing |
| Water staining on interior ceilings | Insufficient headlap for low pitch | Increase headlap to 4" or redesign roof pitch |
Installing slate roofing material is an exercise in precision and patience. By adhering strictly to S1 grading, utilizing non-corrosive fasteners, calculating exact headlap exposures, and mastering the 'hang, don't pin' nailing technique, you ensure the roof will protect the structure for a century or more without major intervention.
Written by
Marcus ChenMarcus Chen is a licensed structural engineer (PE) and building materials analyst with over 12 years of experience across residential, commercial, and industrial construction. He holds a Master of Science in Civil Engineering from UC Berkeley and spent six years at Thornton Tomasetti before transitioning to independent consulting and technical writing. Marcus specializes in material selection for seismic-prone regions, concrete reinforcement strategies, and lifecycle cost analysis. His work has been cited by the American Concrete Institute (ACI) and the Structural Engineers Association of California (SEAOC). When he is not on a job site or at his desk, you will find him hiking the Sierra Nevada or restoring a 1920s craftsman bungalow in Oakland, CA.
More from Marcus Chen
View all
Construction Cost
How Much Did the Eiffel Tower Cost to Build?
How much did the Eiffel Tower cost to build in 1889? We adjust for inflation and compare its budget to modern skyscraper construction.
Aug 4, 2026

Fire Resistance
What Is a Fire Resistant Material? Testing & Certification Guide
Discover what is a fire resistant material through ASTM and UL testing. Learn how fire ratings, certifications, and assemblies work in construction.
Aug 4, 2026

Construction Cost
How Much Did the Burj Khalifa Cost to Build?
How much did the Burj Khalifa cost to build? We break down the $1.5B project and extract 5 money-saving strategies for your next build.
Jul 30, 2026