Spec Mix Stone Veneer Mortar: Complete Mixing and Application Guide
Master Spec Mix stone veneer mortar with our complete guide. Learn exact mixing ratios, application techniques, and troubleshooting for flawless installations.

Understanding Spec Mix Stone Veneer Mortar Formulation
Adhered stone veneer systems demand a mortar that bridges the gap between traditional masonry and modern polymer-modified thinsets. Standard Type S mortar often lacks the flexural bond strength and water retention required to hold heavy manufactured or natural stone profiles on vertical, non-load-bearing substrates. Spec Mix Stone Veneer Mortar is a pre-blended, polymer-modified formulation engineered specifically for this application. It combines portland cement, hydrated lime, graded masonry sand, and proprietary water-retention and bonding agents into a uniform, dry mixture that eliminates the proportioning errors common in field-mixed mortars.
According to guidelines published by The Masonry Society, adhered veneer mortars must exhibit high water retention to prevent the substrate or the stone from rapidly drawing moisture out of the mix, which leads to premature curing and bond failure. The polymer modifiers in this specific product ensure a water retention rate exceeding 75%, allowing the cement to fully hydrate even when applied to highly absorptive manufactured stone or dense natural quartzites.
Technical Specifications and Yield Matrix
Before calculating material requirements, contractors must understand the physical properties and yield metrics of the product. The following data reflects the standard 80 lb (36.2 kg) bag formulation.
| Property | Specification / Metric | Testing Standard |
|---|---|---|
| Compressive Strength (28-day) | > 2,500 psi (17.2 MPa) | ASTM C270 |
| Flexural Bond Strength | > 150 psi (1.03 MPa) | ASTM C1512 |
| Water Retention | > 75% | ASTM C1506 |
| Water Requirement (per 80 lb bag) | 4.5 to 5.5 quarts (4.2 - 5.2 L) | Field / TDS |
| Pot Life | 90 minutes at 75°F (24°C) | Field Observation |
| Coverage (Setting Bed at 1/2") | 12 to 14 sq ft per bag | Calculated Yield |
Mixing Protocol: Preventing Polymer Degradation
The most common point of failure with pre-blended polymer-modified mortars occurs during the mixing phase. High-speed mixing or incorrect water ratios can break the polymer chains or introduce microscopic air voids that weaken the setting bed.
- Equipment Selection: Use a heavy-duty drill with a paddle mixer attachment. Maintain a mixing speed between 400 and 600 RPM. Do not use high-speed grout mixers or mortar boards with hoe attachments, as these can segregate the graded sand from the cementitious binders.
- Water Introduction: Add approximately 4.5 quarts of clean, potable water to the mixing bucket first. Gradually introduce the 80 lb bag of Spec Mix Stone Veneer Mortar while the paddle is in motion. This prevents dry clumps from forming at the bottom of the bucket.
- Initial Mix: Mix for 3 to 5 minutes until a uniform, lump-free consistency is achieved. The mortar should hold its shape on a trowel held vertically without slumping or dripping.
- Slaking Period: Allow the mixture to rest (slake) for exactly 5 minutes. This critical step allows the polymer additives and water-retention agents to fully activate and absorb moisture.
- Final Remix: Remix for an additional 2 minutes without adding any additional water. The mortar is now ready for application.
Once the 90-minute pot life begins, the mortar will gradually stiffen. Do not add water to retemper (re-wet) the mixture. Retempering dilutes the polymer-to-cement ratio, drastically reducing flexural bond strength and guaranteeing eventual delamination of the stone veneer. Discard any mortar that has begun to lose its plasticity.
Application Techniques: The Two-Coat System
Proper installation of adhered stone veneer requires a two-coat application method over a properly prepared substrate (which must include a weather-resistant barrier and self-furring metal lath securely fastened to the framing). Industry standards detailed by the Portland Cement Association emphasize that skipping the scratch coat is a primary cause of veneer system collapse.
The Scratch Coat
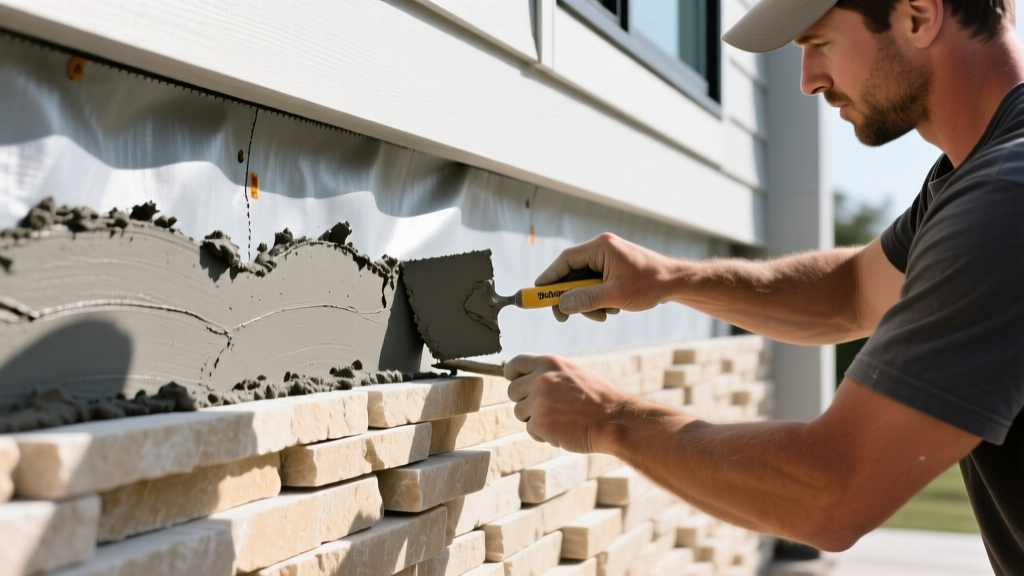
The scratch coat serves as a uniform, stable base that mechanically locks into the metal lath and provides a consistent suction surface for the setting bed. Apply the Spec Mix mortar to a thickness of 1/2 inch over the entire lath surface. While the mortar is still plastic, use a notched trowel or a scarifier to score horizontal grooves into the surface. These horizontal lines increase the surface area and provide a mechanical key for the setting bed. The scratch coat must cure for a minimum of 24 to 48 hours, kept damp if ambient temperatures exceed 85°F, to prevent shrinkage cracking.
The Setting Bed and Stone Buttering
When applying the stone, apply a 1/2-inch layer of fresh mortar to the back of each stone unit (buttering). Press the stone firmly into a fresh 1/2-inch setting bed applied to the cured scratch coat. The goal is to achieve a combined mortar thickness of 1 inch between the lath and the back of the stone, ensuring complete encapsulation. Maintain a 1/2-inch to 1-inch joint space between stones for subsequent grouting. Avoid smearing mortar on the face of the stone; polymer-modified mortars are highly adhesive and will stain porous natural stones if not cleaned immediately with a dry brush.
Troubleshooting Common Veneer Failures
Even with premium materials, environmental factors and technique errors can compromise the installation. Use this diagnostic framework to identify and correct issues.
Symptom: Efflorescence (White Powdery Residue)
Cause: Excess moisture migrating through the mortar matrix, carrying soluble salts to the surface. This is often exacerbated by adding too much water during mixing or lacking a proper weather-resistant barrier and weep screed at the base of the wall.
Correction: Ensure the wall assembly includes a drainage plane. Clean existing efflorescence with a stiff dry brush. Do not use acid washes on polymer-modified mortars or natural calcareous stones (like limestone or marble), as this will degrade the cementitious bond and etch the stone.
Symptom: Shadowing on Thin Natural Stone
Cause: Standard gray mortar is visible through translucent or thinly gauged natural stones (e.g., certain quartzites or translucent marbles).
Correction: Spec Mix offers custom color matching. For translucent stones, specify a white or buff-colored stone veneer mortar variant to maintain the true color profile of the natural stone. Always perform a mock-up panel and allow it to cure for 7 days before full-scale installation.
Symptom: Hollow Sounding Stones (Bond Failure)
Cause: Failure to butter the back of the stone, applying stone to a dry/dusty scratch coat, or retempering the mortar.
Correction: Remove the affected stones. Clean the substrate, reapply the setting bed using freshly mixed mortar, and ensure 100% back-buttering. Lightly mist the cured scratch coat with water before applying the new setting bed to control suction.
2026 Cost Analysis and Project Estimation
Material costs for specialized masonry products have stabilized following the supply chain fluctuations of previous years, though polymer additives remain a premium expense compared to raw portland cement. As of early 2026, contractors should budget accordingly.
- Material Cost per 80 lb Bag: $14.50 - $18.00 (varies by regional distribution and volume discounts).
- Bulk Bag (3,000 lb) Cost: $480 - $550 (Yields approximately 37 standard bags; requires a silo or heavy equipment for site placement).
- Cost per Square Foot (Mortar Only): $1.15 - $1.50 per sq ft (assuming 1/2" setting bed and 1/2" scratch coat, calculating for waste and back-buttering).
For large-scale commercial facades, utilizing the 3,000 lb reusable bulk bags with a portable mortar silo and continuous mixer significantly reduces labor costs associated with bag handling and minimizes packaging waste on the job site. For residential remodels and interior fireplace surrounds, the 80 lb bags offer the necessary flexibility. Further installation best practices and code compliance updates can be tracked via For Construction Pros Masonry to ensure your estimating models reflect current local building codes.
Written by
David NakamuraDavid Nakamura is a licensed architect (AIA) and construction technology writer focused on sustainable building methods, mass timber engineering, and high-performance building envelopes. He holds a Master of Architecture from the University of Washington and is a certified Passive House Consultant (CPHC). David spent eight years at the Seattle firm Mithun, where he led the design of three LEED Platinum projects, before founding his own practice specializing in net-zero residential design. He serves on the editorial advisory board of GreenBuilder Magazine and has authored peer-reviewed papers on cross-laminated timber (CLT) connections for the Journal of Structural Engineering. In his spare time, David teaches woodworking at Pratt Fine Arts Center and kayaks the Puget Sound.
More from David Nakamura
View all
Construction Cost
Labor Cost to Build a Deck Per Sq Ft: 2026 Installation Guide
Discover the exact labor cost to build a deck per sq ft in 2026. This installation guide breaks down contractor rates, complexity factors, and hidden fees.
Aug 4, 2026

Construction Cost
How Much Does It Cost to Build a 3 Bedroom House? Financing Guide
Learn exactly how much it costs to build a 3 bedroom house and explore 2026 financing options, construction loan types, and budget frameworks for your build.
Aug 4, 2026

Construction Cost
Cost to Build a Tennis Court: 2026 Guide
How much does it cost to build a tennis court in 2026? Breakdowns for asphalt, concrete, and synthetic surfaces plus fencing and lighting.
Jul 30, 2026