Veneer Stone Panel Maintenance: Cleaning and Sealing Guide
Learn expert techniques for veneer stone panel maintenance. Discover safe cleaning solutions, sealing schedules, and efflorescence removal methods.

The Material Science of Veneer Stone Panel Degradation
Maintaining a veneer stone panel facade requires understanding the distinct porosity differences between the stone face and the mortar joints. Manufactured veneer stone panels are cast from Portland cement, lightweight aggregates, and iron oxide pigments. This composition makes them inherently more porous than natural granite or slate, with water absorption rates often exceeding 15%. Natural stone veneers, while denser, rely heavily on the integrity of the mortar matrix to prevent water intrusion.
When moisture penetrates the substrate behind the panels, it triggers three primary failure modes: freeze-thaw spalling, efflorescence migration, and metal lath corrosion. Proper maintenance is not merely cosmetic; it is a structural necessity to preserve the drainage plane and protect the building envelope. According to the Brick Industry Association (BIA), improper cleaning techniques cause more permanent damage to masonry veneers than environmental weathering alone.
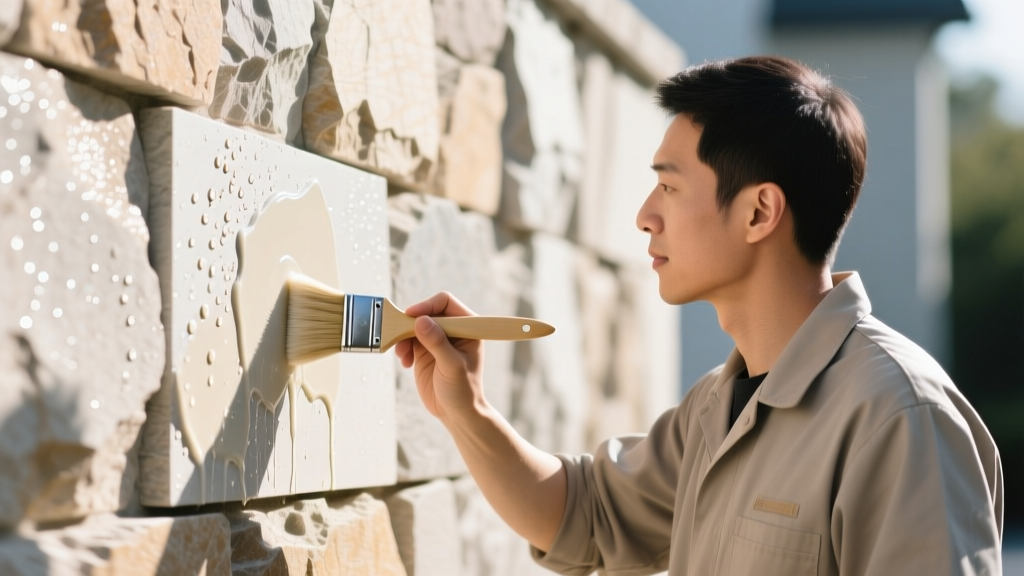
Routine Cleaning Protocols for Stone Veneers
Dirt, biological growth, and atmospheric pollutants accumulate on the textured surface of a veneer stone panel, trapping moisture against the face. Implementing a bi-annual cleaning schedule prevents deep-set staining and biological degradation.
Step 1: Pre-Wetting the Substrate
Never apply cleaning solutions to dry masonry. Dry pores will rapidly absorb the chemical cleaner, pulling it deep into the stone where it cannot be rinsed out, leading to internal salt crystallization. Use a garden hose to thoroughly saturate the wall from the bottom up until the veneer stone panel surface is uniformly wet and no longer absorbing water.
Step 2: Application and Agitation
Apply a neutral-pH (7.0) masonry cleaner using a low-pressure pump sprayer. Allow a dwell time of 3 to 5 minutes, keeping the surface wet with misting. Agitate stubborn areas using a natural-bristle or nylon masonry brush.
Never use wire bristle brushes on manufactured or natural stone. The metal bristles shed microscopic iron particles that embed in the pores and oxidize, creating permanent rust stains. Furthermore, pressure washers must be strictly limited to a maximum of 1,500 PSI with a 40-degree fan tip, held at least 12 inches from the surface. High-pressure streams will erode the softer mortar joints and blast the pigment layer off manufactured panels.
Step 3: Thorough Rinsing
Rinse the wall from the top down using copious amounts of clean water. The goal is to dilute and flush the suspended soils and residual cleaners out of the wall system before they can dry.
Tackling Efflorescence and Mineral Staining
Efflorescence appears as a white, powdery deposit on the surface of a veneer stone panel. It occurs when water-soluble salts (primarily calcium hydroxide) migrate through the mortar and stone to the surface, reacting with carbon dioxide in the air to form insoluble calcium carbonate. While new installations often experience a temporary blooming period, persistent efflorescence indicates a moisture intrusion issue behind the panels.
Stain Identification and Treatment Matrix
Selecting the wrong chemical treatment can permanently etch the stone or dissolve the mortar. Refer to the matrix below to match the stain type with the correct active ingredient.
| Stain Type | Visual Characteristics | Recommended Active Ingredient | Dwell Time |
|---|---|---|---|
| Efflorescence (Light) | White, powdery surface dust | Dry stiff-bristle brushing; no chemicals | N/A |
| Efflorescence (Heavy) | Crusty white mineral buildup | Specialized efflorescence remover (e.g., Prosoco Vana Stop) | 3–5 minutes |
| Organic/Algae | Green, black, or brown slimy patches | Sodium hypochlorite (diluted 1:10) or Quaternary ammonium | 10–15 minutes |
| Rust Stains | Orange/brown streaking from metal lath | Oxalic acid or proprietary rust remover for masonry | 5–10 minutes |
| Mortar Smears | Grey/white hardened cement spots | Buffered hydrofluoric acid masonry cleaner | 1–3 minutes |
For heavy mineral deposits, industry leaders like PROSOCO recommend avoiding raw muriatic acid. Muriatic acid is unbuffered and highly aggressive; it will burn the cementitious matrix of manufactured veneer stone panels and severely degrade Type N mortar joints, leading to premature structural failure.
Sealing Strategies: Breathable Penetrants vs. Film-Forming Coatings
Applying a water repellent to a veneer stone panel is one of the most effective ways to reduce maintenance cycles, but selecting the wrong sealer can trap moisture inside the wall cavity, accelerating freeze-thaw damage.
Silane/Siloxane Penetrating Sealers (Recommended)
Silane and siloxane molecules are small enough to penetrate deep into the capillary pores of the stone and mortar. They chemically bond to the silica in the masonry, creating a hydrophobic lining that repels liquid water while remaining entirely breathable to water vapor. This allows any moisture that enters the wall system through micro-cracks or condensation to evaporate outward. Look for products with a minimum 5-year warranty and a vapor transmission rate exceeding 90%.
Acrylic and Urethane Film-Forming Sealers (Avoid)
Film-forming sealers create a physical plastic barrier on the surface of the veneer stone panel. While they provide a high-gloss "wet look" that some homeowners prefer, they trap water vapor inside the masonry. In climates with freezing winter temperatures, the trapped moisture expands upon freezing, causing the face of the stone to spall and pop off the wall. The Masonry Society strongly advises against using non-breathable coatings on exterior veneer applications in freeze-thaw zones.
Seasonal Inspection Checklist
Proactive maintenance requires identifying failures before water compromises the weather-resistive barrier (WRB). Perform this inspection bi-annually, ideally in early spring and late autumn.
- Mortar Joint Integrity: Check for hairline cracking or crumbling in the mortar joints. Repoint any gaps wider than 1/16 inch using a Type N mortar mix, which offers the correct compressive strength and flexibility for veneer applications.
- Weep Hole Clearance: Ensure all weep holes at the base of the wall and above windows are completely clear of dirt, mortar droppings, and landscaping debris to allow the drainage plane to function.
- Flashing and Sealant: Inspect the transition points where the veneer stone panel meets roofing, decks, or windows. Reapply high-quality polyurethane sealant if the existing bead shows signs of UV cracking or adhesion loss.
- Vegetation Management: Trim back ivy, shrubs, and tree branches. Vegetation holds moisture against the stone face and root systems can penetrate mortar joints, expanding and cracking the masonry from the inside.
Frequently Asked Questions
How often should I reseal my exterior veneer stone panels?
High-quality siloxane-based penetrating sealers typically last 5 to 7 years on vertical surfaces. You can test the sealer's effectiveness by splashing water on the wall; if the water beads up and rolls off, the sealer is intact. If the stone darkens as it absorbs the water, it is time to clean and reseal the facade.
Can I use a standard household bleach solution to kill mold on the panels?
While a diluted household bleach solution (1 part bleach to 10 parts water) will kill surface mold, it does not penetrate deep into the pores of a veneer stone panel to kill the root structure. Furthermore, prolonged use of bleach can break down the polymers in manufactured stone and degrade mortar over time. A specialized quaternary ammonium-based masonry biocide is a safer, longer-lasting alternative.
What causes the bottom row of stone panels to crumble?
Crumbly stone at the base of a wall is almost always caused by "splash-back" and rising damp. When soil or mulch is piled against the bottom course of the veneer, it wicks ground moisture directly into the stone and mortar. Maintain a strict 4-inch clearance between the grade/landscaping and the bottom edge of the stone veneer to prevent capillary moisture uptake.
Written by
David NakamuraDavid Nakamura is a licensed architect (AIA) and construction technology writer focused on sustainable building methods, mass timber engineering, and high-performance building envelopes. He holds a Master of Architecture from the University of Washington and is a certified Passive House Consultant (CPHC). David spent eight years at the Seattle firm Mithun, where he led the design of three LEED Platinum projects, before founding his own practice specializing in net-zero residential design. He serves on the editorial advisory board of GreenBuilder Magazine and has authored peer-reviewed papers on cross-laminated timber (CLT) connections for the Journal of Structural Engineering. In his spare time, David teaches woodworking at Pratt Fine Arts Center and kayaks the Puget Sound.
More from David Nakamura
View all
Construction Cost
Labor Cost to Build a Deck Per Sq Ft: 2026 Installation Guide
Discover the exact labor cost to build a deck per sq ft in 2026. This installation guide breaks down contractor rates, complexity factors, and hidden fees.
Aug 4, 2026

Construction Cost
How Much Does It Cost to Build a 3 Bedroom House? Financing Guide
Learn exactly how much it costs to build a 3 bedroom house and explore 2026 financing options, construction loan types, and budget frameworks for your build.
Aug 4, 2026

Construction Cost
Cost to Build a Tennis Court: 2026 Guide
How much does it cost to build a tennis court in 2026? Breakdowns for asphalt, concrete, and synthetic surfaces plus fencing and lighting.
Jul 30, 2026