Stone Veneer Above Ground Pool Cost & Install Guide 2026
Analyze the true cost of adding stone veneer to an above ground pool in 2026. Includes material pricing, structural prep, and labor estimates.
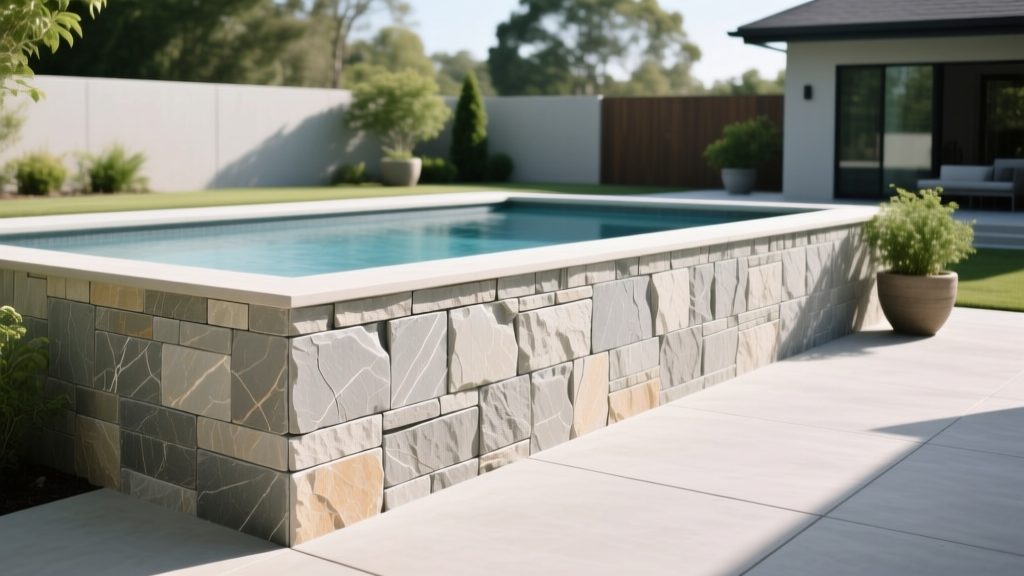
The Structural Reality: Why Direct Attachment Fails
Transforming a standard above ground pool into a luxury backyard feature using stone veneer is one of the highest-ROI landscaping upgrades available in 2026. However, the most common and catastrophic mistake homeowners make is attempting to adhere stone veneer directly to the pool's corrugated steel, aluminum, or resin walls. Above ground pools are dynamic structures; when filled with thousands of gallons of water, hydrostatic pressure causes the pool walls to bow outward by up to 1/2 inch. Rigid mortar and stone cannot flex. If applied directly to the pool wall, the veneer will crack, delaminate, and collapse within the first freeze-thaw cycle or heavy pool usage.
To achieve the stone look, you are not merely buying stone; you are funding the construction of a secondary retaining wall that wraps the pool. This reality fundamentally shifts the cost analysis from a simple masonry job to a combined carpentry and masonry project. According to structural guidelines referenced by the Association of Pool & Spa Professionals (APSP), maintaining structural clearance around flexible pool walls is non-negotiable for long-term integrity and warranty compliance.
2026 Cost Breakdown: Materials vs. Labor vs. Substrate
The total cost to install stone veneer around an above ground pool is divided into three distinct phases: substrate framing, masonry materials, and skilled labor. Below is the current 2026 pricing matrix based on national averages for a standard 4-foot-high pool wall surround.
| Project Phase | Material / Service | Cost per Sq. Ft. | Cost per Linear Ft. |
|---|---|---|---|
| Substrate Prep | Pressure-treated 4x4 posts, 2x6 framing, 1/2" cement board | $6.00 - $9.00 | $24.00 - $36.00 |
| Masonry Base | 2.5lb galvanized lath, weep screed, Type S mortar scratch coat | $3.50 - $5.50 | N/A |
| Veneer (MSV) | Manufactured Stone Veneer (e.g., Ledgestone, Fieldstone) | $7.00 - $13.00 | N/A |
| Veneer (Natural) | Natural Thin Stone Veneer (e.g., Granite, Limestone) | $14.00 - $24.00 | N/A |
| Labor | Framing, lath application, masonry setting, and pointing | $16.00 - $25.00 | N/A |
| Total Estimated Cost (Manufactured Stone) | $32.50 - $52.50 | $130.00 - $210.00 | |
Material Cost Variables: MSV vs. Natural Thin Veneer
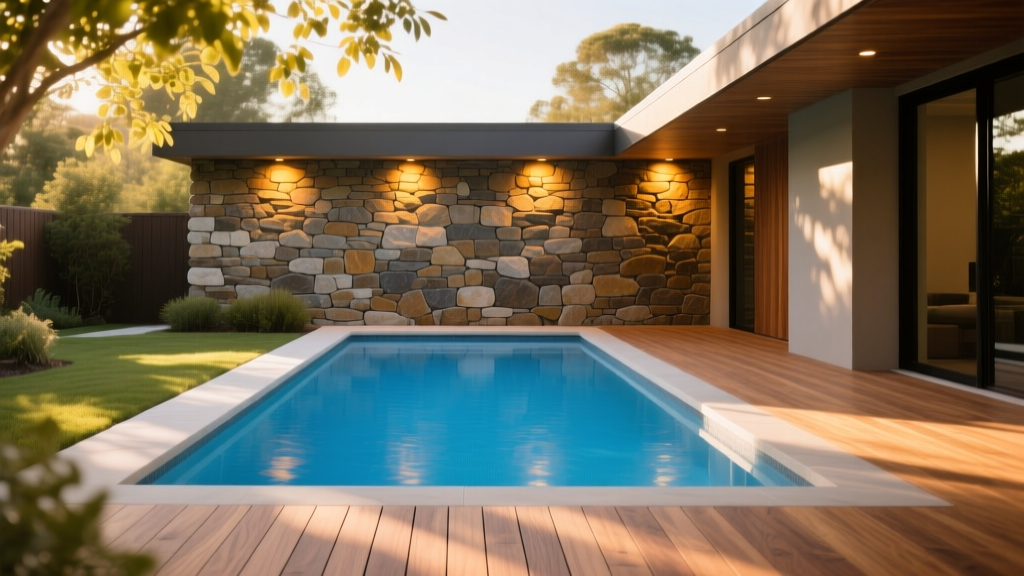
In 2026, Manufactured Stone Veneer (MSV) remains the dominant choice for pool surrounds due to its lighter weight, which reduces the load-bearing requirements on the wooden substrate framing. Brands like Eldorado Stone and ProVia offer specialized architectural profiles that mimic natural rock with high-fidelity color fastness. MSV typically costs between $7 and $13 per square foot. Natural thin veneer, while offering unparalleled authenticity and extreme durability against harsh pool chemicals, weighs significantly more and requires reinforced framing, pushing the total project cost up by 30% to 45%.
Pool Size Pricing Scenarios
To provide actionable budgeting data, here are the calculated costs for the two most common above ground pool footprints, assuming a 4-foot wall height and the use of mid-range Manufactured Stone Veneer.
24-Foot Round Pool
- Circumference: 75.4 linear feet
- Veneer Area: ~302 sq. ft.
- Substrate Framing: $2,260
- Masonry Materials: $3,170
- Labor: $4,530
- Total: $9,960
15x30-Foot Oval Pool
- Perimeter: 90.0 linear feet
- Veneer Area: ~360 sq. ft.
- Substrate Framing: $2,700
- Masonry Materials: $3,780
- Labor: $5,400
- Total: $11,880
Step-by-Step Substrate Preparation (The Make-or-Break Phase)
The longevity of your stone veneer above ground pool relies entirely on the substrate. Follow this sequence to meet Masonry Society standards for exterior, non-load-bearing veneer applications.
- Layout and Post Setting: Mark a perimeter exactly 2 inches away from the pool's outer wall. Dig post holes every 6 feet and set 4x4 pressure-treated lumber or galvanized steel posts in concrete. This 2-inch gap is vital for air circulation and preventing the stone wall from pressing against the pool when the water level fluctuates.
- Framing the Wall: Attach 2x6 pressure-treated horizontal rails to the posts at 16 inches on-center. Ensure the top rail is perfectly level and sits 1/2 inch below the pool's top coping to prevent water runoff from the pool deck from washing behind the stone.
- Sheathing and Moisture Barrier: Screw 1/2-inch exterior-grade cement board (e.g., Durock or HardieBacker) to the framing. Overlap the seams and tape them with alkali-resistant fiberglass mesh tape and thin-set mortar. Apply a fluid-applied waterproofing membrane over the entire cement board surface.
- Lath and Weep Screed: Install a corrosion-resistant weep screed at the base of the wall to allow trapped moisture to escape. Staple 2.5 lb self-furring galvanized metal lath over the cement board, overlapping horizontal seams by 1 inch and vertical seams by 2 inches, per ASTM C1063 specifications.
- The Scratch Coat: Apply a 1/2-inch layer of Type S mortar to the lath. Type S is mandatory for pool environments due to its 1800 PSI compressive strength and superior bond in wet, freeze-thaw conditions. Score the mortar horizontally with a notched trowel and let it cure for 48 hours before setting stone.
Deck Integration and Flashing Details
Most above ground pools feature an adjacent wooden or composite deck. The intersection where the deck meets the stone veneer surround is a primary vulnerability for water intrusion and wood rot. Never allow the deck joists to rest directly on the stone veneer. Instead, install a heavy-duty PVC or stainless steel Z-flashing along the top edge of the stone wall before the final course of stone is laid. The upper leg of the Z-flashing should slide behind the pool's top rail or coping, while the lower leg extends over the stone face. Seal the top edge with a high-grade, UV-stable polyurethane sealant (such as Sikaflex) to create a watertight barrier that accommodates thermal expansion.
Maintenance in a Chemical Environment
Pool environments expose masonry to chlorinated splash-out, algaecides, and constant humidity. While manufactured stone is highly durable, the mortar joints are porous. To prevent efflorescence (the white, powdery salt deposit that forms on masonry) and mortar degradation, apply a breathable, siloxane-based penetrating sealer 30 days after installation. Unlike film-forming acrylic sealers that trap moisture inside the wall and cause spalling during winter freezes, siloxane sealers repel liquid water and pool chemicals while allowing water vapor to escape. Reapplication is typically required every 3 to 5 years depending on local UV exposure and pool usage.
Frequently Asked Questions
Can I use stone veneer on a resin above ground pool?
Yes, but the resin wall itself cannot support the veneer. You must still build the independent 2-inch offset pressure-treated frame described above. The resin wall simply acts as the water barrier, while your custom frame acts as the masonry substrate.
Does adding stone veneer void my pool manufacturer's warranty?
In most cases, attaching anything directly to the pool wall voids the structural warranty. By building a freestanding, independent surround that does not physically touch or bear weight on the pool structure, you preserve the pool manufacturer's warranty while achieving the desired aesthetic.
What is the best stone profile for a pool surround?
Ledgestone and stacked stone profiles are highly popular for modern pool surrounds due to their clean, horizontal lines. However, profiles with deep crevices can trap dirt and pool algae. For easier maintenance near the waterline, choose a flatter profile like Fieldstone or Ashlar, which can be wiped down easily during seasonal pool cleanings.
Written by
James ThorntonJames Thornton is a construction industry veteran with 25 years of hands-on experience in wood framing, lumber grading, and residential building codes. He started as a framing carpenter in rural Oregon, earned his ICC Residential Building Inspector certification, and eventually became a senior plan reviewer for the City of Portland Bureau of Development Services. James holds a B.S. in Wood Science & Technology from Oregon State University and is a certified lumber grader through the West Coast Lumber Inspection Bureau (WCLIB). He has inspected over 3,000 residential construction sites and authored the city's internal guide on advanced framing techniques (2x6 at 24" O.C.). James lives in Bend, OR, where he builds custom timber-frame cabins and competes in lumberjack sports.
More from James Thornton
View all
Insulation
Best Home Insulation Materials: Complete 2026 Guide
Compare top home insulation materials for 2026. Find R-values, installed costs per square foot, and best uses for fiberglass, spray foam, and mineral wool.
Aug 4, 2026

Sustainable Building
Certify Your Green Building Material for LEED and WELL
Step-by-step guide to certifying a green building material for LEED v5 and WELL v2. Master EPDs, HPDs, and VOC limits for 2026 project specifications.
Aug 4, 2026

Stone & Masonry
Veneer Stacked Stone Panels: Interior Design & Style Showcase
Discover how veneer stacked stone panels transform interiors. Explore modern design profiles, material pairings, and technical installation specs.
Aug 4, 2026