Stone Veneer Cladding: The Complete Material Guide
Explore our complete guide to stone veneer cladding. Compare natural vs. manufactured options, installation methods, costs, and structural requirements.

Understanding Stone Veneer Cladding Systems
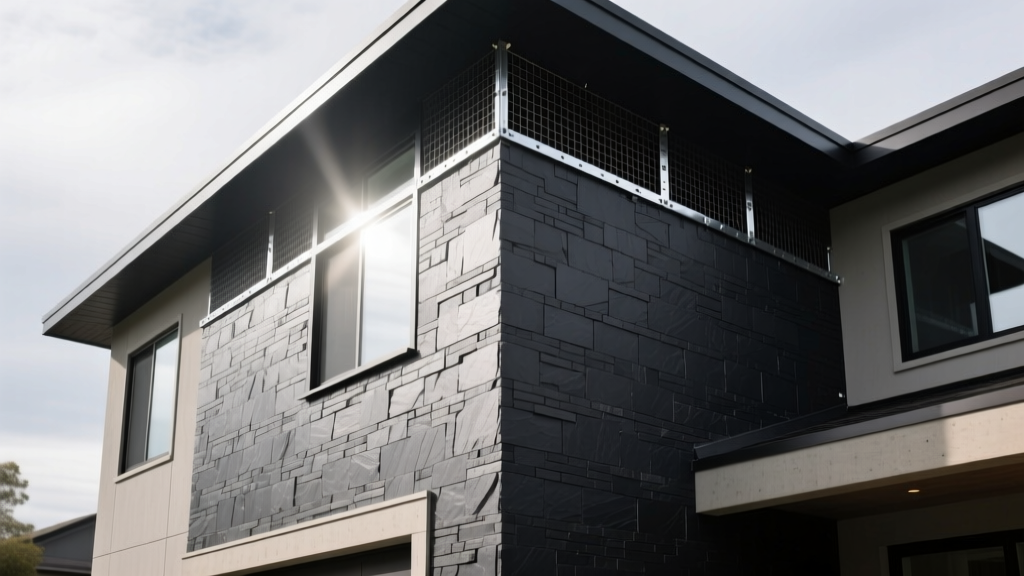
Stone veneer cladding provides the aesthetic weight and texture of solid masonry without the structural demands of full-depth stone. Unlike structural stone walls that support building loads, veneer cladding is a non-load-bearing exterior or interior finish. It transfers its weight directly to the foundation or structural framing, requiring specialized moisture management and deflection control to prevent long-term failure. This guide details the material specifications, structural prerequisites, and installation protocols required for specifying and installing stone veneer cladding in modern construction.
Natural vs. Manufactured Stone Veneer (MSV)
The market divides stone veneer cladding into two primary categories: natural stone and manufactured stone veneer (MSV). Natural stone is quarried and sliced to a uniform thickness, while MSV is cast from Portland cement, lightweight aggregates, and iron oxide pigments in molds taken from real stone.
| Property | Natural Stone Veneer | Manufactured Stone Veneer (MSV) |
|---|---|---|
| Governing Standard | ASTM C568 (Limestone), ASTM C56 (Sandstone) | ASTM C1670 / C1670M |
| Weight | 10 to 15+ lbs per sq. ft. | 6 to 10 lbs per sq. ft. |
| Thickness | 0.75 to 1.5 inches | 0.5 to 1.25 inches |
| Compressive Strength | 4,000 to 12,000+ psi | 1,800 to 2,800 psi |
| Water Absorption | Varies (Limestone is highly porous) | Maximum 22% (per ASTM C1670) |
| Color Consistency | High natural variation | Batch-dependent, highly consistent |
MSV dominates the residential and light commercial market due to its lighter weight, lower material cost, and integrated corner pieces that simplify wrapping around building edges. Natural stone is specified for high-end commercial projects or historic restorations where authentic mineral variation and extreme compressive strength are required.
Structural Requirements and Framing Deflection
Because stone veneer cladding is brittle, the structural framing behind it must resist deflection under wind and seismic loads. If the wall bends, the rigid mortar joints and stone units will crack and delaminate.
For wood-framed structures, this typically requires upgrading from 2x4 to 2x6 studs at 16 inches on center, or adding mid-height blocking and structural sheathing (like 1/2-inch plywood or OSB) to increase the wall's moment of inertia. Steel stud framing requires heavier gauge studs (minimum 20-gauge, often 16-gauge for multi-story applications) and specialized bridging.
Moisture Management and Drainage Planes
Moisture intrusion is the leading cause of stone veneer cladding failure. Both natural and manufactured stone are porous; they absorb rainwater and hold it against the wall assembly. A robust drainage plane is non-negotiable.
The Drainage Matrix Protocol
- Weather-Resistant Barrier (WRB): Apply two layers of Grade D building paper, or one layer of a high-performance WRB (such as a dimpled drainage mat like Benjamin Obdyke HydroGap) directly over the structural sheathing.
- Corrosion-Resistant Lath: Attach minimum 2.5 lb self-furring galvanized expanded metal lath. The 'self-furring' dimples hold the lath 1/4-inch away from the WRB, allowing mortar to encapsulate the back of the mesh.
- Weep Screed: Install a corrosion-resistant weep screed (ASTM C1063) at the base of the wall. It must be positioned a minimum of 4 inches above finished soil grade and 2 inches above hard surfaces like concrete patios to prevent capillary action and soil moisture wicking.
- Air Space: While traditional mortared veneer sits flush against the lath, modern best practices recommend a 1-inch clear air space behind the veneer in high-rainfall climates, utilizing drainage mats to facilitate downward water flow to the weep screed.
According to technical guidelines published by the National Park Service Preservation Briefs, trapped moisture in masonry assemblies leads to freeze-thaw spalling and structural rot. Proper flashing above windows, doors, and roof intersections is just as critical as the base weep screed.
Installation Methods: Mortared vs. Mortarless Systems
Traditional Mortared Installation
The standard installation requires a three-step process: scratch coat, mortar bed, and pointing.
- Scratch Coat: A 3/8-inch thick layer of Type S mortar is troweled over the metal lath and scored horizontally with a raking tool. This must cure for 24 to 48 hours to create a rigid, textured base.
- Mortar Selection: Use Type N mortar (1 part Portland cement, 1 part hydrated lime, 6 parts sand) for the setting bed. Type N yields a compressive strength of roughly 750 psi. Avoid high-strength Type M mortar; if the mortar is stronger than the stone unit, thermal expansion will cause the stone faces to spall off rather than allowing the mortar joint to absorb the micro-movements.
- Buttering and Placement: Apply a 1/2-inch layer of mortar to the back of each stone unit (buttering) and press firmly into the scratch coat until mortar squeezes out, ensuring 100% coverage to prevent voids where water can pool and freeze.
Mortarless and Interlocking Panel Systems
Recent innovations have introduced mortarless stone veneer cladding. Systems like ClipStone or Evolve Stone utilize hidden metal clips, construction adhesives, or interlocking tongue-and-groove profiles that attach directly to structurally rated sheathing or furring strips.
Cost Breakdown and Material Economics
Costs vary significantly based on material origin, profile complexity, and regional labor rates. The following table outlines average 2026 pricing for exterior applications.
| Cost Component | Manufactured Stone Veneer (MSV) | Natural Stone Veneer |
|---|---|---|
| Material (per sq. ft.) | $6.00 - $11.00 | $12.00 - $25.00+ |
| Accessories (Lath, Mortar, Screed) | $1.50 - $2.50 | $1.50 - $2.50 |
| Labor (per sq. ft.) | $8.00 - $14.00 | $15.00 - $28.00 |
| Total Installed Cost (per sq. ft.) | $15.50 - $27.50 | $28.50 - $55.50+ |
While MSV offers a lower upfront cost, natural stone provides a higher return on investment in luxury real estate markets. Furthermore, natural stone requires zero color-maintenance, whereas lower-tier MSV may require tinting or sealing after 15-20 years if UV degradation occurs in the iron oxide pigments.
Common Failure Modes and Troubleshooting
Efflorescence
Efflorescence appears as a white, powdery deposit on the stone surface. It occurs when water-soluble salts (present in Portland cement and natural lime) migrate to the surface and crystallize upon evaporation.
The Fix: Do not use muriatic acid or harsh masonry cleaners on MSV. Acid eats away the cementitious binder, exposing the lightweight aggregate and ruining the stone's face. Instead, use a stiff nylon brush and a specialized, non-acidic efflorescence cleaner. Long-term, apply a breathable silane/siloxane penetrating sealer to prevent water ingress while allowing water vapor to escape.
Delamination and Spalling
Stones popping off the wall or faces shearing off are usually caused by two factors: lack of a scratch coat cure time, or freezing of the mortar bed before it achieves full hydration.
The Fix: Installation must cease if temperatures are below 40°F (4°C) unless heated enclosures are used. If stones delaminate, chip away the old mortar, apply a bonding agent to the scratch coat, and reset using fresh Type N mortar, ensuring full back-buttering.
Cracking at Openings
Diagonal cracks radiating from the corners of windows and doors indicate structural settling or framing deflection exceeding the L/600 threshold.
The Fix: This requires structural intervention. Install flexible sealant joints at the interface between the stone veneer and the window/door frames to accommodate minor movement, and consult a structural engineer to verify the framing gauge and fastening schedule.
For comprehensive testing standards regarding masonry and veneer tolerances, refer to the specifications maintained by ASTM International, specifically focusing on the C1670 standard for manufactured masonry units to ensure your specified materials meet minimum compressive and absorption thresholds.
Written by
Elena RodriguezElena Rodriguez is a civil engineer and technical writer specializing in concrete technology, masonry systems, and ASTM/ACI compliance. She earned her B.S. in Civil Engineering from Texas A&M University and spent a decade at a materials testing laboratory, performing over 2,000 concrete compressive strength tests and masonry prism evaluations. Elena is an ACI-certified Field Testing Technician (Grade I) and a member of ASTM Committee C12 on Natural Building Stone. She currently consults on forensic engineering cases involving concrete failures and moisture intrusion. Based in San Antonio, TX, Elena is a proud member of the Society of Women Engineers (SWE) and coaches her daughter's FIRST Robotics team.
More from Elena Rodriguez
View all
Walls & Panels
Cost Analysis: Light Gauge Steel Framing Advantages and Disadvantages
Evaluate light gauge steel framing advantages and disadvantages through a strict cost analysis lens, comparing material, labor, and lifecycle expenses.
Aug 4, 2026

Walls & Panels
Gypsum Board Types: Exact Specifications, Thickness & Dimensions
Compare standard, Type X, and moisture-resistant gypsum board types. Get exact specifications, thicknesses, dimensions, and ASTM standards for your project.
Aug 4, 2026

Fire Resistance
Best Fire-Resistant Outdoor Decking Materials: 2026 Buyer Guide
Discover the best fire-resistant outdoor decking materials for 2026. Compare Class A PVC, aluminum, and hardwood options for WUI compliance and safety.
Aug 4, 2026