Vetting Stone Veneer Installation Contractors: Technical Specs
Learn the exact technical specifications to demand from stone veneer installation contractors, including WRB, lath, mortar types, and clearance codes.

The Hidden Cost of Ignoring Technical Specifications
Adhered masonry veneer (AMV) is a composite system, not just a surface finish. When evaluating stone veneer installation contractors, property owners and general contractors frequently focus on aesthetic portfolios while neglecting the concealed structural and moisture-management layers. A failure in the weather resistive barrier (WRB), improper lath fastening, or incorrect mortar chemistry will inevitably result in delamination, efflorescence, or catastrophic water intrusion. The best stone veneer installation contractors distinguish themselves through strict adherence to ASTM standards and International Building Code (IBC) requirements. This guide outlines the non-negotiable technical specifications you must demand during the bidding and vetting process.
Many contractors attempt to save time by applying stone veneer directly over a single layer of house wrap (e.g., standard Tyvek). For cementitious adhered veneers, this violates ICC ES AC380 standards. The alkalinity of the mortar scratch coat can degrade standard WRBs, and the lack of a capillary break traps moisture against the sheathing. Always mandate a dual-layer system or a specialized drainage mat.
Weather Resistive Barriers (WRB) and Flashing
The foundation of a durable stone veneer installation is the moisture management system. According to Eldorado Stone Installation Guidelines and standard building codes, exterior applications require a minimum of two layers of Grade D building paper (ASTM D226) or an equivalent high-performance fluid-applied membrane paired with a drainage mat.
The Capillary Break and Weep Screeds
The first layer of Grade D paper acts as the primary drainage plane, while the second layer serves as a sacrificial slip sheet. This slip sheet prevents the moisture and alkaline salts from the cementitious scratch coat from bonding to the primary WRB. At the base of the wall, contractors must install a corrosion-resistant weep screed (ASTM C926). The technical clearances for this screed are strict and frequently violated:
- Earth Clearance: Minimum 4 inches from the weep screed to finished grade.
- Hardscape Clearance: Minimum 2 inches from the weep screed to patios, driveways, or decks.
- Roof Clearance: Minimum 2 inches above adjoining roof surfaces.
If a contractor proposes burying the weep screed behind soil or hardscaping to achieve a specific aesthetic look, disqualify them immediately. This guarantees capillary wicking and structural rot.
Metal Lath and Fastening Schedules
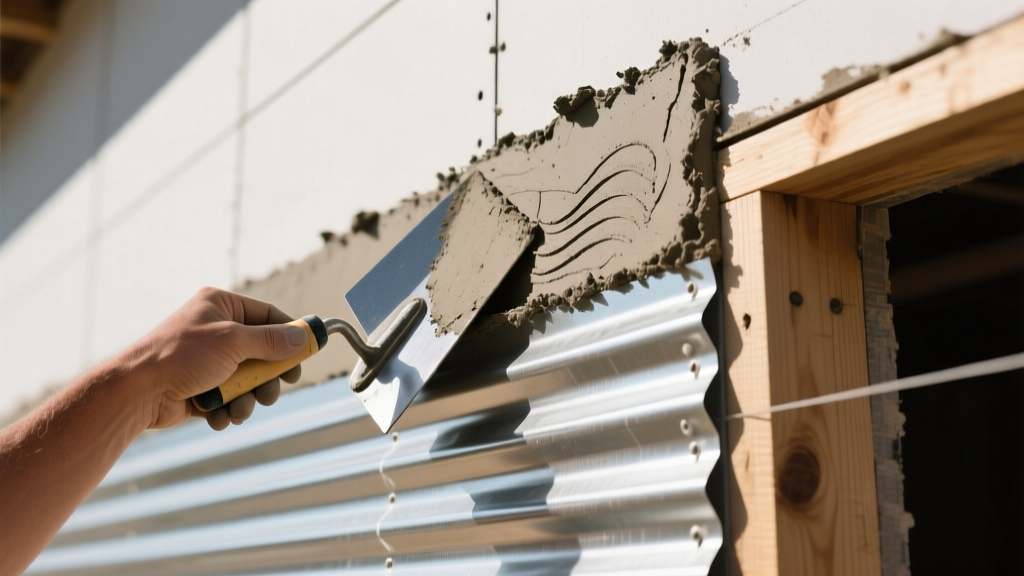
Metal lath provides the mechanical key for the mortar scratch coat. The industry standard requires 2.5 lb/sq yd self-furring galvanized steel lath, manufactured to ASTM C847 Standard Specification for Metal Lath. The term "self-furring" refers to the dimpled indentations stamped into the wire mesh, which hold the lath exactly 1/4 inch away from the WRB. This gap is critical; it allows the scratch coat mortar to flow behind the wire, fully encapsulating it and preventing rust.
| Specification | Required Standard | Common Contractor Error |
|---|---|---|
| Lath Weight | 2.5 lb/sq yd minimum | Using 1.75 lb interior lath for exterior applications |
| Fastener Type | 1-1/4" galvanized nails/screws with washers | Using standard drywall screws or non-galvanized staples |
| Fastener Penetration | Minimum 1 inch into structural framing (studs) | Fastening only into OSB/plywood sheathing |
| Spacing Schedule | 6" o.c. vertically, 16" o.c. horizontally | Spacing fasteners 12+ inches apart to save time |
| Overlap Joints | 1" side joints, 2" end joints | Butting joints flush without overlapping |
Furthermore, lath must wrap all inside and outside corners by a minimum of 12 inches. Relying on corner beads or stopping the lath exactly at the corner stud guarantees vertical cracking as the building experiences thermal expansion and wind shear.
Mortar Chemistry: Type S vs. Type N
Mortar selection is not a matter of preference; it is dictated by structural load, exposure, and tensile requirements. The Portland Cement Association outlines distinct compressive strengths for different mortar types, and stone veneer installation contractors must utilize the correct mix for each phase of the installation.
The Scratch Coat and Setting Bed
The scratch coat must consist of Type S mortar, which boasts a minimum compressive strength of 1,800 psi. Type S provides the high tensile bond strength required to hold the weight of the stone and resist wind uplift. The scratch coat must be applied at a thickness of 3/8 inch to 1/2 inch and horizontally scarified with a coarse rake while still thumbprint-hard. This horizontal grooving creates a mechanical shelf for the setting bed to grip.
"A scratch coat that is troweled smooth or left un-scarified reduces the shear bond strength of the setting bed by up to 40%. Always inspect the scratch coat for deep, horizontal grooves before the contractor begins setting stone."
The setting bed, which adheres the stone to the scratch coat, can also be Type S for exterior applications or heavy natural stone. However, for interior applications or lightweight manufactured stone veneer (MSV), Type N mortar (750 psi) is often preferred. Type N offers greater flexibility, accommodating minor thermal movements without transferring stress to the stone units. Jointing and pointing mortar should almost always be Type N to prevent the mortar from being harder than the stone, which can cause spalling during freeze-thaw cycles.
Vetting Framework: 5 Technical Questions to Ask
To separate qualified masonry professionals from general handymen, incorporate these technical questions into your contractor interview process. Compare their answers against the correct specifications provided below.
- "What is your scratch coat cure time before you apply the setting bed?"
Correct Answer: Minimum 48 hours. The contractor should also mention misting the scratch coat with water during the curing process to prevent rapid moisture loss, which causes shrinkage cracking and weakens the cement hydration. - "How do you prepare the back of natural stone before setting?"
Correct Answer: Natural stone must be washed with a stiff brush and water to remove loose dust and clay. Manufactured stone veneer (MSV) should not be washed but must be dry. A thin slurry of mortar (back-buttering) must be applied to the back of every stone unit to ensure 100% adhesion. - "What is your protocol for installing weep screed over existing foundation concrete?"
Correct Answer: The weep screed must be fastened through the WRB into the framing studs, not just nailed into the concrete foundation. The WRB must lap over the weep screed's vertical flange by at least 2 inches to direct water outward. - "How do you handle control joints in a continuous stone veneer wall?"
Correct Answer: Control joints must align with the underlying framing's control joints and be installed every 18 feet horizontally and at every floor line vertically to accommodate structural deflection. - "Do you use a bonding agent on painted or sealed CMU block before applying lath?"
Correct Answer: Lath and scratch coat cannot be applied directly over painted or sealed masonry. The surface must be mechanically abraded (sandblasted or ground) to expose the raw, porous CMU, or the contractor must install furring strips to create a new structural attachment plane.
Final Sign-Off and Warranty Validation
Manufacturers of premium stone veneer, such as Eldorado Stone or Cultured Stone, offer 50-year limited warranties. However, these warranties are entirely voided if the installation deviates from their published technical specifications. Before releasing final payment, require the contractor to provide photographic documentation of the concealed layers: the WRB overlaps, the lath fastening schedule, and the weep screed clearances. By enforcing these technical specifications, you ensure the structural integrity of the veneer system and protect your investment against the most common masonry failure modes.
Written by
James ThorntonJames Thornton is a construction industry veteran with 25 years of hands-on experience in wood framing, lumber grading, and residential building codes. He started as a framing carpenter in rural Oregon, earned his ICC Residential Building Inspector certification, and eventually became a senior plan reviewer for the City of Portland Bureau of Development Services. James holds a B.S. in Wood Science & Technology from Oregon State University and is a certified lumber grader through the West Coast Lumber Inspection Bureau (WCLIB). He has inspected over 3,000 residential construction sites and authored the city's internal guide on advanced framing techniques (2x6 at 24" O.C.). James lives in Bend, OR, where he builds custom timber-frame cabins and competes in lumberjack sports.
More from James Thornton
View all
Insulation
Best Home Insulation Materials: Complete 2026 Guide
Compare top home insulation materials for 2026. Find R-values, installed costs per square foot, and best uses for fiberglass, spray foam, and mineral wool.
Aug 4, 2026

Sustainable Building
Certify Your Green Building Material for LEED and WELL
Step-by-step guide to certifying a green building material for LEED v5 and WELL v2. Master EPDs, HPDs, and VOC limits for 2026 project specifications.
Aug 4, 2026

Stone & Masonry
Veneer Stacked Stone Panels: Interior Design & Style Showcase
Discover how veneer stacked stone panels transform interiors. Explore modern design profiles, material pairings, and technical installation specs.
Aug 4, 2026