Master Stone Veneer Walling Installation: Pro Techniques & Tips
Master stone veneer walling installation with this pro guide. Learn substrate prep, mortar mixing, lath application, and sealing techniques for lasting results.

Pre-Installation: Substrate and Weather Barrier Prep
The longevity of stone veneer walling relies entirely on the substrate preparation. Moisture intrusion is the primary cause of veneer failure, leading to delamination, efflorescence, and structural rot. Before mixing any mortar, the wall assembly must be detailed to manage water.
For exterior wood-framed walls, install a water-resistive barrier (WRB) consisting of two layers of Grade D building paper or a high-performance fluid-applied membrane. Overlap horizontal seams by a minimum of 2 inches and vertical seams by 6 inches. Next, install a corrosion-resistant weep screed at the base of the wall. According to InterNACHI standards and ASTM C1063, the weep screed must have a minimum 3/16-inch flange and be positioned at least 4 inches above final grade or 2 inches above paved hardscapes to prevent capillary water draw.
Once the WRB and weep screed are secure, attach 2.5 lb/yd² self-furring galvanized diamond mesh lath (meeting ASTM C847). The self-furring dimples are non-negotiable; they hold the lath away from the WRB, allowing the scratch coat mortar to encapsulate the wire completely. Fasten the lath using 1-inch galvanized roofing nails or staples, penetrating the wall studs by at least 3/4 inch. Overlap all lath seams by 1 inch horizontally and 2 inches vertically.
Material Selection Matrix: Mortar, Lath, and Stone
Selecting the correct materials ensures structural integrity and aesthetic consistency. As of 2026, premium manufactured stone veneer costs between $8.50 and $14.00 per square foot, while natural thin stone ranges from $12.00 to $22.00. Below is the specification matrix for the supporting materials.
| Component | Specification / Type | Purpose & Performance |
|---|---|---|
| Mortar | Type S (Pre-blended or site-mixed) | Provides ~1,800 psi compressive strength and high bond strength required for vertical veneer applications. |
| Metal Lath | 2.5 lb/yd² Self-Furring Galvanized | Creates a mechanical key for the scratch coat; galvanized coating prevents rust bleed-through. |
| Fasteners | 1-inch Galvanized Nails/Staples | Secures lath to studs; corrosion resistance prevents structural failure over decades. |
| Weep Screed | 26-gauge Galvanized Steel | Terminates the lath and provides an exit point for incidental moisture behind the veneer. |
Step 1: Mixing and Applying the Scratch Coat
The scratch coat is the foundational layer that binds the metal lath to the wall and provides a textured surface for the veneer mortar to grip. Do not skip this step or attempt to apply the stone directly to the bare lath.
Pro Mortar Mixing Ratios
While pre-blended Type S mortar bags are convenient for smaller projects, site-mixed mortar offers superior workability for large-scale stone veneer walling. Use the following volumetric ratio:
- 1 part Portland cement (Type I/II)
- 1/4 part Hydrated lime (Type S) - increases workability and water retention
- 3 to 3.75 parts Clean, washed masonry sand
Apply the scratch coat over the lath using a flat trowel, forcing the mortar completely through the mesh to encapsulate the wires. The total thickness must be between 3/8-inch and 1/2-inch. Before the mortar sets, use a notched trowel or a stiff-bristled brush to score horizontal lines into the surface. This horizontal scoring creates a mechanical shelf for the setting mortar to lock into. Allow the scratch coat to cure for a minimum of 24 to 48 hours, keeping it lightly misted if temperatures exceed 85°F (29°C) to prevent rapid moisture loss and cracking.
Step 2: Layout and Dry-Fitting the Veneer
Before wetting the wall or mixing setting mortar, lay out the stone veneer on the ground. This dry-fit process is critical for achieving a natural, randomized aesthetic and avoiding repetitive patterns, which are the most common visual flaw in amateur installations.
- Blend Pallets: Open at least three boxes of manufactured stone or mix three piles of natural stone to blend color variations and sizes.
- Sort by Profile: Separate thick, thin, large, and small pieces. You will need a mix of all profiles to maintain a consistent 1-inch to 1.5-inch overall wall thickness.
- Plan the Corners: Corner pieces dictate the rhythm of the wall. Place them first during your dry layout, ensuring the long and short legs alternate to mimic natural masonry bonding patterns.
Step 3: Mortaring and Setting the Stone Veneer Walling
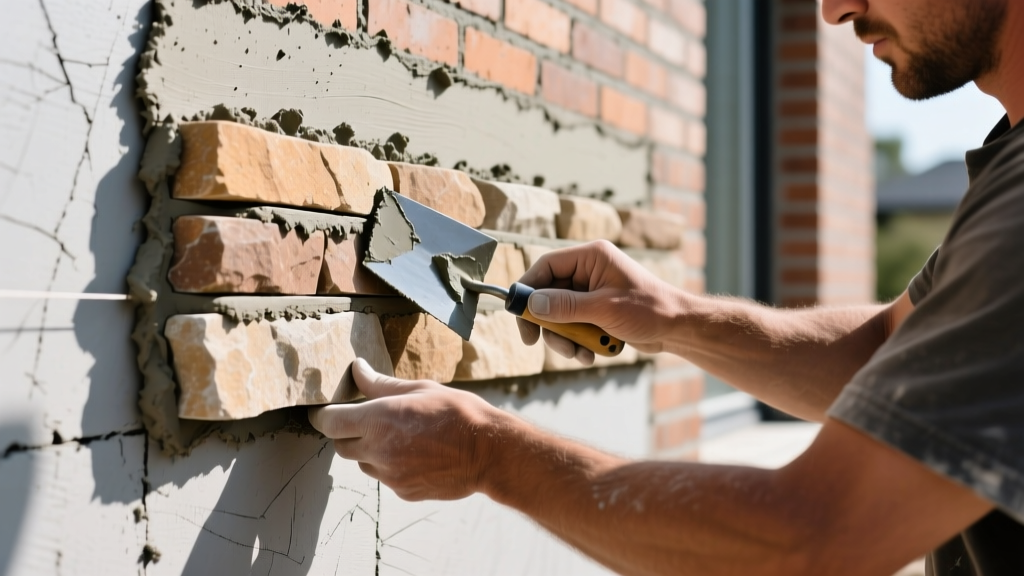
When applying the stone, always work from the bottom up, starting with the corner pieces. Dampen the back of the stone with a wet brush or spray bottle to prevent the porous material from sucking moisture out of the setting mortar too quickly.
The Back-Buttering Technique
Never rely solely on 'spot-mudding' (applying dollops of mortar to the back of the stone). According to guidelines referenced by The Masonry Society, full coverage is mandatory to prevent voids where water can pool and freeze. Apply a 1/2-inch thick layer of Type S mortar to the entire back surface of the stone using a masonry trowel. Press the stone firmly into the scratch coat, wiggling it slightly to squeeze out excess mortar and ensure a 100% bond. Maintain a joint spacing of 1/2-inch to 1-inch between stones, depending on the specified profile style.
Step 4: Pointing, Grouting, and Tooling the Joints
Once the stones are set and the mortar has firmed up slightly (usually 30 to 60 minutes, depending on ambient humidity), it is time to point the joints. You can use a mortar bag for precise application or a hawk and pointing trowel for a more rustic, over-grouted look.
Fill the joints completely, ensuring no voids remain. The critical phase is 'tooling' the joints. Wait until the mortar reaches a 'thumbprint hard' state—when you press your thumb into the joint, it leaves an impression but no mortar sticks to your skin. Use a convex jointing tool or a stiff bristle brush to compact and smooth the mortar. Compacting the mortar at this exact stage densifies the surface, dramatically reducing future water permeability and cracking.
Common Failure Modes and How to Avoid Them
Even with premium materials, stone veneer walling can fail if environmental factors are ignored. Understanding these failure modes is the difference between a 50-year facade and a 5-year disaster.
- Efflorescence (White Staining): Caused by water-soluble salts migrating to the surface. Prevention: Ensure proper flashing above the veneer, use a breathable penetrating sealer (siloxane-based, not acrylic film-forming), and avoid acid-based cleaners during wash-downs.
- Delamination: The stone pops off the wall. Prevention: This is almost always caused by inadequate scratch coat curing, failure to back-butter, or applying mortar to a frozen or excessively hot substrate. Always check the Portland Cement Association guidelines for cold-weather masonry construction if working below 40°F (4°C).
- Cracking at Control Joints: Prevention: Stone veneer must respect the underlying framing's control joints. Never bridge a structural control joint with stone or mortar; install a flexible, color-matched polyurethane sealant at these transitions.
'The most expensive part of a stone veneer project is fixing it after it fails. Investing time in the weather-resistive barrier and weep screed details yields a higher return than upgrading to a more expensive stone profile.' — Industry best practice standard for building envelope management.
By adhering to these precise material specifications, mixing ratios, and application techniques, your stone veneer walling installation will achieve both the structural resilience required for exterior environments and the timeless aesthetic of authentic masonry.
Written by
Sarah WhitfieldSarah Whitfield is a chartered quantity surveyor (MRICS) and construction cost analyst with 15 years of experience in material pricing, procurement strategy, and project budgeting. She earned her degree in Construction Management from the University of Reading (UK) and has worked on projects ranging from $2M custom homes to $180M mixed-use developments across North America and Europe. Sarah currently leads cost estimating for BuildMat Insight, maintaining a proprietary database of 4,000+ material price points updated quarterly. She is a frequent contributor to RSMeans cost data panels and has presented at the International Cost Engineering Council (ICEC) congress. Based in Denver, CO, Sarah is an avid trail runner and volunteer mentor for Women in Construction.
More from Sarah Whitfield
View all
Wood & Lumber
What Are the Different Types of Wood? A Builder's Guide
Compare structural softwoods, finish hardwoods, and engineered lumber. Analyze Janka ratings, MOE values, and 2026 pricing for construction.
Aug 4, 2026

Walls & Panels
Steel Framing vs Wood Framing: Corrosion and Moisture Defense
Compare steel framing vs wood framing for moisture resistance. Learn about galvanized coatings, condensation risks, and corrosion protection strategies.
Jul 21, 2026

Stone & Masonry
How to Cut Stone Veneer: Wet Saw vs Grinder Comparison
Compare the best tools for cutting stone veneer. We review wet saws, angle grinders, and chop saws to help you achieve clean, chip-free cuts.
Jul 21, 2026