How to Evaluate CertainTeed Panel Siding for Installation
Learn how to evaluate CertainTeed panel siding for your next project. This installation guide covers product specs, nailing patterns, and flashing details.
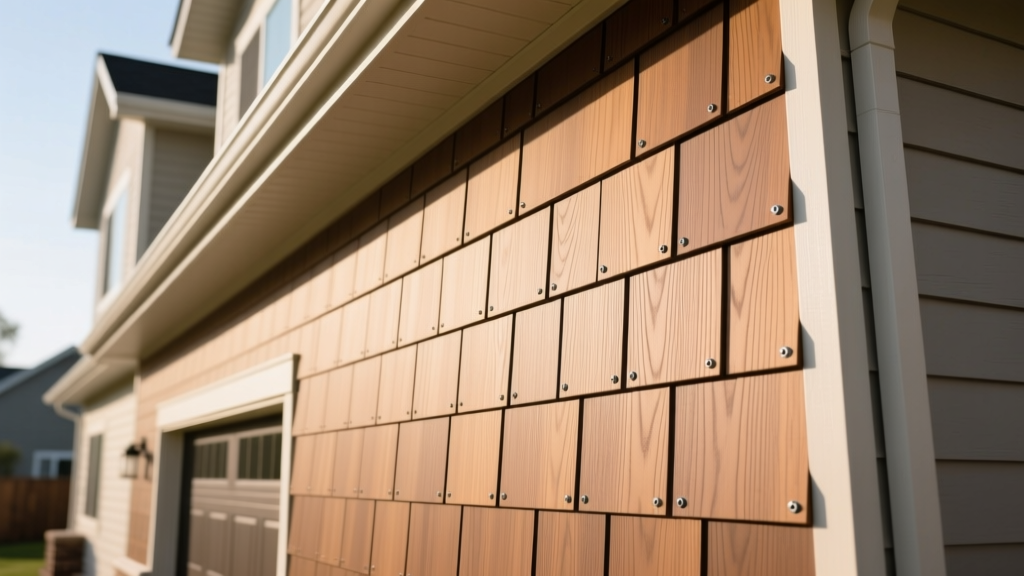
Evaluating the CertainTeed Panel Siding Ecosystem
When contractors evaluate the building materials company CertainTeed on panel siding, the focus must shift from basic aesthetics to rigorous installation tolerances and material science. CertainTeed’s portfolio spans standard extruded vinyl, high-impact polypropylene polymers, and insulated siding systems. A successful installation requires understanding how these distinct material compositions react to thermal cycling, wind shear, and moisture intrusion. According to the Vinyl Siding Institute (VSI), improper fastening and inadequate expansion gaps account for over 70% of post-installation warranty claims across all vinyl and polymer siding brands.
This guide provides a technical framework for evaluating CertainTeed’s specific panel lines, preparing the substrate, and executing fastening protocols that meet both manufacturer warranties and ASTM D3679 structural standards.
Product Matrix: Matching Panels to Performance Requirements
CertainTeed segments its panel siding into distinct performance tiers. Selecting the correct panel dictates your nailing schedule, trim integration, and substrate requirements. Below is a technical comparison of their three primary panel systems used in residential and light commercial applications.
| Product Line | Material Composition | Exposure / Reveal | Wind Load Rating |
|---|---|---|---|
| Board & Batten | Extruded Vinyl (DuraLock post-form) | 8-inch vertical reveal | 110 mph (ASTM D3679) |
| Cedar Impressions | Injection-Molded Polypropylene | 5-inch (Perfection Shingle) | 130+ mph (High-Velocity Zone) |
| MainStreet | Standard Extruded Vinyl | 4-inch to 4.5-inch horizontal | 90 mph (Standard Residential) |
Substrate Preparation and Weather Barrier Integration
CertainTeed panel siding is a cladding system, not a waterproofing membrane. Evaluating the substrate before installation is non-negotiable. The U.S. Department of Housing and Urban Development (HUD) emphasizes that all structural sheathing must be flat within a 1/4-inch tolerance over any 10-foot span. Deviations beyond this will cause the interlocking panel legs to bind, leading to zipper-failures during high-wind events.
Weather-Resistive Barrier (WRB) Protocols
- House Wrap Integration: Apply a code-approved WRB (e.g., Tyvek or Typar) with horizontal overlaps of minimum 2 inches and vertical overlaps of 6 inches. Tape all seams with manufacturer-approved acrylic tape, not standard duct or OSB tape.
- Rigid Foam Considerations: If installing over continuous exterior rigid foam insulation, the foam cannot serve as the nailing base. You must use furring strips (minimum 1x3 wood or 20-gauge steel) fastened directly into the wall studs at 16-inch or 24-inch centers to provide the required 1.5-inch nail penetration into solid wood.
- Flashing Pre-Installation: Install kick-out flashing at all roof-to-wall intersections and continuous Z-flashing above windows and doors before applying the starter strip.
Critical Fastening and Expansion Protocols
The most common failure point when contractors evaluate and install CertainTeed panel siding is improper fastening. Vinyl and polymer panels must hang on the wall, not be pinned to it.
Nailing Specifications
Use only electro-galvanized steel or aluminum roofing nails. The nail head must be a minimum of 11/32-inch (8mm) in diameter, and the shank must be 1/8-inch thick. For standard installations, nails must be a minimum of 1.5 inches long to ensure they penetrate the wood stud by at least 3/4-inch, bypassing OSB sheathing and foam insulation.
Managing Thermal Expansion in 12-Foot Runs
Vinyl siding expands and contracts significantly with temperature fluctuations. A standard 12-foot CertainTeed MainStreet or Board & Batten panel will expand approximately 1/2-inch across a 100-degree Fahrenheit temperature swing.
- Center the Nails: Always drive nails in the exact center of the nailing slots to allow equal movement in both directions.
- Overlap Margins: When overlapping horizontal panels, maintain a 1-inch overlap if installing in temperatures above 70°F. If installing in freezing temperatures (below 32°F), increase the overlap to 1.5 inches to prevent the panels from pulling apart and exposing the WRB when summer heat causes the material to expand.
- Terminal Clearances: Leave a minimum 1/4-inch clearance between the panel ends and all J-channels, lineals, or corner posts. In extreme cold, increase this gap to 3/8-inch.
Flashing, Trim, and Lineal Execution
CertainTeed offers a comprehensive trim system designed to integrate with their panel profiles. Evaluating the transition points between the siding and the building envelope is where water management is won or lost.
Window and Door Integration
Avoid using standard J-channel around windows and doors on high-end installations. Instead, utilize CertainTeed’s proprietary vinyl lineals or Cellular PVC trim boards. If using J-channel, you must build it out with backer rod or foam to ensure the panel sits flush and does not wavy-bow around the fenestration.
For vertical Board & Batten installations, water is highly prone to channeling down the grooves. You must install a specialized sill flashing or utility trim with integrated weep holes at the base of all windows to divert water outward, away from the WRB. Refer to the CertainTeed Siding Installation Guide for the exact utility trim part numbers compatible with the 8-inch Board & Batten profile.

Common Installer Deviations and Failure Modes
Even experienced crews make errors when transitioning from wood or fiber cement to vinyl and polymer systems. Watch for these specific deviations during site supervision:
- Face Nailing: Never face-nail a panel to repair a sagging section. Face nailing punctures the weather-shedding surface, creates a leak path, and locks the panel in place, forcing the surrounding material to buckle when it expands. Use a zip tool to unlock the panel, re-hang it properly on the nailing hem, and lock it back into the course below.
- Stretching Panels Around Corners: Do not force or stretch panels to reach a corner post. If a panel is too short, cut it cleanly and use a snap-lock punch tool to create lugs every 6 inches along the cut edge, then secure it with finish trim and trim nails.
- Ignoring Soffit Ventilation: When installing CertainTeed vented soffit panels, ensure the continuous vent strip is not blocked by insulation baffles or improperly placed WRB tape inside the eave. Blocked soffits lead to ice damming and attic moisture accumulation.
Final Evaluation Checklist for Contractors
Before signing off on a completed CertainTeed panel siding installation, run through this technical punch list to ensure warranty compliance and structural integrity:
- Verify all panels slide freely laterally by at least 1/4-inch in both directions.
- Confirm no nail heads are visible on the face of any panel or trim piece.
- Check that all J-channels and corner posts have a 1/4-inch expansion gap at the top and bottom terminations.
- Ensure kick-out flashing is present and properly lapped over the WRB at all roof-wall intersections.
- Validate that the bottom starter strip is level and securely fastened into studs, not just sheathing, to prevent the first course from sagging under wind uplift.
Proper evaluation and execution of these details ensure the CertainTeed system performs as an engineered weather-shedding cladding, protecting the structure for decades while maintaining its aesthetic profile under extreme environmental stress.
Written by
Priya KapoorPriya Kapoor is a real estate market analyst and construction economics researcher with expertise in housing affordability, development feasibility, and infrastructure investment. She holds a Master of Regional Planning from Cornell University and previously worked as a senior analyst at CBRE's Investment Properties group, where she modeled returns for $4B in mixed-use development pipelines. Priya now runs an independent research practice advising developers, municipalities, and REITs on construction cost forecasting and market timing. She publishes the quarterly "BuildMat Market Pulse" report tracking material price indices across 12 commodity categories. Based in Austin, TX, Priya serves on the board of Habitat for Humanity Austin and is a marathon runner.
More from Priya Kapoor
View all
Construction Cost
Cost to Build a 1600 Sq Ft Home in 2026: Full Breakdown
Accurate 2026 cost to build a 1600 sq ft home—material, labor, and regional pricing breakdowns included. Plan your budget with real-time estimates.
Aug 11, 2026

Wood & Lumber
Name the Types of Wood for Pressure Treatment and Preservation
Learn how to name the types of wood best suited for pressure treatment. Compare species treatability, chemical retention levels, and 2026 preservation costs.
Aug 4, 2026

Stone & Masonry
Stone Veneer Suppliers Lindenhurst: 2026 Cost Analysis
Analyze 2026 stone veneer costs in Lindenhurst, NY. Compare local supplier pricing, delivery fees, and Suffolk County installation labor rates.
Aug 4, 2026