Installing the Best Siding Materials: A Pro's Guide
Master the installation of the best siding materials, including fiber cement and engineered wood, with pro-level fastening, flashing, and gap techniques.

Why Installation Dictates the Lifespan of Premium Siding
Selecting the best siding materials for your home is only the first step in protecting your investment. Premium products like fiber cement, engineered wood, and insulated vinyl are engineered to withstand extreme weather, resist pests, and maintain their aesthetic for decades. However, a 50-year material can easily fail in five years if the installation protocol is compromised. The most common point of failure in exterior cladding is not the material itself, but the hidden layers, fastener placement, and moisture management details executed by the crew.
This guide bypasses generic DIY advice and dives into the exact specifications, fastening mechanics, and moisture protocols required to install top-tier siding materials to manufacturer standards in 2026.
The Hidden Layer: Weather Resistive Barriers and Rain Screens
Before any siding panel is lifted, the substrate must be prepared to manage bulk water and vapor. The Building America Solution Center emphasizes that a Weather Resistive Barrier (WRB) is mandatory behind all siding types to prevent sheathing rot.
- Standard WRB: Housewraps like Tyvek CommercialWrap provide basic water resistance but sit flat against the sheathing, limiting drainage.
- Drainable WRB: Products like Benjamin Obdyke HydroGap feature a 1mm gap created by integrated spacers, allowing bulk water to drain freely.
- Furring Strips (Rain Screen): For fiber cement and engineered wood in high-moisture climates, installing 1/4-inch to 3/8-inch vertical furring strips over the WRB creates a true rain screen. This ventilated air gap equalizes pressure and allows the back of the siding to dry, drastically extending paint life and preventing mold.
Installation Matrix: Fastening and Gap Specifications
Different materials expand, contract, and absorb moisture at vastly different rates. Using the wrong fastener or ignoring expansion gaps will cause buckling, cracking, or warranty voidance. Below is the critical specification matrix for the top three premium siding categories.
| Material Type | Fastener Requirement | Min. Penetration | Joint Gap | Cut Edge Treatment |
|---|---|---|---|---|
| Fiber Cement (e.g., James Hardie) | Stainless steel or hot-dipped galvanized (0.113" shank) | 1 inch into framing | 1/8" at joints | No priming required (factory sealed) |
| Engineered Wood (e.g., LP SmartSide) | Hot-dipped galvanized box nails (8d or 12d) | 1.5 inches into framing | 3/16" at joints | Prime all cut edges within 24 hours |
| Insulated Vinyl (e.g., CraneBoard) | Aluminum or galvanized roofing nails | 3/4 inch into framing | 1/4" to 3/8" overlap slot | None (cut with aviation snips) |
Deep Dive: Installing Fiber Cement Lap Siding
Fiber cement remains one of the best siding materials on the market due to its Class A fire rating and dimensional stability. However, its weight and silica content demand strict installation protocols. Always consult the latest James Hardie Installation Guidelines before beginning.
Cutting and Silica Dust Management
Cutting fiber cement generates respirable crystalline silica. OSHA regulations and health best practices require mitigation. Use a polycrystalline diamond (PCD) blade with 4 to 6 teeth on a circular saw equipped with a dust-collection bag attached to a HEPA vacuum. For straight, dust-free cuts, use a score-and-snap tool or fiber cement shears. Never use a high-speed grinder or standard masonry blade, as these create unmanageable dust clouds and fray the board edges.
Fastening Mechanics: Blind vs. Face Nailing
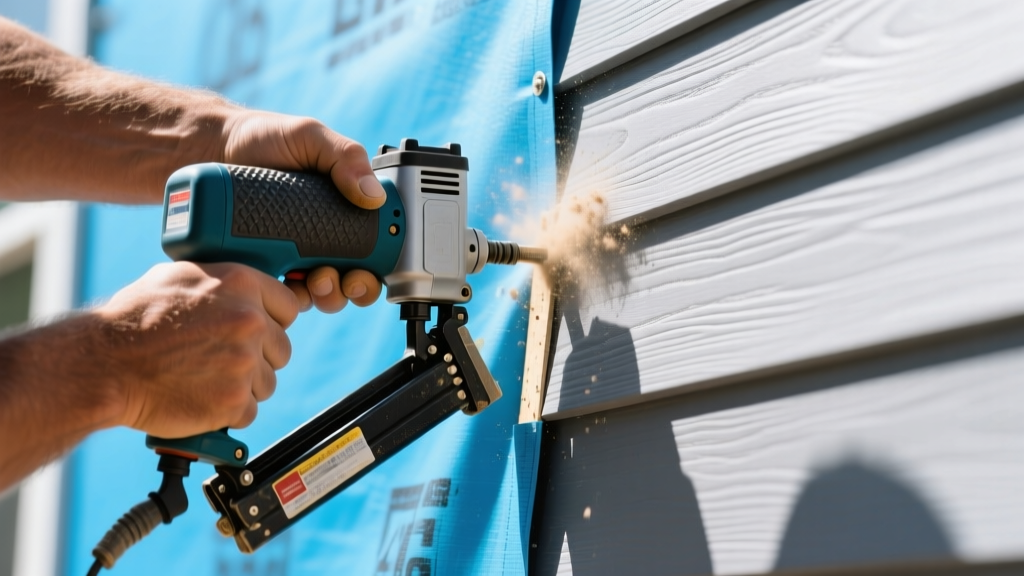
For lap siding (e.g., 6-inch or 8-inch reveal), blind nailing is the preferred method. Drive the nail 3/4-inch down from the top edge of the board. The subsequent course will overlap this nail by at least 1 inch, hiding the fastener and preventing water intrusion through the nail head. If face nailing is required (such as on the bottom course or in high-wind zones), the nail must be driven flush—never countersunk. Countersinking crushes the cementitious matrix, creating a divot that holds water and leads to premature cracking.
Deep Dive: Installing Engineered Wood Siding
Engineered wood, such as LP SmartSide, offers the authentic look of cedar with enhanced structural integrity. It is lighter than fiber cement and installs much like traditional wood, but moisture management at the joints is non-negotiable.
The 3/16-Inch Rule and Edge Sealing
Unlike fiber cement, engineered wood expands significantly when exposed to ambient humidity. The LP SmartSide Installation Guide strictly mandates a 3/16-inch gap at all end joints and a 1/8-inch gap around penetrations like pipes and electrical boxes.
Furthermore, every field cut must be sealed. The exposed wood strands at a cut edge will wick moisture directly into the core if left untreated. Apply a high-quality, 100% acrylic latex or oil-based primer (such as Diamond Vogel SurePrime) to all cut edges, including those around windows and doors, before the board is nailed to the wall.
- Improper Ground Clearance: Installing any siding less than 6 inches above hardscapes (patios, driveways) or 8 inches above soil grade. Capillary action will wick ground moisture into the boards.
- Missing Kick-Out Flashing: Failing to install kick-out flashing where a roofline intersects a sidewall, forcing thousands of gallons of roof runoff directly behind the siding.
- Caulking End Joints: Caulking the end joints of fiber cement or engineered wood. These joints must remain open or be covered with H-metal flashing to allow the wall cavity to breathe and drain.
- Over-driving Nails: Blowing the nail head through the face of the material, compromising the weather seal.
- Skipping Z-Flashing: On horizontal panel installations, omitting Z-flashing at horizontal seams allows water to bypass the WRB.
2026 Labor and Material Cost Expectations
When budgeting for premium cladding, labor often eclipses the material cost, especially for heavy products requiring specialized cutting and multi-person lifts. Below are the national average installed costs for 2026.
- Fiber Cement (Lap): $4.50 - $7.00 per sq. ft. (Materials) | $6.00 - $10.00 per sq. ft. (Labor) | Total: $10.50 - $17.00 per sq. ft.
- Engineered Wood (Lap): $3.50 - $6.00 per sq. ft. (Materials) | $4.50 - $8.00 per sq. ft. (Labor) | Total: $8.00 - $14.00 per sq. ft.
- Insulated Vinyl: $5.00 - $8.50 per sq. ft. (Materials) | $3.00 - $5.50 per sq. ft. (Labor) | Total: $8.00 - $14.00 per sq. ft.
Note: Scaffolding setup, tear-off of existing cladding, and sheathing repairs will add $1.50 to $3.50 per square foot to the final invoice.
Frequently Asked Questions
Can I install new fiber cement directly over existing wood siding?
While physically possible, it is highly discouraged. Existing wood siding is rarely perfectly flat, which will cause the rigid fiber cement to bow, crack, or snap under wind loads. Additionally, installing over old siding traps moisture between the two layers, accelerating rot on the original sheathing. Best practice dictates a complete tear-down to the studs or existing sheathing, followed by a new WRB and rigid foam insulation if required by local energy codes.
What is the best nail gun for installing heavy lap siding?
For fiber cement, a 15-degree coil siding nailer (like the Bostitch N66C-1 or Hitachi NV65AH2) is the industry standard. These tools accept 1-1/4 to 2-1/2 inch stainless steel or hot-dipped galvanized coil nails. Ensure the gun has an adjustable depth-of-drive dial; this is critical for setting the nail head perfectly flush without crushing the cementitious surface.
Written by
Sarah WhitfieldSarah Whitfield is a chartered quantity surveyor (MRICS) and construction cost analyst with 15 years of experience in material pricing, procurement strategy, and project budgeting. She earned her degree in Construction Management from the University of Reading (UK) and has worked on projects ranging from $2M custom homes to $180M mixed-use developments across North America and Europe. Sarah currently leads cost estimating for BuildMat Insight, maintaining a proprietary database of 4,000+ material price points updated quarterly. She is a frequent contributor to RSMeans cost data panels and has presented at the International Cost Engineering Council (ICEC) congress. Based in Denver, CO, Sarah is an avid trail runner and volunteer mentor for Women in Construction.
More from Sarah Whitfield
View all
Wood & Lumber
What Are the Different Types of Wood? A Builder's Guide
Compare structural softwoods, finish hardwoods, and engineered lumber. Analyze Janka ratings, MOE values, and 2026 pricing for construction.
Aug 4, 2026

Walls & Panels
Steel Framing vs Wood Framing: Corrosion and Moisture Defense
Compare steel framing vs wood framing for moisture resistance. Learn about galvanized coatings, condensation risks, and corrosion protection strategies.
Jul 21, 2026

Stone & Masonry
How to Cut Stone Veneer: Wet Saw vs Grinder Comparison
Compare the best tools for cutting stone veneer. We review wet saws, angle grinders, and chop saws to help you achieve clean, chip-free cuts.
Jul 21, 2026