Expert Installation Guide for Outside Siding Materials
Master the installation of outside siding materials with our expert guide. Learn weather-sealing techniques, material prep, and fastening specs.

Substrate Preparation and Weather-Resistive Barriers (WRB)
The longevity of outside siding materials relies entirely on the water management system installed behind them. Before any cladding is unboxed, the substrate must be prepped to handle bulk water intrusion and condensation. Modern building science dictates that a drained and vented rainscreen approach is no longer optional in wet or mixed-humid climates; it is a critical requirement for preventing structural rot.
Begin by inspecting the OSB or plywood sheathing. Replace any panels with edge swelling or delamination. Seal all sheathing seams using a 3-inch wide butyl or acrylic flashing tape for vertical joints, and a 6-inch tape for horizontal joints. For integrated WRB systems like Huber Zip, use the manufacturer-specific liquid flashing at all seams and penetrations.
According to the Building America Solution Center, integrating a textured WRB or installing vertical furring strips (1x3 or 1x4 pine, pressure-treated) over the WRB creates a 3/8-inch to 1-inch drainage gap. This capillary break allows bulk water to drain freely and promotes back-drying of the siding material.
Outside Siding Materials: Fastening and Clearance Matrix
Different cladding profiles react uniquely to thermal expansion, moisture absorption, and wind loads. Use the matrix below to verify your fastening and clearance specifications before loading your nail gun.
| Material Type | Expansion Gap (End Joints) | Fastener Specification | Minimum Ground Clearance | Rainscreen Gap Required? |
|---|---|---|---|---|
| Fiber Cement (Lap) | 1/8 inch | 6d or 8d SS or Hot-Dipped Galv. Ring-Shank | 6 inches above soil | Highly Recommended |
| Vinyl (Horizontal Lap) | 1/4 inch (up to 1/2 in cold) | 1-1/2 in. Electro-Galvanized Roofing Nails | 6 inches above soil | Optional (Built-in) |
| Engineered Wood (Lap) | 3/16 inch | 8d Hot-Dipped Galv. Ring-Shank | 6 inches above soil | Recommended in Wet Zones |
| Steel (Vertical Panels) | 1/8 inch | 1-1/2 in. Self-Drilling Metal Screws w/ Neoprene | 4 inches above soil | Mandatory |
Execution Protocol: Fiber Cement Lap Siding
Fiber cement, such as JamesHardie HardiePlank, remains the dominant premium outside siding material due to its fire resistance and dimensional stability. However, its weight and silica content demand strict installation protocols.
Cutting and Silica Dust Mitigation
OSHA strictly regulates respirable crystalline silica. Do not use a standard circular saw with a masonry blade on-site without a HEPA-filtered dust collection shroud. For low-volume cuts, use fiber cement guillotine shears or polycrystalline diamond (PCD) tipped shears, which score and snap the board, generating zero airborne dust. Always prime and paint all cut edges, especially bottom edges and miter joints, with a 100% acrylic exterior primer to prevent moisture wicking.
Blind Nailing vs. Face Nailing
For blind nailing, position the nail 3/4 inch down from the top edge of the board. The overlapping course must cover the nail head by at least 1 inch. For face nailing, position the nail 1 inch up from the bottom edge. In both cases, drive the nail flush with the surface—never overdrive it, as crushing the cement matrix compromises the board's holding strength and creates a divot that collects water.
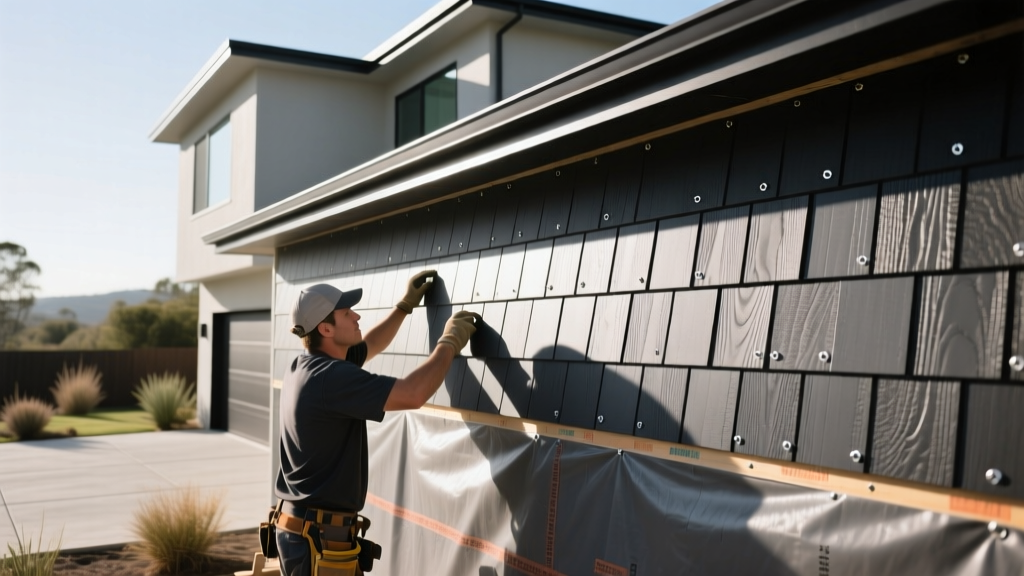
Execution Protocol: Vinyl and Polypropylene Siding
Vinyl siding expands and contracts significantly with temperature fluctuations. A 12-foot panel can expand up to 5/8 inch between winter and summer extremes. The Vinyl Siding Institute mandates a 'hang loose' installation methodology.
- Center the Fastener: Always drive nails in the exact center of the 1/2-inch nailing slots. This allows the panel to slide laterally.
- Leave a Gap: Leave a 1/32-inch gap between the nail head and the vinyl hem. If you pin the vinyl tight to the sheathing, thermal expansion will cause severe buckling and oil-canning.
- Overlap Direction: Overlap vertical end joints by a minimum of 1 inch. Always face the overlap away from the prevailing wind and away from the main entryway to hide the seam.
- Utility Trim: Never caulk the top or bottom courses of vinyl siding. Use utility trim (also known as finish trim or undersill trim) under window sills and at the soffit line to lock the final cut edge of the panel in place while allowing vertical movement.
Flashing and Penetration Details
The most common failure point in exterior cladding is not the field of the wall, but the transitions. Improper flashing at roof-to-wall intersections and window penetrations accounts for over 80% of siding-related moisture damage.
Kick-Out Flashing
Where a sloped roof meets a sidewall, the step flashing must be integrated with a kick-out diverter. This small, angled piece of metal directs roof runoff away from the wall cavity and into the gutter. Omitting kick-out flashing forces thousands of gallons of annual rainwater directly behind the WRB and into the wall assembly. Ensure the kick-out diverter overlaps the WRB and sits beneath the siding material, maintaining a minimum 2-inch clearance above the roof surface.
Pan Flashing at Windows and Doors
Do not rely solely on the window's integral nailing flange. Install a sloped pan flashing system at the rough sill. Apply a continuous bead of polyurethane sealant (such as OSI Quad Max) to the backside of the window flange before setting it into the opening. Tape the side flanges over the WRB, and tape the head flange last, ensuring water sheds downward in a shingle-lap fashion.
2026 Material and Labor Cost Breakdown
Budgeting for outside siding materials requires accounting for both the raw cladding and the specialized labor required for weather-sealing. The following estimates reflect national averages for a standard 2,000-square-foot exterior envelope, including the removal and disposal of one layer of existing siding.
| Material Category | Material Cost (per sq. ft.) | Labor Cost (per sq. ft.) | Total Installed Cost (per sq. ft.) |
|---|---|---|---|
| Standard Vinyl Lap | $1.50 - $2.50 | $2.50 - $4.00 | $4.00 - $6.50 |
| Engineered Wood (e.g., LP SmartSide) | $2.50 - $4.50 | $3.50 - $5.50 | $6.00 - $10.00 |
| Fiber Cement (e.g., JamesHardie) | $3.50 - $5.50 | $4.50 - $7.50 | $8.00 - $13.00 |
| Vertical Steel Panels | $4.00 - $7.00 | $5.00 - $8.00 | $9.00 - $15.00 |
Note: Adding a 1x4 pressure-treated furring strip rainscreen system adds approximately $1.25 to $1.75 per square foot in combined material and labor costs.
Final Inspection and Quality Assurance
Before signing off on the installation, conduct a perimeter walkthrough focusing on clearances. Verify that no siding material terminates less than 6 inches above the finished soil grade to prevent termite ingress and capillary water draw. Check that all J-channels are weep-holed at the bottom corners, and confirm that no caulking was used to seal the bottom edges of lap siding, which would trap water inside the wall cavity. Proper execution of these outside siding materials ensures a durable, low-maintenance exterior that will perform for decades.
Written by
James ThorntonJames Thornton is a construction industry veteran with 25 years of hands-on experience in wood framing, lumber grading, and residential building codes. He started as a framing carpenter in rural Oregon, earned his ICC Residential Building Inspector certification, and eventually became a senior plan reviewer for the City of Portland Bureau of Development Services. James holds a B.S. in Wood Science & Technology from Oregon State University and is a certified lumber grader through the West Coast Lumber Inspection Bureau (WCLIB). He has inspected over 3,000 residential construction sites and authored the city's internal guide on advanced framing techniques (2x6 at 24" O.C.). James lives in Bend, OR, where he builds custom timber-frame cabins and competes in lumberjack sports.
More from James Thornton
View all
Insulation
Best Home Insulation Materials: Complete 2026 Guide
Compare top home insulation materials for 2026. Find R-values, installed costs per square foot, and best uses for fiberglass, spray foam, and mineral wool.
Aug 4, 2026

Sustainable Building
Certify Your Green Building Material for LEED and WELL
Step-by-step guide to certifying a green building material for LEED v5 and WELL v2. Master EPDs, HPDs, and VOC limits for 2026 project specifications.
Aug 4, 2026

Stone & Masonry
Veneer Stacked Stone Panels: Interior Design & Style Showcase
Discover how veneer stacked stone panels transform interiors. Explore modern design profiles, material pairings, and technical installation specs.
Aug 4, 2026