How to Repair and Maintain Common Types of Siding Material
Diagnose and fix exterior cladding issues. Learn specific repair techniques, material costs, and maintenance schedules for all common types of siding material.

Exterior cladding serves as the primary shield against moisture, UV radiation, and thermal shifting. When evaluating the various types of siding material, longevity is dictated less by the initial installation and more by the rigor of ongoing maintenance and the precision of targeted repairs. A hairline fracture in stucco or a compromised expansion joint in vinyl can rapidly escalate into structural sheathing rot if ignored. This guide provides a diagnostic framework and material-specific repair protocols to preserve your building envelope.
Diagnostic Triage: Identifying Siding Failure Modes
Before purchasing replacement materials or sealants, accurately diagnose the failure. Different types of siding material exhibit distinct stress signatures when exposed to environmental loads.
| Visible Symptom | Primary Material Affected | Root Cause | Immediate Action Required |
|---|---|---|---|
| Wavy, buckled panels | Vinyl | Nailed too tightly; thermal expansion restricted | Re-nail with 1/32" clearance; check locking hems |
| Bottom edge crumbling | Fiber Cement | Capillary moisture wicking from soil/splash zones | Clear debris; apply elastomeric bottom-edge sealer |
| Stepped diagonal cracking | Stucco / Masonry | Foundation settlement or structural framing shift | Monitor for 30 days; consult structural engineer if widening |
| Soft, spongy depressions | Wood / Engineered Wood | Fungal decay behind paint film; trapped moisture | Probe with awl; excise rot; treat with borate solution |
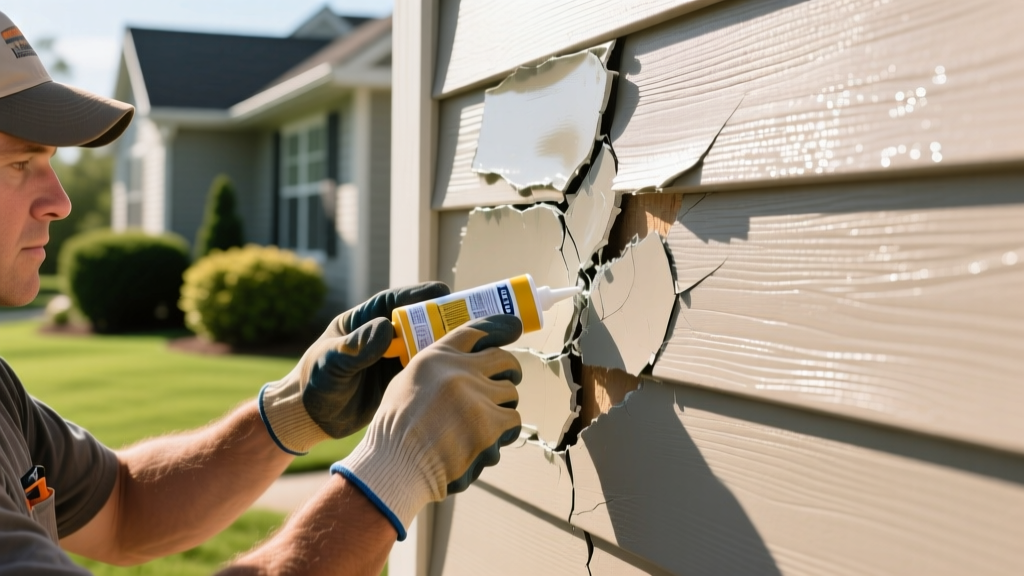
Vinyl Siding: Thermal and Impact Repairs
Vinyl is highly susceptible to thermal expansion and contraction. A standard 10-foot vinyl panel can expand or contract by up to 5/8 of an inch across a 100°F temperature swing. When repairing impact damage (e.g., from hail or landscaping equipment), the primary error homeowners make is cutting the replacement piece to the exact measurement of the gap.
The Zip-Tool Replacement Protocol
To replace a shattered vinyl course without dismantling the entire wall:
- Insert a specialized zip tool (such as the Malco Sideswipe) under the overlapping course above the damaged piece.
- Pull downward and slide horizontally to unhook the interlocking hem.
- Extract the nails securing the damaged piece using a flat pry bar, taking care not to tear the weather-resistive barrier (WRB) beneath.
- Cut the replacement vinyl panel 1/4 inch shorter than the measured gap if installing in temperatures above 70°F, or 3/8 inch shorter if installing below 40°F. This prevents future buckling.
- Nail the new piece centrally in the nailing slots, leaving a 1/32-inch gap between the nail head and the vinyl to allow lateral movement.
- Hook the zip tool onto the top lip of the new piece and snap the overlapping course back into place.
Fiber Cement: Moisture Wicking and Paint Adhesion
Fiber cement (such as James Hardie products) is impervious to rot and insects, but it acts like a dense sponge at unsealed cut edges. According to manufacturer warranty and maintenance guidelines, failure to maintain proper clearances and sealants will void product coverage.
The 2-Inch Ground Clearance Rule
The most common failure point for fiber cement is the bottom course. If the siding touches soil, mulch, or concrete flatwork, capillary action will draw moisture upward into the board, causing the bottom edge to swell, delaminate, and crumble. Maintain a strict 2-inch clearance above grade and a 1-inch clearance above roofs or decks. If the bottom edge is already compromised, scrape away the friable material, treat the area with a masonry consolidator, and coat the exposed bottom edge with a high-build elastomeric waterproofing membrane.
Joint and Flashing Maintenance
Unlike wood, fiber cement does not expand and contract significantly with temperature, but it does absorb moisture and swell slightly. Do not use rigid polyurethane caulks at butt joints. Instead, use a high-grade elastomeric sealant like OSI Quad Max, which can handle up to 300% joint movement. Inspect all horizontal flashings annually; if water is wicking behind the siding, the Z-flashing is likely clogged with debris or installed backward.
Wood and Engineered Wood: Rot and Insect Mitigation
Natural wood (cedar, redwood) and engineered wood (like LP SmartSide) require rigorous moisture management. The EPA emphasizes that controlling moisture is the only way to prevent the fungal decay that destroys wood cladding.
Structural Epoxy Fills for Localized Rot
When woodpeckers or localized moisture intrusion create cavities in wood siding, standard exterior spackle will fail within a single freeze-thaw cycle. For a permanent repair:
- Excavate: Use a rotary tool to remove all soft, discolored wood until you reach hard, sound fibers.
- Treat: Brush a liquid borate solution (e.g., Bora-Care) into the cavity to kill existing fungal spores and deter carpenter ants.
- Fill: Use a two-part structural epoxy wood filler, such as Abatron WoodEpox. Mix the resin and hardener in a 1:1 ratio. Press it firmly into the cavity, overfilling slightly.
- Finish: Once cured (typically 2-4 hours at 70°F), the epoxy can be sanded, routed, and painted exactly like natural wood. It will not shrink or absorb moisture.
"Engineered wood siding features a resin-saturated overlay that resists moisture, but the cut ends remain highly vulnerable. Always prime field cuts with the manufacturer-specified end-sealer before installation, and reapply during any repair work to maintain the moisture barrier."
Stucco and Synthetic Stone: Crack Injection vs. Patching
Stucco is a rigid, cementitious system. The National Park Service's Preservation Brief on historic stucco notes that while hairline crazing is normal, larger cracks indicate substrate failure. Modern synthetic stucco (EIFS) requires entirely different repair protocols due to its foam-insulation core.
Repairing Traditional Hard-Coat Stucco
For cracks wider than 1/16 inch, surface patching will inevitably fail because the crack will telegraph through the new material. You must use a routing and injection method:
- Use a masonry blade to widen the crack into a 'V' channel, approximately 1/4 inch wide and 1/4 inch deep.
- Vacuum the channel to remove all dust and loose aggregate.
- Inject a polyurethane concrete crack sealant (such as Sikaflex Self-Leveling) deep into the channel to bond the two sides of the fracture and allow for minor structural flexing.
- Once the sealant cures, apply a polymer-modified stucco patching compound over the top, texturing it with a stiff bristle brush or sponge to match the surrounding finish coat.
Preventative Maintenance Matrix
Relying solely on reactive repairs reduces the lifespan of all types of siding material by up to 40%. Implement this seasonal maintenance schedule to preserve the cladding and the underlying weather-resistive barrier.
| Season | Critical Maintenance Task | Required Tools / Materials |
|---|---|---|
| Early Spring | Clear bottom-edge obstructions; inspect for winter ice-dam water intrusion behind fascia. | Leaf blower, moisture meter, flashlight |
| Late Spring | Low-pressure wash to remove fungal spores and pollen; inspect caulking at windows and penetrations. | Garden hose, soft-bristle brush, oxygen bleach |
| Autumn | Clean gutters to prevent overflow cascading onto siding; trim vegetation 12 inches away from walls. | Gutter scoop, pruning shears, ladder stabilizer |
| Winter | Monitor for ice buildup at eaves; ensure attic ventilation is preventing interior condensation from freezing on exterior sheathing. | Roof rake, infrared thermometer |
Repair Cost Estimates and DIY Thresholds
Understanding the financial threshold between DIY repairs and professional remediation is critical for property management. Costs below reflect 2026 national averages for materials and professional labor.
- Vinyl Panel Replacement: DIY costs $15-$30 per panel. Professional repair typically carries a $250 minimum service call fee, making DIY highly cost-effective for isolated impact damage.
- Fiber Cement Repainting/Sealing: DIY touch-up kits cost $35-$50. Full professional repainting of a 2,000 sq. ft. facade ranges from $4,500 to $7,000 due to the required scaffolding and specialized masonry primers.
- Wood Rot Excision and Epoxy Fill: DIY materials cost under $60 per repair zone. Professional carpentry repair averages $95 to $150 per hour, often requiring full board replacement rather than patching, pushing costs to $300+ per localized area.
- Stucco Crack Injection: DIY sealants and patching compounds cost $40-$80. Professional stucco remediation for structural cracking requires mesh reinforcement and full re-coating, costing $12 to $18 per square foot.
Maintaining the integrity of your building envelope requires matching the repair technique to the specific physical properties of the cladding. By respecting thermal movement in vinyl, managing capillary action in fiber cement, and utilizing structural epoxies in wood, you can extend the functional lifespan of your exterior siding well beyond its standard warranty period.
Written by
Priya KapoorPriya Kapoor is a real estate market analyst and construction economics researcher with expertise in housing affordability, development feasibility, and infrastructure investment. She holds a Master of Regional Planning from Cornell University and previously worked as a senior analyst at CBRE's Investment Properties group, where she modeled returns for $4B in mixed-use development pipelines. Priya now runs an independent research practice advising developers, municipalities, and REITs on construction cost forecasting and market timing. She publishes the quarterly "BuildMat Market Pulse" report tracking material price indices across 12 commodity categories. Based in Austin, TX, Priya serves on the board of Habitat for Humanity Austin and is a marathon runner.
More from Priya Kapoor
View all
Construction Cost
Cost to Build a 1600 Sq Ft Home in 2026: Full Breakdown
Accurate 2026 cost to build a 1600 sq ft home—material, labor, and regional pricing breakdowns included. Plan your budget with real-time estimates.
Aug 11, 2026

Wood & Lumber
Name the Types of Wood for Pressure Treatment and Preservation
Learn how to name the types of wood best suited for pressure treatment. Compare species treatability, chemical retention levels, and 2026 preservation costs.
Aug 4, 2026

Stone & Masonry
Stone Veneer Suppliers Lindenhurst: 2026 Cost Analysis
Analyze 2026 stone veneer costs in Lindenhurst, NY. Compare local supplier pricing, delivery fees, and Suffolk County installation labor rates.
Aug 4, 2026