1/2-Inch Gypsum Board Installation: Pro Techniques
Master 1/2-inch gypsum board installation with pro techniques for framing, fastening, and finishing. Includes 2026 cost data and fastener schedules.

The Benchmark of Interior Construction: 1/2-Inch Gypsum Board
Standard 1/2-inch gypsum board remains the undisputed baseline for interior wall and ceiling assemblies in both residential and light commercial construction. Weighing approximately 1.6 pounds per square foot for standard panels—and dropping to 1.25 pounds per square foot for advanced lightweight formulations like USG Sheetrock UltraLight Panels—this thickness balances acoustic mass, fire resistance, and structural rigidity. However, the performance of any 1/2 gypsum board assembly is entirely dependent on the precision of its installation. Improper fastener schedules, ignored framing tolerances, and rushed taping sequences will compromise the fire rating and guarantee visible defects under critical lighting.
This guide details the exact installation techniques, fastener schedules, and finishing protocols required to achieve a Level 4 or Level 5 finish with 1/2-inch panels, reflecting current 2026 material standards and building codes.
Pre-Installation: Framing Tolerances and Acclimation
Before a single sheet of 1/2 gypsum board is lifted, the underlying substrate must be verified. The Gypsum Association's GA-216 standard mandates strict framing tolerances to prevent joint ridging and fastener pops.
Material Acclimation Protocol
Store 1/2-inch panels flat on a level surface in the interior environment where they will be installed. Maintain a minimum temperature of 55°F (13°C) for at least 48 hours before hanging. Do not stack panels higher than 9 inches to prevent edge crushing and core fracturing on the bottom sheets.
Hanging Sequence: Ceilings First, Walls Second
The universal rule of drywall installation is to hang ceilings before walls. This allows the wall panels to push up tightly against the ceiling panels, creating a structural wedge that supports the ceiling edges and hides the seam in the upper corner.
Ceiling Framing Spacing Limits
When installing standard 1/2-inch gypsum board on ceilings, framing spacing is the critical variable. Standard 1/2-inch panels require joists spaced at a maximum of 16 inches on center (o.c.) when installed perpendicular to the framing. If the joists are spaced 24 inches o.c., you must upgrade to a specialized sag-resistant 1/2-inch product (such as USG Sheetrock UltraLight or CertainTeed AirRenew) or use 5/8-inch board. Applying standard 1/2 gypsum board to 24-inch o.c. ceiling joists will result in visible sagging between joists within 12 to 18 months due to gravity and ambient humidity absorption.
Staggering Seams and Edge Management
- End Joints: Stagger end joints by a minimum of 4 feet in both directions to prevent a weak plane that invites cracking.
- Butt Joints: Avoid butt joints (taperless ends) whenever possible. When unavoidable, stagger them and install a backing block or use a specialized butt-hanger clip to recess the joint slightly, mimicking a factory-tapered edge.
- Expansion Gaps: Maintain a 1/8-inch gap between adjacent panels and at abutments to structural elements to allow for thermal and hygroscopic expansion.
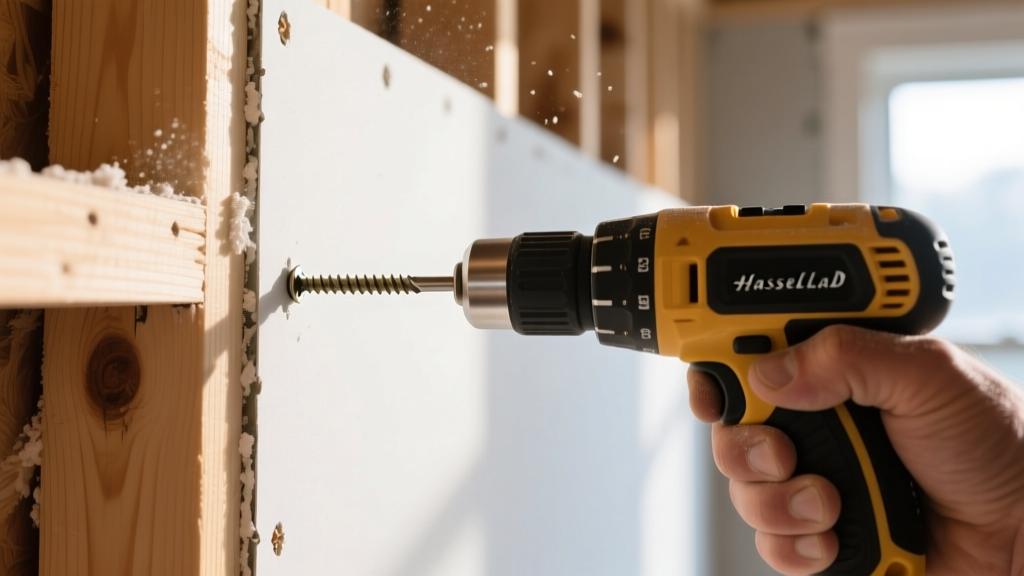
Fastener Selection and Driving Depth
Using the correct fastener type and driving it to the exact depth is what separates professional assemblies from DIY failures. The fastener head must create a 'dimple' in the face paper without breaking the paper or fracturing the gypsum core.
| Framing Type | Fastener Specification | Edge Spacing | Field Spacing |
|---|---|---|---|
| Wood Studs / Joists | 1-1/4' Coarse-Thread Drywall Screw (Type W) | 8 inches o.c. | 16 inches o.c. |
| Steel Studs (25ga - 20ga) | 1' Fine-Thread Drywall Screw (Type S) | 8 inches o.c. | 16 inches o.c. |
| Steel Studs (18ga - 16ga) | 1-1/4' Self-Drilling Fine-Thread Screw (Type S-12) | 8 inches o.c. | 16 inches o.c. |
Taping and Mudding: The 3-Coat System
Achieving a flawless Level 4 finish on 1/2 gypsum board requires a strict three-coat methodology. Relying on a single lightweight compound for all coats is a primary cause of joint banding and shrinkage cracks.
Coat 1: Bedding and Taping
Use a setting-type joint compound (e.g., USG Durabond 45 or Sheetrock Brand Easy Sand 45) for the first coat. Setting compounds undergo a chemical curing process rather than drying by evaporation, resulting in minimal shrinkage and high tensile strength. Apply the compound with a 6-inch taping knife, embed paper tape firmly into the bed, and wipe off excess mud. Note: Do not use paper tape with setting compounds on inside corners if you are inexperienced; the fast setup time makes corner folding difficult. Use pre-creased paper or specialized composite tape like Straus Strait-Flex.
Coat 2: Filling and Feathering
Once the first coat is fully cured, apply a second coat using a lightweight all-purpose or topping compound (e.g., USG Sheetrock Plus 3). Use a 10-inch knife to feather the edges at least 2 inches beyond the first coat. The goal is to fill the tapered depression completely, bringing the joint flush with the panel face.
Coat 3: Final Skim and Blending
The third coat uses a high-build finishing compound applied with a 12-inch or 14-inch flat trowel. This coat blends the joint into the field of the board. Maintain consistent pressure to avoid leaving heavy ridges. After drying, sand lightly with 220-grit sandpaper or a fine sanding sponge. For Level 5 finishes, follow this with a skim coat of diluted topping compound or a specialized primer-surfacer like USG First Coat over the entire surface.
Common Failure Modes and Troubleshooting
Even with premium 1/2-inch materials, environmental and mechanical errors manifest as specific visual defects. Consult the Northwest Wall and Ceiling Bureau (NWCB) industry standards for deep-dive defect analysis, but recognize these primary field issues:
- Screw Pops: Manifest as small circular ridges or popped heads. Cause: Wood framing shrinkage or panels not pulled tight to the stud during fastening. Fix: Drive a new screw 1 inch above the pop, dimple it, and patch both holes with setting compound.
- Joint Ridging: A visible raised line along the seam. Cause: Compression of the panels due to high humidity during installation, followed by expansion, or framing deflection. Fix: Sand the ridge flat, apply a wide skim coat (minimum 16 inches) to transition the hump gradually, and prime with a flat paint to minimize light glare.
- Tape Blistering: Air pockets under paper tape. Cause: Insufficient bedding compound or applying compound over a dusty/dirty panel surface. Fix: Slit the blister, inject setting compound with a putty knife, and skim over the repair.
2026 Material Cost and Labor Estimates
Budgeting for 1/2 gypsum board installation requires accounting for both raw material fluctuations and regional labor rates. The table below outlines national average costs for 2026, excluding demolition and specialized soundproofing assemblies.
| Line Item | Unit Cost (Materials) | Labor Cost (per sq. ft.) | Total Installed (per sq. ft.) |
|---|---|---|---|
| Standard 1/2' Regular Board | $0.45 - $0.55 / sq. ft. | $1.10 - $1.45 | $1.55 - $2.00 |
| 1/2' Lightweight Ultra-Panel | $0.55 - $0.70 / sq. ft. | $1.05 - $1.35 | $1.60 - $2.05 |
| 1/2' Mold/Moisture Resistant | $0.65 - $0.85 / sq. ft. | $1.15 - $1.50 | $1.80 - $2.35 |
| Level 5 Finishing Upgrade | $0.15 / sq. ft. (skim) | $0.60 - $0.90 | $0.75 - $1.05 (add-on) |
While lightweight 1/2-inch panels carry a 15% to 20% material premium over standard boards, they reduce hanging labor time by up to 25% due to ergonomic handling, often resulting in a net-neutral or slightly cheaper total installed cost for multi-story residential projects where material staging and transport are significant labor sinks.
Written by
David NakamuraDavid Nakamura is a licensed architect (AIA) and construction technology writer focused on sustainable building methods, mass timber engineering, and high-performance building envelopes. He holds a Master of Architecture from the University of Washington and is a certified Passive House Consultant (CPHC). David spent eight years at the Seattle firm Mithun, where he led the design of three LEED Platinum projects, before founding his own practice specializing in net-zero residential design. He serves on the editorial advisory board of GreenBuilder Magazine and has authored peer-reviewed papers on cross-laminated timber (CLT) connections for the Journal of Structural Engineering. In his spare time, David teaches woodworking at Pratt Fine Arts Center and kayaks the Puget Sound.
More from David Nakamura
View all
Construction Cost
Labor Cost to Build a Deck Per Sq Ft: 2026 Installation Guide
Discover the exact labor cost to build a deck per sq ft in 2026. This installation guide breaks down contractor rates, complexity factors, and hidden fees.
Aug 4, 2026

Construction Cost
How Much Does It Cost to Build a 3 Bedroom House? Financing Guide
Learn exactly how much it costs to build a 3 bedroom house and explore 2026 financing options, construction loan types, and budget frameworks for your build.
Aug 4, 2026

Construction Cost
Cost to Build a Tennis Court: 2026 Guide
How much does it cost to build a tennis court in 2026? Breakdowns for asphalt, concrete, and synthetic surfaces plus fencing and lighting.
Jul 30, 2026