Precision Gypsum Board Installation: Pro Framing & Fastening Guide
Master gypsum board installation with pro framing tips, exact screw patterns, and joint treatments. Avoid callbacks with these advanced contractor techniques.

The Foundation: Framing Tolerances for Flawless Gypsum Board Installation
Successful gypsum board installation begins long before the first panel is lifted. The underlying framing dictates the flatness, structural integrity, and crack-resistance of the finished wall. According to the Gypsum Association Standards (GA-216), framing members must not deviate more than 1/8 inch in 8 feet from the plane of the framing. Any bowing or twisting beyond this tolerance will telegraph through the finished surface, causing visible ridges and shadowing under critical lighting.
Wood vs. Steel Stud Preparation
When framing with wood, moisture content is the primary enemy. Lumber must be kiln-dried and acclimated to the interior environment, with a moisture content below 15% before hanging begins. High-moisture studs will shrink as they dry, pulling the fasteners with them and causing widespread nail pops. For steel stud assemblies, verify the gauge thickness. While 25-gauge studs are common in non-load-bearing partitions, 20-gauge or heavier is required for ceilings, fire-rated Type X assemblies, and walls subject to impact or heavy fixtures.
Never install gypsum board over green or high-moisture timber. If framing lumber exceeds 19% moisture content, delay the installation. As the wood dries and shrinks, it will compromise the holding power of Type W screws, leading to catastrophic fastener pop-outs during the taping phase.
Fastening Protocols: Screw Patterns and Penetration Depths
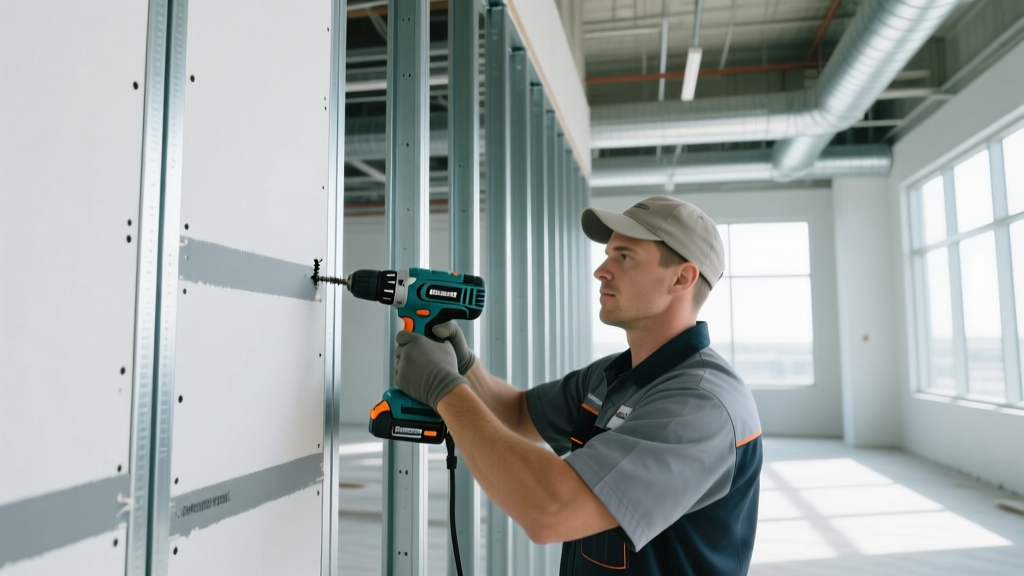
Modern gypsum board installation relies almost exclusively on collated screw guns equipped with depth-sensitive nosepieces (such as the Makita XSF03Z or Bosch GSR18V-4900B). These tools ensure the bugle head of the screw dimples the gypsum core exactly 1/32 inch below the face paper without breaking the paper surface. If the paper is torn, the fastener loses its holding power and must be abandoned, with a new screw placed 2 inches away.
Fastener Spacing Matrix
Adhering to precise spacing matrices is critical for structural shear capacity and fire-resistance ratings. The following table outlines the maximum allowable spacing based on USG Sheetrock Drywall Guidelines and standard building codes.
| Application | Framing Spacing | Field Fastener Spacing | Edge Fastener Spacing |
|---|---|---|---|
| Walls (1/2" or 5/8") | 16" O.C. | 16" O.C. | 8" O.C. |
| Walls (1/2" or 5/8") | 24" O.C. | 12" O.C. | 8" O.C. |
| Ceilings (1/2" or 5/8") | 16" or 24" O.C. | 12" O.C. | 7.5" to 8" O.C. |
Screw Selection: Use Type W (coarse thread) for wood studs, Type S (fine thread, self-drilling) for steel studs up to 14-gauge, and Type G (coarse thread to coarse thread) for floating interior angles or multi-layer applications.
Advanced Hanging Techniques to Prevent Seam Cracks
Cracking is rarely a failure of the joint compound; it is almost always a failure of installation technique and structural movement accommodation. Implement these advanced hanging methods to eliminate callbacks:
- Floating Inside Corners: Do not fasten the gypsum board within 7 inches of an inside corner on the intersecting wall. This allows the wall framing to flex independently without tearing the tape at the corner junction.
- Staggering End Joints: Stagger vertical end joints by a minimum of 4 feet between adjacent rows. Aligning butt joints creates a continuous weak plane that will inevitably crack under thermal expansion or structural settling.
- Back-Blocking Butt Joints: Factory edges are tapered, but butt joints are not. Install proprietary back-blocks (such as USG Sheetrock Brand Back-Blocking) or scrap lumber behind butt joints to create an artificial taper. This allows the taper to absorb the joint compound, preventing the raised ridge effect known as "joint banding."
- Cutout Precision: When cutting around electrical boxes, measure from the nearest installed edge, not the framing. Use a drywall router (e.g., DeWalt DW660) with a 1/8-inch spiral bit, cutting from the back side of the panel whenever possible to prevent face-paper tear-out on the finished side.
Joint Treatment and Taping Sequences
The finishing phase transforms a structural partition into a seamless surface. The Association of the Wall and Ceiling Industry (AWCI) defines six levels of finish, with Level 4 (standard residential) and Level 5 (premium/skim-coated) being the most common. The critical error contractors make is mismatching the tape type with the embedding compound.
If you choose fiberglass mesh tape (like FibaTape) for its speed and blister-resistance, you must use a setting-type compound (e.g., USG DuraBond 90 or Easy Sand 45) for the embedding coat. Drying-type compounds (All-Purpose) lack the early tensile strength to restrain the mesh, leading to widespread seam cracking. Paper tape, conversely, relies on the capillary action and drying shrinkage of All-Purpose mud to lock into the paper face.
The Three-Coat System
- Taping Coat: Embed the tape using a 10-inch or 12-inch knife. Apply sufficient pressure to squeeze out excess compound, leaving a thin, tight layer beneath the tape. Do not over-wipe, which starves the joint and causes blisters.
- Filler Coat: Apply a setting-type or heavy-body drying compound, feathering the edges out to 14 inches. This coat builds the mass required to fill the factory taper.
- Finish Coat: Use a lightweight topping compound (e.g., Sheetrock Brand UltraLightweight Topping). Feather the edges to 18-24 inches using a 14-inch trowel. This compound sands easily and minimizes tool marks.
"A Level 5 finish is not merely an extra coat of paint; it requires a continuous skim coat of joint compound or a specialized primer-surfacer applied over the entire surface to equalize the porosity between the gypsum face paper and the joint treatments, eliminating joint banding under gloss paints or oblique natural light."
Troubleshooting Common Installation Failures
Even experienced crews encounter anomalies. Use this diagnostic matrix to identify and correct failures before the final paint inspection.
| Symptom | Root Cause | Corrective Action |
|---|---|---|
| Nail/Screw Pops | Framing shrinkage, improper screw depth, or panel not pulled tight to stud. | Drive a new screw 2" away, dimpling the core. Knock the popped screw deeper, patch with setting compound, and re-tape. |
| Joint Banding (Visible Seams) | Differential porosity between paper and mud, or inadequate feathering. | Upgrade to a Level 5 finish. Apply a continuous skim coat or use a high-build drywall primer-surfacer before painting. |
| Ridge at Butt Joints | Lack of a tapered edge; compound buildup over a flat joint. | Sand heavily. For future installs, use back-blocking to create an artificial taper or hang panels horizontally to minimize butt joints. |
| Tape Blisters | Insufficient embedding compound under the tape or over-wiping during taping. | Slit the blister, inject all-purpose mud with a taping knife, and apply a thin filler coat over the repaired area. |
Mastering gypsum board installation requires shifting focus from mere speed to precision execution. By controlling the framing environment, adhering to strict fastener matrices, and respecting the chemical requirements of joint compounds, contractors can deliver monolithic, crack-free surfaces that withstand the test of time and environmental stress.
Written by
Marcus ChenMarcus Chen is a licensed structural engineer (PE) and building materials analyst with over 12 years of experience across residential, commercial, and industrial construction. He holds a Master of Science in Civil Engineering from UC Berkeley and spent six years at Thornton Tomasetti before transitioning to independent consulting and technical writing. Marcus specializes in material selection for seismic-prone regions, concrete reinforcement strategies, and lifecycle cost analysis. His work has been cited by the American Concrete Institute (ACI) and the Structural Engineers Association of California (SEAOC). When he is not on a job site or at his desk, you will find him hiking the Sierra Nevada or restoring a 1920s craftsman bungalow in Oakland, CA.
More from Marcus Chen
View all
Construction Cost
How Much Did the Eiffel Tower Cost to Build?
How much did the Eiffel Tower cost to build in 1889? We adjust for inflation and compare its budget to modern skyscraper construction.
Aug 4, 2026

Fire Resistance
What Is a Fire Resistant Material? Testing & Certification Guide
Discover what is a fire resistant material through ASTM and UL testing. Learn how fire ratings, certifications, and assemblies work in construction.
Aug 4, 2026

Construction Cost
How Much Did the Burj Khalifa Cost to Build?
How much did the Burj Khalifa cost to build? We break down the $1.5B project and extract 5 money-saving strategies for your next build.
Jul 30, 2026