1/4 Drywall Applications: Scenario Matching for Quarter-Inch Board
Discover exact scenarios where 1/4 drywall outperforms standard boards. Learn bending limits, resurfacing techniques, and framing requirements.
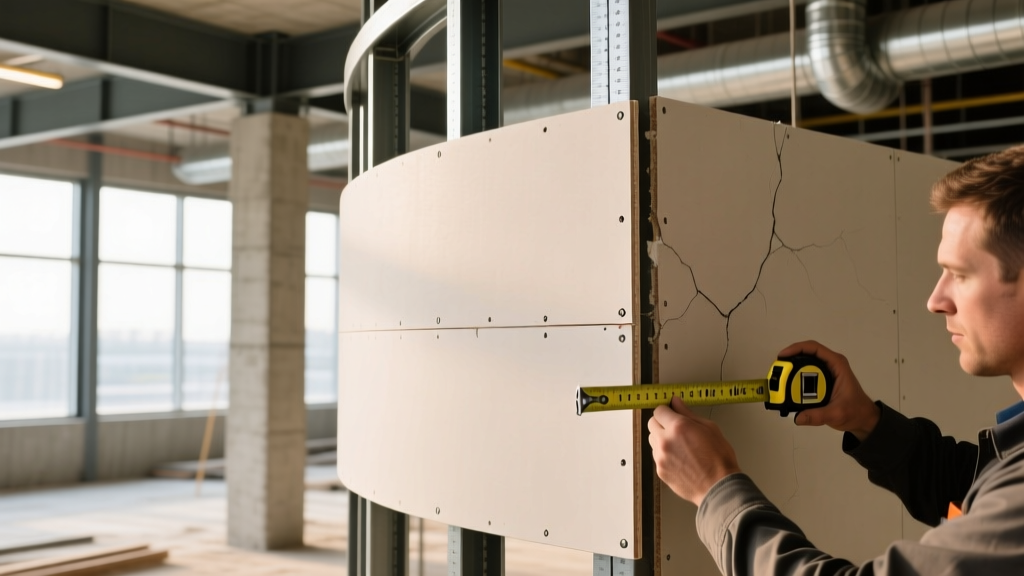
The Physics of 1/4-Inch Gypsum Board
Quarter-inch gypsum board is a highly specialized building material that is frequently misapplied by general contractors who treat it as a mere thinner alternative to standard 1/2-inch panels. In reality, 1/4 drywall possesses distinct physical properties—specifically regarding tensile flexibility and weight-to-area ratios—that make it the mandatory choice for specific architectural and renovation scenarios. Misapplying it on standard 16-inch on-center (OC) wall framing will result in catastrophic sagging and impact failure, while utilizing it correctly can save thousands of dollars in demolition and reframing costs.
Core Material Specifications
- Nominal Thickness: 1/4 inch (6.4 mm)
- Weight: Approximately 1.2 lbs per square foot (a 4x8 sheet weighs roughly 38 lbs, compared to 52 lbs for standard 1/2-inch)
- Core Density: Lower density than Type X or standard panels to facilitate bending
- Bending Radius (Dry): 60 inches (5 feet) minimum
- Bending Radius (Wet): 30 inches (2.5 feet) minimum, depending on manufacturer
The Scenario Matching Matrix
Selecting the correct gypsum panel requires matching the physical constraints of the job site to the material's mechanical limits. The following matrix outlines exactly when 1/4 drywall is the superior choice, and when it must be rejected in favor of thicker alternatives.
| Application Scenario | 1/4-Inch Board | 1/2-Inch Standard | 5/8-Inch Type X | Primary Decision Factor |
|---|---|---|---|---|
| Curved Walls & Arches | Optimal | Poor (Requires scoring) | Fail | Flexibility and bending radius |
| Resurfacing Existing Plaster | Optimal | Acceptable (Adds bulk) | Poor (Too heavy) | Weight load on existing lath/framing |
| Manufactured / Mobile Homes | Optimal | Acceptable | Poor | Overall structure weight reduction |
| Constrained Layer Soundproofing | Optimal (w/ damping compound) | Good | Good | Mass-Spring-Mass decoupling dynamics |
| Standard 16" OC Wall Framing | Fail | Optimal | Optimal | Impact resistance and sag prevention |
| Ceiling Joists (16" or 24" OC) | Fail | Optimal (16" OC) | Optimal (24" OC) | Gravitational sag resistance |
Execution Guide: Curved Walls and Arches
When designing radiused walls, barrel ceilings, or arched doorways, 1/4 drywall is the industry standard. According to the Gypsum Association guidelines for panel application, the method of installation dictates the minimum achievable radius.
Dry Bending vs. Wet Bending Protocols
- Dry Bending (Radii > 60 inches): For gentle curves, 1/4-inch panels can be bent dry. The panel must be installed with the long dimension perpendicular to the framing. Fasteners should be placed every 6 inches along the edges and 8 inches in the field to pull the board tightly against the curved studs.
- Wet Bending (Radii 30 to 60 inches): For tighter curves, the face paper must be lightly sponged with clean water. Allow the moisture to penetrate the gypsum core for 15 to 30 minutes. This temporarily relaxes the crystalline structure of the gypsum. Install the panel immediately while damp, starting from the center of the curve and working outward. Warning: Do not over-saturate the paper, as this will degrade the bond between the paper face and the gypsum core, leading to delamination.
- Scoring the Back Paper (Radii < 30 inches): For extremely tight columns or arches, wet bending is insufficient. You must score the back paper and break the gypsum core at 1-inch to 2-inch intervals along the length of the curve, leaving the face paper intact to act as a hinge.
Execution Guide: Resurfacing Existing Plaster
In renovation projects involving cracked or failing horsehair plaster over wood lath, tearing out the existing wall is often cost-prohibitive and creates massive dust containment issues. Overlaying with 1/4 drywall is the preferred remediation strategy.
To prevent the new 1/4-inch layer from telegraphing the underlying plaster cracks, you must isolate the two layers. Apply a continuous bead of acoustic sealant or a specialized drywall adhesive (such as USG SheetRock Brand Adhesive) to the existing plaster. Fasten the 1/4-inch board using 1-1/4 inch coarse-thread drywall screws. Screw spacing must be strictly maintained at 7 inches on the edges and 12 inches in the field to ensure the thin panel does not bubble or detach from the uneven substrate behind it.
This method adds only 1/4 inch to the room's dimensions, minimizing the need to extend electrical outlet boxes or adjust door jambs, which is a major hidden cost when using 1/2-inch overlays.
Advanced Acoustic Application: Constrained Layer Damping
While mass is generally the enemy of sound transmission, high-end acoustic isolation relies on decoupling and damping. In a Constrained Layer Damping (CLD) assembly, a viscoelastic damping compound (like Green Glue) is sandwiched between two layers of drywall.
Using 1/4 drywall as the secondary, interior layer in a CLD setup is a highly effective, space-saving technique. The 5/8-inch base layer provides the primary mass to block low-frequency sound waves, while the damping compound converts acoustic energy into negligible heat. The 1/4-inch face layer acts as the constraining layer, forcing the damping compound to shear as the wall vibrates. This specific configuration yields an STC (Sound Transmission Class) improvement of 10-15 points over a standard single-layer wall, without the extreme weight penalty of using two layers of 5/8-inch Type X board. For detailed framing requirements in acoustic assemblies, contractors should consult the USG Application and Finishing technical data sheets.
Critical Failure Modes to Avoid
⚠️ High-Risk Installation Errors
- Ceiling Sagging: Never install 1/4-inch drywall on standard ceiling joists spaced at 16" or 24" OC. The panel lacks the structural rigidity to support its own weight against gravity over time, resulting in visible pillowing between joists within months.
- High-Traffic Impact Zones: Do not use 1/4-inch board as the primary wall surface in hallways, commercial corridors, or garages. A standard doorknob impact or moving furniture will easily puncture the 1/4-inch core.
- Improper Taping: The tapered edges on 1/4-inch panels are significantly shallower than those on 1/2-inch panels. Using standard paper tape and heavy all-purpose mud will create a visible bulge. Use ultra-thin fiberglass mesh tape and lightweight setting-type compound (e.g., USG Easy Sand) to maintain a flat plane.
2026 Pricing and Material Sourcing
As of early 2026, 1/4-inch drywall remains a specialty item and is not always stocked in deep inventory at big-box home improvement centers. Contractors typically need to special-order it through dedicated commercial drywall suppliers or lumber yards.
Expect to pay between $13.00 and $16.50 per 4x8 sheet, representing a 15% to 20% premium over standard 1/2-inch panels due to lower production volumes and specialized manufacturing runs. When estimating job costs for curved walls or resurfacing projects, factor in the additional cost of specialized adhesives, finer-grit setting compounds, and the increased labor time required for the tighter 7-inch fastening schedule required to secure the thinner material to uneven substrates.