Mastering Gypsum Board All Purpose Joint Compound Techniques
Master gypsum board all purpose joint compound application. Learn pro taping techniques, mixing ratios, drying times, and sanding methods for flawless walls.

The Role of All-Purpose Joint Compound in Drywall Finishing
All-purpose (AP) joint compound is the foundational material for taping and finishing gypsum board. Unlike setting-type compounds that cure via a chemical reaction, AP compound relies on evaporation. This air-drying characteristic makes it the undisputed workhorse for embedding paper tape and executing second coats. According to the Gypsum Association's installation guidelines, AP compound offers superior bond strength and minimal shrinkage, which are critical for preventing seam telegraphing and ensuring a Level 5 finish.
- Standard AP (e.g., USG Sheetrock Brand All-Purpose): Higher vinyl binder content, maximum bond strength, ideal for paper tape bedding. Heavier and harder to sand.
- Lightweight AP (e.g., USG Plus 3): Formulated with perlite or glass microspheres. Easier to sand and lighter to carry, but slightly lower bond strength. Best reserved for second coats or bedding fiberglass mesh.
The Chemistry and Consistency: Mixing and Thinning
Out of the bucket, pre-mixed AP compound is typically too thick for optimal taping. Applying it straight from the factory seal often results in excessive drag, edge ridging, and trapped air bubbles. Proper thinning is a non-negotiable step for professional results.
Exact Thinning Ratios
For a standard 5-gallon bucket of pre-mixed AP compound, add 16 ounces (2 cups) of clean, room-temperature water for the taping (bedding) coat. For the second (fill) coat, increase the water to 24 ounces (3 cups). If you are using a powdered AP mix, the standard ratio is 2 parts powder to 1 part water by weight, but always defer to the manufacturer's data sheet, such as the USG Sheetrock AP technical specifications.
Mixing Protocol
- Use a heavy-duty mud mixer paddle attached to a variable-speed drill.
- Set the drill to a low speed, strictly under 300 RPM. High speeds whip air into the compound, creating microscopic bubbles that will burst during drying and leave pockmarks.
- Mix for 3 to 5 minutes until the compound reaches a smooth, creamy consistency resembling thick mayonnaise.
- Let the mixture slake (rest) for 10 minutes, then remix briefly for 30 seconds without adding more water.
Step-by-Step Taping and Bedding Techniques
The bedding coat is where the structural integrity of the drywall seam is established. AP compound is specifically required when using paper tape, as its high glue content locks the paper into the gypsum core. Fiberglass mesh tape, conversely, requires a setting-type compound for the first coat due to AP compound's natural shrinkage.
Flat Seams and Butt Joints
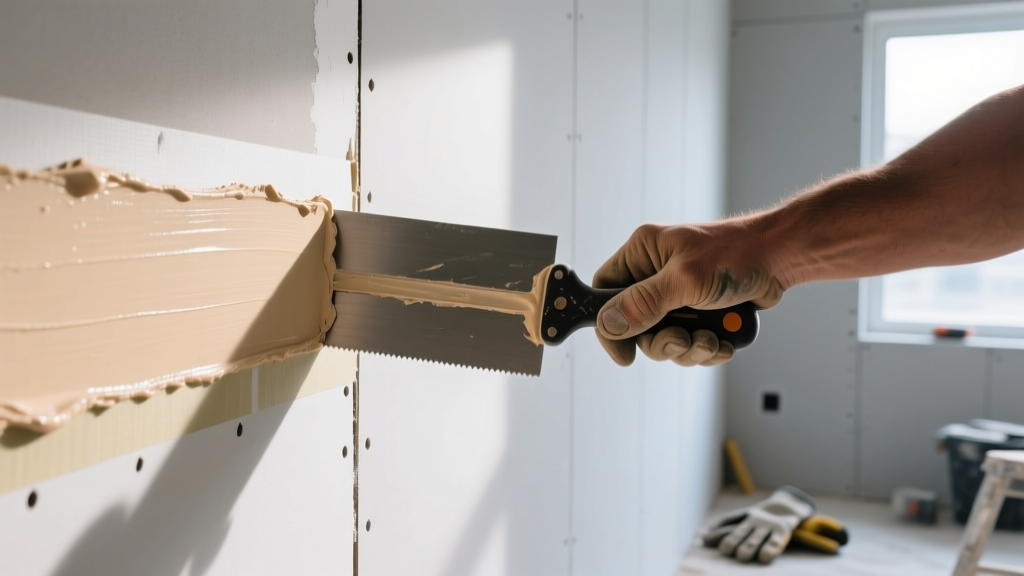
Apply a continuous, 1/8-inch thick layer of AP compound down the center of the tapered seam using a 6-inch taping knife. Unroll the paper tape and lightly press it into the mud. Switch to a 10-inch or 12-inch taping knife for the embedding stroke. Hold the blade at a 45-degree angle to the wall, applying firm, even pressure on the leading edge. The goal is to squeeze out excess compound from beneath the tape without starving the joint. A starved joint will result in tape blisters once the wall is painted.
Pro Tip for Butt Joints: Butt joints (where two non-tapered ends meet) lack a recessed edge. To compensate, apply the AP compound in a wide, gradual crown. Feather the edges out at least 16 inches on either side of the joint to create the optical illusion of a flat plane.
Inside and Outside Corners
For inside corners, fold the paper tape precisely along the factory crease. Apply AP compound to both sides of the corner, embed the tape, and pull your knife from the center of the corner outward. For outside corners, install metal or vinyl corner beads first, securing them with AP compound or mechanical fasteners, and skim the bead with a 10-inch knife, keeping the blade centered on the bead's nose.
Environmental Variables and Drying Times
Because AP compound cures through evaporation, ambient temperature, relative humidity, and airflow dictate drying times. Applying a second coat before the first is fully dry traps moisture, leading to delayed shrinkage and catastrophic seam cracking weeks after the project is finished.
| Temperature | Relative Humidity | Estimated Drying Time | Airflow Requirement |
|---|---|---|---|
| 70°F (21°C) | 30% - 40% | 12 - 16 Hours | Moderate cross-ventilation |
| 70°F (21°C) | 60% - 70% | 24 Hours | High (use box fans) |
| 60°F (15°C) | 50% | 36+ Hours | High + Dehumidifier |
| Below 55°F (13°C) | Any | Do Not Apply | N/A (Requires space heaters) |
Common Failure Modes and Troubleshooting
Even experienced finishers encounter defects when working with AP compound. Identifying the root cause is essential for permanent repairs.
Tape Blisters
Cause: Insufficient compound beneath the paper tape, or pulling the tape too tightly during embedding, which squeezes out all the mud.
Fix: Use a utility knife to slit the blister. Inject thinned AP compound under the tape using a putty knife, press firmly, and skim a thin layer over the top. Allow to dry completely before sanding.
Edge Ridging (Flashing)
Cause: The compound was applied too thickly at the edges of the tape, or the drywall panels were not properly fastened to the framing, allowing microscopic movement.
Fix: Sand the ridge aggressively with 100-grit sandpaper. Apply a wide, extremely thin skim coat of lightweight AP compound, feathering it out to 18 inches to blend the transition.
Map Cracking (Spider Webbing)
Cause: Applying AP compound in environments below 55°F, or applying a coat that is too thick, causing the surface to dry and shrink while the underlying layer remains wet.
Fix: Scrape out the cracked compound completely. Re-tape the joint using a setting-type compound (like Durabond 90) for the base layer, followed by a thin AP topping coat.
Sanding and Dust Control Protocols
Sanding all-purpose joint compound requires a strategic approach to avoid scuffing the paper face of the gypsum board. Because standard AP compound contains high levels of limestone and vinyl binders, it is denser and harder to sand than lightweight variants.
Begin with a 120-grit aluminum oxide sanding screen or paper on a pole sander for the initial knockdown of ridges and tool marks. For the final pass between the second and third coats, switch to a 150-grit or 220-grit sanding sponge. Always sand perpendicular to the seam to feather the edges to a zero-thickness transition.
Sanding joint compound generates respirable crystalline silica. Under current OSHA silica standards, dry sanding without dust extraction is a severe health hazard and regulatory violation on commercial sites. Always use a pole sander equipped with a HEPA-filtered vacuum attachment, or utilize wet-sanding techniques with a damp cellulose sponge for final smoothing to eliminate airborne particulates.
Mastering gypsum board all purpose joint compound requires patience, precise mixing, and an understanding of environmental variables. By adhering to strict thinning ratios, maintaining proper knife angles, and respecting drying times, you will achieve seamless, Level 5 drywall finishes that stand the test of time.
Written by
James ThorntonJames Thornton is a construction industry veteran with 25 years of hands-on experience in wood framing, lumber grading, and residential building codes. He started as a framing carpenter in rural Oregon, earned his ICC Residential Building Inspector certification, and eventually became a senior plan reviewer for the City of Portland Bureau of Development Services. James holds a B.S. in Wood Science & Technology from Oregon State University and is a certified lumber grader through the West Coast Lumber Inspection Bureau (WCLIB). He has inspected over 3,000 residential construction sites and authored the city's internal guide on advanced framing techniques (2x6 at 24" O.C.). James lives in Bend, OR, where he builds custom timber-frame cabins and competes in lumberjack sports.
More from James Thornton
View all
Insulation
Best Home Insulation Materials: Complete 2026 Guide
Compare top home insulation materials for 2026. Find R-values, installed costs per square foot, and best uses for fiberglass, spray foam, and mineral wool.
Aug 4, 2026

Sustainable Building
Certify Your Green Building Material for LEED and WELL
Step-by-step guide to certifying a green building material for LEED v5 and WELL v2. Master EPDs, HPDs, and VOC limits for 2026 project specifications.
Aug 4, 2026

Stone & Masonry
Veneer Stacked Stone Panels: Interior Design & Style Showcase
Discover how veneer stacked stone panels transform interiors. Explore modern design profiles, material pairings, and technical installation specs.
Aug 4, 2026