Drywall and Tape Matching Guide: Best Pairs for Every Room
Match the right drywall and tape for every room. Expert scenario guide covering standard, moisture-resistant, and fire-rated board joints.
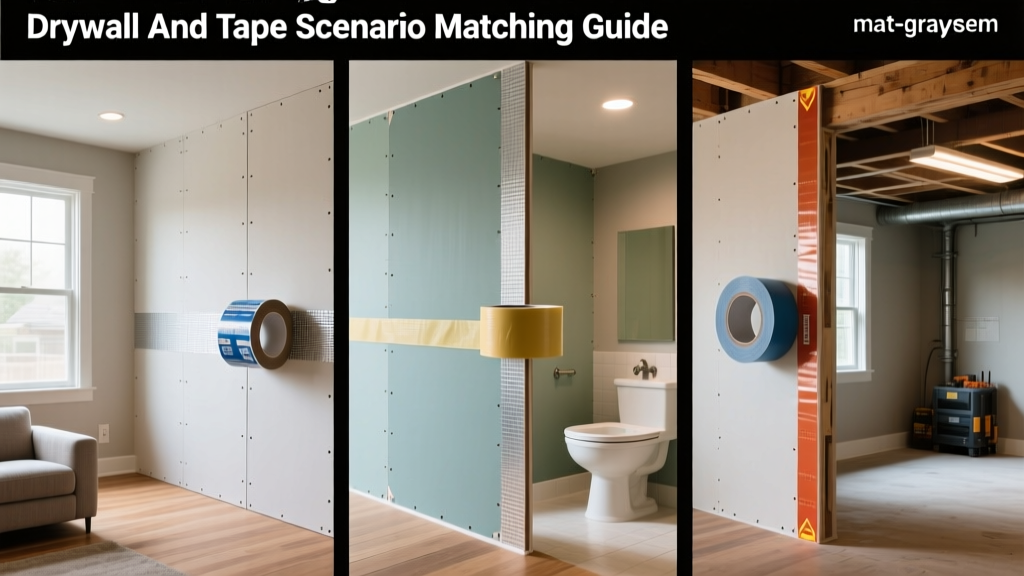
The Core Matrix: Board Types and Compatible Tapes
Selecting the correct joint tape is not a one-size-fits-all decision. The physical properties of the gypsum board dictate the chemical and mechanical requirements of the tape and bedding compound. A mismatch leads to edge lifting, joint ridging, or catastrophic failure in fire-rated assemblies. Below is the definitive pairing matrix based on 2026 industry standards and Gypsum Association guidelines.
| Gypsum Board Type | Primary Tape Recommendation | Required Bedding Compound | Failure Risk if Mismatched |
|---|---|---|---|
| Standard (White/Gray) | Paper Tape | All-Purpose Pre-Mixed | Mesh tape cracking without setting compound |
| Moisture-Resistant (Green) | Alkali-Resistant Fiberglass Mesh | Setting-Type (45 or 90 min) | Paper tape molding and delaminating |
| Type X Fire-Rated | Paper Tape (UL Listed) | All-Purpose or Setting-Type | Mesh melting, voiding fire assembly rating |
| Glass-Mat (Tile Backer) | Alkali-Resistant Cement Board Tape | Polymer-Modified Thinset | Standard mesh degrading from alkalinity |
| Abuse-Resistant | Composite/Polymeric Core Tape | Setting-Type (90 min) | Standard tape tearing under impact stress |
Scenario 1: Standard Living Spaces (Standard Gypsum Board)
For standard 1/2-inch or 5/8-inch regular gypsum board in living rooms, bedrooms, and hallways, traditional paper tape remains the gold standard for flat seams and inside corners. Paper tape possesses superior tensile strength compared to fiberglass mesh because the paper fibers run longitudinally along the tape, resisting the natural expansion and contraction of the wood or steel framing.
The Starch Bonding Mechanism
Paper tape relies on a chemical bond, not just a mechanical one. The face paper of standard drywall and the joint tape itself are manufactured with starch-based sizing. When you embed paper tape into an all-purpose joint compound (which also contains starch), the starches cross-link as they dry, creating a monolithic surface. According to USG Corporation technical data, this bond is actually stronger than the gypsum core itself.
For inside corners, always pre-crease paper tape using a corner trowel or a specialized folding tool before applying the bedding coat. Apply a continuous 1/8-inch bead of all-purpose compound to both sides of the corner, embed the pre-creased tape, and pull a 6-inch taping knife from the bottom up to squeeze out excess mud. Never pull the knife parallel to the corner, which will drag the tape out of alignment.
While self-adhesive fiberglass mesh tape is popular for its speed, it lacks the tensile strength of paper. If you must use mesh on flat seams in standard drywall, the first coat must be a setting-type compound (like Durabond 90). Pre-mixed all-purpose compound shrinks as it dries and lacks the structural rigidity to prevent mesh tape from telegraphing cracks through the finish.
Scenario 2: High-Moisture Zones (Moisture-Resistant & Glass Mat Boards)
In bathrooms, laundry rooms, and kitchens, moisture-resistant (green board) or glass-mat gypsum boards are mandated by building codes. The environment here dictates a complete shift in your taping strategy.
Why Paper Tape Fails in Wet Areas
Paper tape is essentially a cellulose product. When exposed to the high humidity cycles of a bathroom, or when embedded in cementitious or high-moisture joint treatments, paper tape becomes a food source for mold spores. Furthermore, the moisture can break down the starch bond, leading to blistering.
The Alkali-Resistant Mesh Solution
For moisture-resistant drywall, use an alkali-resistant fiberglass mesh tape, such as Saint-Gobain FibaTape Mold-X10. This tape is coated with a specialized polymer that prevents the alkaline environment of moisture-resistant joint compounds from degrading the fiberglass filaments.
Do not use standard drywall mesh tape on glass-mat gypsum tile backers (like USG Fiberock Aqua-Tough) or cement boards. The Portland cement and thinset mortars used in these assemblies are highly alkaline (pH 12+). Standard fiberglass will dissolve within months. You must use tape specifically labeled as 'Alkali-Resistant Cement Board Tape' and bed it in polymer-modified thinset, not drywall mud.
Scenario 3: Fire-Rated Assemblies (Type X Gypsum Board)
Type X gypsum board contains glass fibers and other additives to increase its fire resistance, typically providing a 1-hour or 2-hour fire rating when installed in tested assemblies (per ASTM E119 standards). The joint treatment is not merely cosmetic in these scenarios; it is a critical life-safety component.
In UL-listed fire-rated wall and ceiling assemblies, the joint tape must maintain the integrity of the barrier as the gypsum core calcines and shrinks under extreme heat. Fiberglass mesh tape melts at approximately 1,500°F (815°C). In a severe fire, the mesh will melt away before the gypsum board fails, leaving an open joint that allows flames and toxic gases to pass through the barrier prematurely.
Paper tape, conversely, chars and carbonizes. This carbon layer maintains a physical bridge across the joint longer than melting fiberglass, holding the calcined gypsum edges together. Therefore, nearly all strict commercial and multi-family residential fire-rated assemblies explicitly mandate the use of paper tape or specifically tested composite tapes. Always verify the specific UL Design (e.g., U419) for the exact joint treatment requirements before taping a fire wall.
Scenario 4: High-Stress & Impact Areas (Abuse-Resistant Boards)
Corridors in commercial buildings, hospitals, and high-traffic residential zones often utilize abuse-resistant or impact-resistant gypsum boards. These boards feature dense cores and heavy face papers. Standard paper tape on outside corners or off-angles in these zones will easily dent, tear, or crack upon impact.
For these scenarios, transition to composite tapes with a polymeric core, such as Strait-Flex PERFECT-90 or Tuff-Tape. These products feature a rigid, high-impact plastic or vinyl center hinge flanked by paper or synthetic edges. They provide a perfectly straight, impact-resistant outside corner that will not dent when struck by carts, luggage, or furniture. Bed these composite tapes using a high-strength setting compound (90-minute set time) to ensure the rigid core locks into place without flexing.
2026 Material Cost & Yield Breakdown
Budgeting for joint treatment requires understanding the yield per linear foot. The table below outlines current 2026 material costs and coverage rates for a standard 2,000 sq. ft. residential project (approx. 4,500 linear feet of seams and corners).
| Material | Unit Size | Avg. Cost (2026) | Yield / Coverage | Best Application |
|---|---|---|---|---|
| USG Sheetrock Paper Tape | 500 ft roll | $11.50 | 500 linear ft | Standard flat seams, inside corners |
| FibaTape Perfect Finish (Mesh) | 300 ft roll | $16.00 | 300 linear ft | Moisture-resistant flat seams |
| Strait-Flex PERFECT-90 | 100 ft roll | $38.00 | 100 linear ft | High-impact outside corners |
| All-Purpose Pre-Mixed Mud | 5 Gallon Bucket | $22.00 | ~450 linear ft (3 coats) | Bedding paper tape, topping |
| Durabond 90 Setting Compound | 25 lb Bag | $18.50 | ~250 linear ft (1st coat) | Bedding mesh tape, deep fills |
Note: Setting-type compounds yield less linear footage per pound than pre-mixed compounds because they are applied thicker to compensate for the lack of shrinkage and to fully encapsulate fiberglass mesh.
Troubleshooting Tape Failure Modes
Even with the correct drywall and tape pairing, application errors cause failures. Use this diagnostic guide to identify and correct issues before priming.
- Symptom: Blisters or Bubbles under Paper Tape.
Cause: Insufficient bedding compound or applying the tape over a dusty board surface. The starch bond failed to form.
Fix: Slice the blister with a utility knife, peel back the loose tape, inject all-purpose compound using a caulking gun with a wide nozzle, and press flat with a 6-inch knife. Do not attempt to mud over a blister; it will telegraph through the paint. - Symptom: Edge Lifting on Fiberglass Mesh Tape.
Cause: Using pre-mixed compound for the bedding coat. The pre-mixed compound shrank as it dried, pulling the self-adhesive mesh away from the board edges.
Fix: Sand the lifted edges flush. Apply a thin coat of setting-type compound (Durabond 45) over the edges to lock them down, followed by a standard topping coat. - Symptom: Joint Ridging (A visible raised line along the seam).
Cause: Framing lumber shrinkage pushing the board edges up, or applying the first coat of mud too thickly over paper tape.
Fix: Ridge prevention starts at the framing stage by leaving a 1/8-inch gap between board edges. If ridging occurs, you cannot sand it flat without cutting the tape. You must widen the joint transition using a 14-inch or 16-inch drywall blade on the final coat to feather the ridge into the surrounding field.
Final Verification Checklist
Before scheduling the painting crew, run a high-intensity LED work light parallel to the wall surface (side-lighting). This will immediately reveal any tape edges, compound shrinkage divots, or ridging. Correct any visible tape lines with a skim coat of ultra-lightweight topping compound, sand with 180-grit aluminum oxide sandpaper, and verify the surface is perfectly flush before applying a PVA drywall sealer.