Gold Bond Fire Shield Gypsum Board Installation Techniques
Master Gold Bond Fire Shield gypsum board installation with expert framing, fastening, and taping techniques to ensure maximum fire resistance.

The Anatomy of a Fire-Rated Assembly
Achieving a certified fire-resistance rating requires more than simply hanging drywall. When specifying Gold Bond Fire Shield gypsum board—National Gypsum’s premium 5/8-inch Type X product—installers must adhere to strict assembly protocols. The core of Fire-Shield board is reinforced with glass fibers and proprietary additives designed to maintain structural integrity long after the gypsum core has calcined and released its chemically bound water. However, this advanced core technology is entirely compromised if the fastening, framing, and joint treatment deviate from tested Underwriters Laboratories (UL) designs.
Under the latest 2024 and 2025 International Building Code (IBC) adoptions enforced in 2026, inspectors are increasingly scrutinizing fire-rated partitions in multi-family residential and commercial occupancies. A single over-driven screw or unsealed penetration can void the entire assembly's rating. This guide details the exact installation techniques required to maximize the performance of Gold Bond Fire-Shield systems.
Framing Prerequisites and Deflection Management
Fire-rated walls are highly susceptible to cracking at the ceiling perimeter due to structural deflection. If the building frame sags under live loads, a rigid drywall assembly will crack, breaking the fire barrier and allowing smoke and flames to bypass the wall.
Never attach Gold Bond Fire-Shield gypsum board directly to the top track of a metal stud wall if the track is serving as a deflection slip joint. The board must stop 1/4-inch to 1/2-inch below the top track, leaving a gap that is subsequently sealed with a fire-rated, intumescent acoustic sealant. Fastening the board to both the stud and the deflection track locks the assembly, guaranteeing edge fractures when the floor above deflects.
For wood-framed assemblies, ensure all studs are crowned uniformly and installed with the crown facing up. Any twisting or bowing exceeding 1/8-inch over an 8-foot span will induce stress fractures in the Fire-Shield board once the joint compound cures. Use 25-gauge or 20-gauge steel studs for commercial shaft walls and area separation walls, ensuring the metal is straight and properly anchored to the concrete slab with powder-actuated fasteners or concrete screws.
Fastener Selection and Spacing Matrix
The holding power of the fastener is what keeps the calcined gypsum core attached to the framing during a fire event. If the screws pull through the board, the core collapses. According to Gypsum Association's GA-216 Application and Finishing standard, fastener type and spacing are non-negotiable in rated assemblies.
| Assembly Type | Fastener Type | Length | Edge Spacing (o.c.) | Field Spacing (o.c.) |
|---|---|---|---|---|
| 1-Hour Wall (Steel Studs) | Type S (Fine Thread) | 1-1/4" | 8 inches | 12 inches |
| 1-Hour Wall (Wood Studs) | Type W (Coarse Thread) | 1-1/4" | 7 inches | 12 inches |
| 1-Hour Ceiling (Wood Joist) | Type W (Coarse Thread) | 1-1/4" | 7 inches | 12 inches |
| 2-Hour Wall (Face Layer) | Type S or W | 1-5/8" or 1-7/8" | 12 inches | 24 inches |
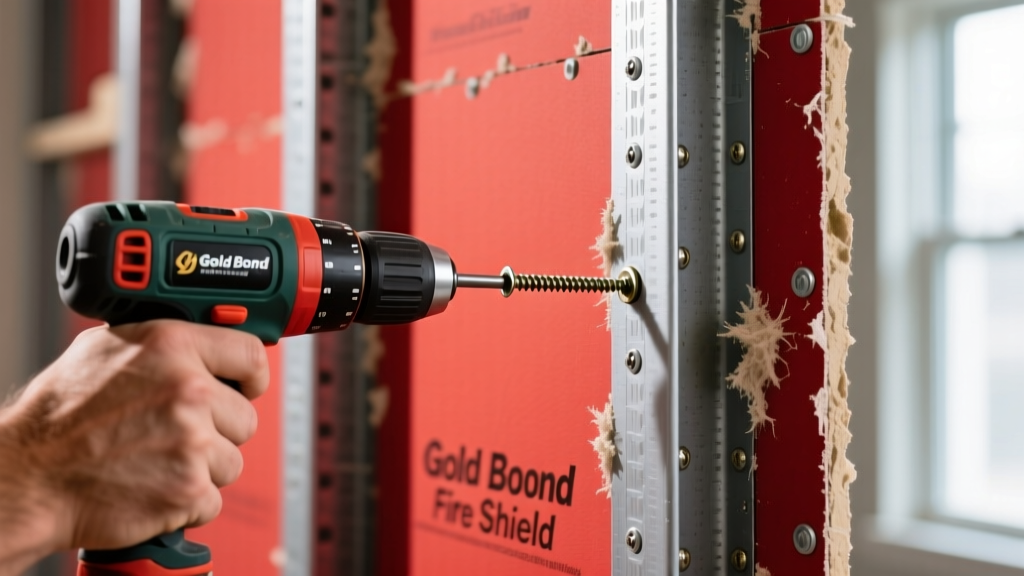
When driving screws into Gold Bond Fire-Shield, the screw head must dimple the paper face without breaking it. If the paper tears, the fastener loses its withdrawal resistance. In such cases, the compromised screw must be abandoned, and a new screw driven 2 inches away from the original location.
Multi-Layer Installation for 2-Hour Ratings
Achieving a 2-hour fire rating typically requires a multi-layer assembly, such as two layers of 5/8-inch Fire-Shield board on each side of the stud. The installation sequence for these systems is critical to prevent continuous joints that act as a chimney for fire and smoke.
Step 1: Base Layer Attachment
The base layer can be attached using either mechanical fasteners or a combination of adhesive and fasteners. If using screws, 1-inch Type S fasteners are sufficient, spaced 24 inches on center in the field and 12 inches on the edges. Alternatively, apply a continuous 3/8-inch bead of National Gypsum-approved laminating adhesive to the stud flanges, press the board firmly, and secure with a minimal number of screws to hold the board while the adhesive cures (typically 24 hours).
Step 2: Face Layer Staggering
The face layer must be installed so that no vertical or horizontal joints align with the base layer joints. Vertical joints of the face layer must be offset from the base layer joints by a minimum of 10 inches, though offsetting by a full stud bay (24 inches) is the industry best practice. Horizontal joints in the face layer must be staggered by at least 24 inches from the base layer horizontal joints.
Step 3: Face Layer Fastening
Drive 1-5/8-inch (for steel) or 1-7/8-inch (for wood) screws through both the face layer and the base layer into the framing. The longer screw length ensures a minimum of 5/8-inch penetration into the framing member, securely clamping both layers together.
Joint Treatment: The Paper vs. Mesh Debate in Fire Ratings
One of the most frequent causes of fire-rated assembly failure during municipal inspections is the unauthorized use of fiberglass mesh tape. While self-adhesive fiberglass mesh is popular in standard residential drywall for its speed, it is generally not permitted in UL-listed fire-rated assemblies unless the specific UL design explicitly calls for it.
Expert Insight: The UL Fire Resistance Directory tests assemblies with specific joint treatments. Standard paper tape, embedded in a setting-type joint compound (like Durabond 90), creates a monolithic, calcified barrier that resists heat transfer far better than fiberglass mesh. Always default to paper tape for Gold Bond Fire-Shield joints unless your project architect has specified a UL design that explicitly includes and tests mesh tape.
For the taping process, apply a setting-type compound to the joint, embed the paper tape, and wipe it down tightly to force out excess compound and air bubbles. Follow with at least two coats of drying-type all-purpose or lightweight topping compound, feathering the edges out to a minimum width of 12 inches to achieve a Level 4 finish. In areas subject to severe lighting or where fire-resistive membranes must remain perfectly intact under thermal stress, a Level 5 skim coat is highly recommended.
Managing Penetrations and Perimeter Edge Cases
A fire-rated wall is only as strong as its weakest penetration. Electrical boxes, HVAC ducts, and plumbing pipes routinely breach Gold Bond Fire-Shield partitions. Proper detailing here is mandatory.
- Electrical Boxes: Maintain a minimum 1/4-inch gap between the drywall cutout and the electrical box. Do not force the board over the box, as this creates stress points. Seal the perimeter gap with a fire-rated acoustic sealant. If boxes are installed back-to-back on opposite sides of a stud cavity, they must be separated by a minimum of 24 inches horizontally, or wrapped in intumescent firestop putty pads.
- Pipe Penetrations: For metallic pipes passing through the wall, install a firestop collar or pack the annular space with mineral wool and seal with an intumescent firestop caulk. The caulk expands when exposed to heat, choking off the oxygen supply and preventing smoke migration.
- Ductwork: HVAC ducts penetrating a 1-hour or 2-hour Gold Bond Fire-Shield wall require a UL-listed fire damper. The drywall must be cut cleanly around the damper sleeve, and the perimeter sealed with high-temperature silicone or firestop mastic.
By strictly adhering to these fastening schedules, multi-layer staggering techniques, and penetration protocols, contractors ensure that Gold Bond Fire-Shield gypsum board performs exactly as engineered, providing life-saving compartmentalization during a fire event.
Written by
David NakamuraDavid Nakamura is a licensed architect (AIA) and construction technology writer focused on sustainable building methods, mass timber engineering, and high-performance building envelopes. He holds a Master of Architecture from the University of Washington and is a certified Passive House Consultant (CPHC). David spent eight years at the Seattle firm Mithun, where he led the design of three LEED Platinum projects, before founding his own practice specializing in net-zero residential design. He serves on the editorial advisory board of GreenBuilder Magazine and has authored peer-reviewed papers on cross-laminated timber (CLT) connections for the Journal of Structural Engineering. In his spare time, David teaches woodworking at Pratt Fine Arts Center and kayaks the Puget Sound.
More from David Nakamura
View all
Construction Cost
Labor Cost to Build a Deck Per Sq Ft: 2026 Installation Guide
Discover the exact labor cost to build a deck per sq ft in 2026. This installation guide breaks down contractor rates, complexity factors, and hidden fees.
Aug 4, 2026

Construction Cost
How Much Does It Cost to Build a 3 Bedroom House? Financing Guide
Learn exactly how much it costs to build a 3 bedroom house and explore 2026 financing options, construction loan types, and budget frameworks for your build.
Aug 4, 2026

Construction Cost
Cost to Build a Tennis Court: 2026 Guide
How much does it cost to build a tennis court in 2026? Breakdowns for asphalt, concrete, and synthetic surfaces plus fencing and lighting.
Jul 30, 2026