Gypsum Backer Board Selection Guide: Tile & Wet Area Substrates
Compare top gypsum backer board options for tile and wet areas. Learn ASTM standards, installation rules, and how it stacks up against cement board.

The Role of Gypsum Backer Board in Modern Tile Assemblies
Selecting the correct substrate is the most critical decision in any tile installation. While traditional cement board has dominated the market for decades, gypsum backer board has emerged as the preferred choice for professional contractors tackling residential and light-commercial wet areas. Engineered with a moisture-resistant, high-density gypsum core and faced with fiberglass mats instead of organic paper, these panels bridge the gap between the ease of drywall installation and the durability of masonry substrates.
This selection guide breaks down the material science, product-specific performance data, and installation parameters required to specify the right gypsum backer board for showers, tub surrounds, and high-moisture flooring assemblies.
Core Material Composition and ASTM Standards
Unlike standard paper-faced drywall, which acts as a food source for mold when exposed to chronic moisture, premium gypsum backer boards are manufactured to meet strict industry benchmarks. The core is formulated with silicone-based hydrophobic additives, while the facing utilizes inorganic fiberglass mats.
When reviewing technical data sheets, ensure the product complies with the following standards:
- ASTM C1396: Standard Specification for Gypsum Board (general physical properties).
- ASTM C630: Standard Specification for Water-Resistant Gypsum Backing Board (specific to moisture performance and surface water absorption limits).
- ANSI A108.11: Standard for installation of cementitious and gypsum backing boards.
Top Gypsum Backer Board Products Compared
The market is anchored by a few high-performance manufacturers. Below is a comparison of the leading 1/2-inch gypsum backer boards available for tile applications.
| Product | Facing Material | Integrated Barrier? | Avg. Cost (4x8 Sheet) | Weight (4x8 Sheet) |
|---|---|---|---|---|
| GP DensShield Tile Backer | Grey fiberglass (front) / Acrylic-coated yellow (back) | Yes (Back side) | $30 - $34 | ~52 lbs |
| CertainTeed Fiberock Aqua-Tough | Acrylic-coated fiberglass mat (both sides) | No (Requires liquid membrane) | $28 - $32 | ~55 lbs |
| USG Securock Glass-Mat Sheathing | Glass mat (both sides) | No (Commercial exterior/wet) | $35 - $40 | ~58 lbs |
Note: Pricing reflects average national retail and pro-desk rates. Contractor bulk pricing may reduce per-sheet costs by 10-15%.
Gypsum Backer Board vs. Cement Board vs. Foam Substrates
To make an informed selection, you must weigh gypsum backer board against its primary competitors: Portland cement-based boards (e.g., HardieBacker, Durock) and extruded polystyrene foam boards (e.g., Wedi, Kerdi-Board).
Weight and Cutability
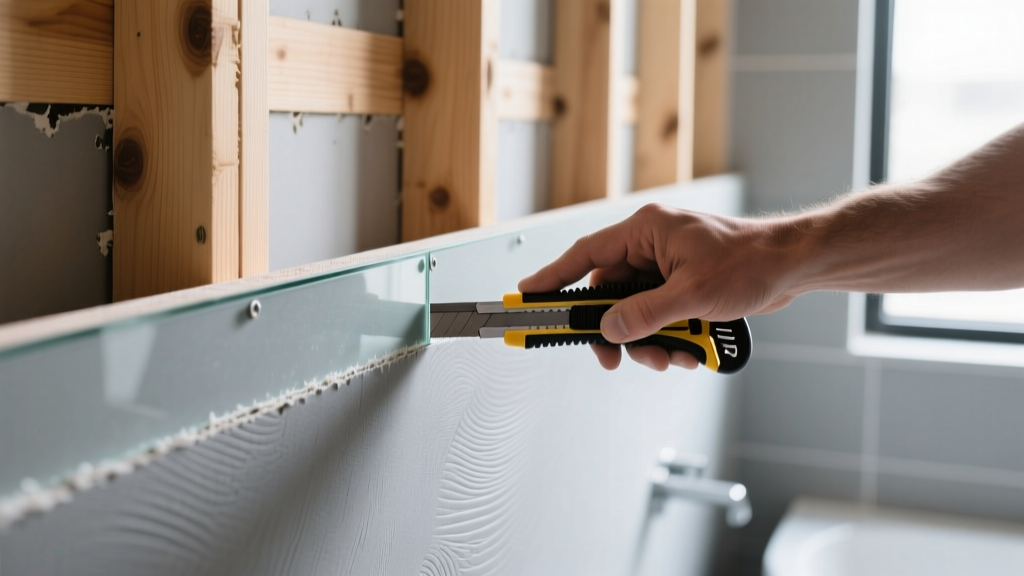
A standard 1/2-inch 3x5-foot cement board sheet weighs approximately 45-50 pounds and requires a carbide-tipped scoring tool or an angle grinder to cut, generating significant silica dust. In contrast, a 4x8-foot sheet of gypsum backer board weighs roughly 52 pounds but yields 16 square feet of coverage (compared to 15 sq ft for a 3x5 cement board). More importantly, gypsum backer board scores and snaps cleanly with a standard utility knife, reducing installation time by up to 30% and eliminating hazardous silica dust on the job site.
Moisture Management and Waterproofing
Cement board is dimensionally stable when wet, but it is not waterproof; it acts like a sponge, requiring a separate liquid-applied or sheet membrane (like RedGard or Kerdi) to protect the framing. Products like GP DensShield feature an integrated acrylic moisture barrier on the back side, eliminating the need for a separate vapor retarder behind the board. However, for continuous wet areas like shower pans and steam rooms, the Tile Council of North America (TCNA) still mandates a liquid-applied waterproofing membrane over the face of any gypsum or cement substrate.
Step-by-Step Selection Framework for Wet and Dry Zones
Use this decision matrix to specify the correct substrate based on the project environment:
- Residential Tub/Shower Surrounds: Specify GP DensShield. The integrated back-side barrier protects the wood framing, while the grey front side readily accepts polymer-modified thinset and liquid waterproofing membranes.
- Steam Showers and Continuous Wet Rooms: Specify Fiberock Aqua-Tough or DensShield, but mandate a high-performance liquid-applied membrane (ANSI A118.10) over the face. Gypsum cores can degrade if subjected to continuous vapor drive without a face-sealed membrane.
- Kitchen Backsplashes and Dry-Zone Wainscoting: Standard water-resistant drywall (green/purple board) is technically sufficient, but upgrading to gypsum backer board provides superior impact resistance and prevents fastener pull-through when mounting heavy stone or large-format porcelain tiles.
- Floor Tile Underlayment (Over Wood Subfloors): Avoid gypsum backer board for floors. The deflection of wood joists can cause the rigid gypsum core to fracture. Use 1/4-inch cement board or an uncoupling membrane (e.g., Schluter Ditra) for floor assemblies.
Critical Installation Rules to Prevent Failure
Gypsum backer board is highly forgiving, but improper installation will void manufacturer warranties and lead to catastrophic tile failures. Adhere strictly to these parameters:
Warning: The 'Yellow Side' Gotcha
When installing GP DensShield, the yellow acrylic-coated side must face the studs (inward), and the grey fiberglass side must face the room (outward). Installing it backward traps moisture inside the wall cavity and prevents thinset adhesion on the slick yellow surface.
- Fastener Selection: Never use standard drywall screws. The alkaline nature of thinset and moisture will corrode them, causing rust stains to bleed through grout lines. Use hot-dipped galvanized or ceramic-coated backer board screws, minimum 1-1/4 inches long, spaced 8 inches on center.
- Joint Treatment: Do not use paper drywall tape or standard joint compound. All seams and corners must be taped with alkali-resistant fiberglass mesh tape and fully embedded in a polymer-modified thinset mortar (ANSI A118.4 or A118.15).
- Expansion Gaps: Leave a 1/8-inch gap between all board edges, and a 1/4-inch gap at the floor/tub flange. Fill these gaps with thinset and mesh tape to create a monolithic surface that accommodates minor structural deflection.
- Membrane Application: If applying a liquid waterproofing membrane over the grey face, ensure the board is free of dust. Apply the membrane at the manufacturer's specified wet-mil thickness (usually 30-40 wet mils) using a notched trowel or roller, verifying thickness with a wet-mil gauge.
Cost Breakdown: Material and Labor Implications
While the upfront material cost of gypsum backer board ($30-$35 per 4x8 sheet) is roughly 20% higher than basic 1/2-inch cement board ($15-$22 per 3x5 sheet), the total installed cost is frequently lower. The ability to score and snap the board without specialized carbide tools, combined with the larger 4x8 sheet size, drastically reduces labor hours. For a standard 60-square-foot shower surround, a two-person crew can typically hang, tape, and prep gypsum backer board in 3 to 4 hours, compared to 5 to 7 hours for cement board. When factoring in contractor labor rates averaging $65 to $95 per hour, the labor savings easily offset the premium material cost, making gypsum backer board the most economically efficient choice for high-volume residential remodeling.
Written by
Marcus ChenMarcus Chen is a licensed structural engineer (PE) and building materials analyst with over 12 years of experience across residential, commercial, and industrial construction. He holds a Master of Science in Civil Engineering from UC Berkeley and spent six years at Thornton Tomasetti before transitioning to independent consulting and technical writing. Marcus specializes in material selection for seismic-prone regions, concrete reinforcement strategies, and lifecycle cost analysis. His work has been cited by the American Concrete Institute (ACI) and the Structural Engineers Association of California (SEAOC). When he is not on a job site or at his desk, you will find him hiking the Sierra Nevada or restoring a 1920s craftsman bungalow in Oakland, CA.
More from Marcus Chen
View all
Construction Cost
How Much Did the Eiffel Tower Cost to Build?
How much did the Eiffel Tower cost to build in 1889? We adjust for inflation and compare its budget to modern skyscraper construction.
Aug 4, 2026

Fire Resistance
What Is a Fire Resistant Material? Testing & Certification Guide
Discover what is a fire resistant material through ASTM and UL testing. Learn how fire ratings, certifications, and assemblies work in construction.
Aug 4, 2026

Construction Cost
How Much Did the Burj Khalifa Cost to Build?
How much did the Burj Khalifa cost to build? We break down the $1.5B project and extract 5 money-saving strategies for your next build.
Jul 30, 2026