Gypsum Board Bulkhead Guide: Materials, Framing, and Costs
Master your gypsum board bulkhead project with our comprehensive guide covering material selection, framing techniques, finishing tips, and current costs.

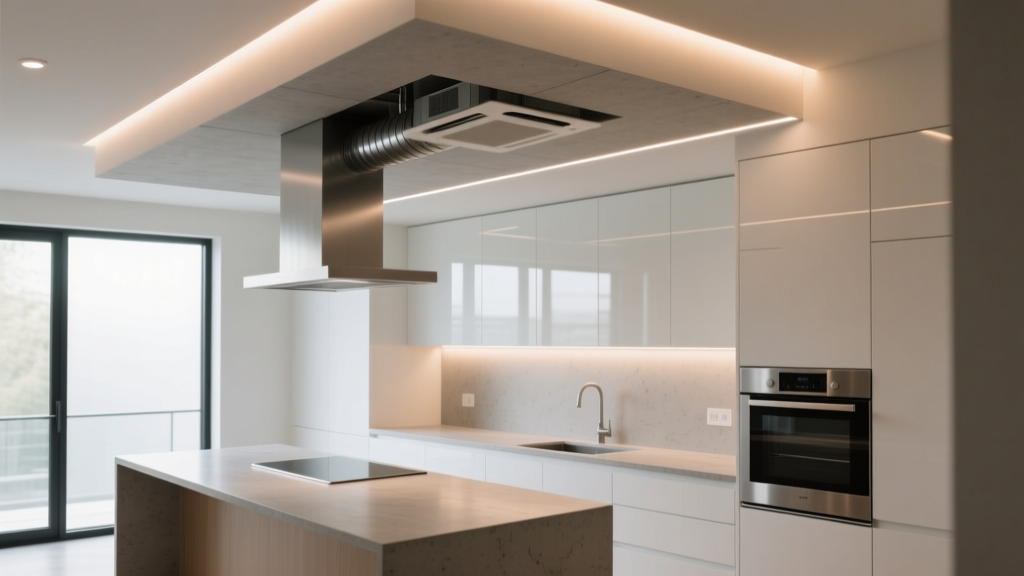
A gypsum board bulkhead (often referred to as a soffit, dropped ceiling, or chase) is a boxed-in architectural feature used to conceal HVAC ductwork, plumbing stacks, electrical wiring, or structural beams. While functionally necessary in many residential and commercial builds, bulkheads are notorious for visible seam cracking, screw pops, and poor finishing if the wrong materials or framing techniques are utilized. Because bulkheads often intersect multiple planes and house heat-generating recessed lighting, they require specific material grades and installation protocols to ensure long-term stability.
Material Selection by Application
Choosing the correct gypsum panel is the first critical decision. Standard 1/2-inch regular board is insufficient for high-humidity zones or commercial fire-rated assemblies. According to ASTM C1396, the standard specification for gypsum board, panels must meet specific physical and performance requirements based on their environment.
Core Board Types for Bulkheads
- Standard (Regular) Gypsum Board: Suitable for living rooms, bedrooms, and hallways where humidity is controlled and fire ratings are not mandated by code. Typically 1/2-inch thick.
- Moisture and Mold-Resistant (Green/Purple Board):strong> Mandatory for bathroom shower soffits, kitchen bulkheads above cooktops, and laundry rooms. Features a treated core and moisture-resistant face paper. Products like USG Sheetrock Brand Mold Tough or CertainTeed M2Tech are industry standards.
- Fire-Rated (Type X): Required for bulkheads in attached garages, multi-family dwelling separations, and commercial egress corridors. Type X boards are 5/8-inch thick and contain glass fibers to maintain structural integrity during a fire, achieving a 1-hour rating in specific assemblies.
- Flexible Gypsum Board (1/4-inch): Used exclusively for curved or arched bulkheads. Must be installed in two layers with the face grain running perpendicular to the framing radius.
| Board Type | Thickness | Edge Type | Best Application | Avg Cost (4x8 Sheet) |
|---|---|---|---|---|
| Standard Regular | 1/2' | Tapered | Dry living areas, bedroom soffits | $14 - $18 |
| Moisture/Mold Resistant | 1/2' | Tapered | Bathrooms, kitchens, laundry | $20 - $26 |
| Type X Fire-Rated | 5/8' | Tapered | Garages, commercial, fire walls | $22 - $28 |
| Flexible | 1/4' | Square | Curved arches, radius soffits | $25 - $32 |
Framing and Structural Support
The framing skeleton dictates the bulkhead's dimensional accuracy and resistance to vibration. Bulkheads are subject to floor deflection from above and vibration from the HVAC equipment they conceal.
Wood vs. Steel Framing
For residential applications, 2x3 or 2x4 dimensional lumber is standard. To prevent warping, use kiln-dried (KD) lumber with a moisture content below 19%. For commercial jobs or multi-story residential, 25-gauge or 20-gauge galvanized steel studs (1-5/8' or 2-1/2' widths) are preferred due to their dimensional stability and non-combustible nature. Always isolate steel framing from structural concrete using a closed-cell foam sill sealer to prevent acoustic transfer.
Clearance for Recessed Lighting and HVAC
A common failure in bulkhead design is inadequate clearance for recessed lighting (can lights). If using non-IC (Insulation Contact) rated fixtures, building codes require a minimum 3-inch clearance between the gypsum board and the light housing to prevent overheating and fire. IC-rated fixtures can be covered directly, allowing for shallower bulkheads. Furthermore, HVAC ducts require a 1-inch air gap between the ductwork and the framing to prevent thermal transfer and condensation on the back of the gypsum board.
If you plan to hang heavy pendant lights, curtain rods, or ceiling-mounted cabinets from the bulkhead, you must install solid wood blocking (2x4s or 2x6s) between the joists or studs before hanging the drywall. Drywall alone cannot support dynamic point loads exceeding 15-20 lbs per fastener.
Step-by-Step Installation Protocol
Proper sequencing minimizes seam visibility and structural weak points. Follow the application guidelines outlined by the Gypsum Association for optimal results.
- Hang the Bottom Panel First: Always install the horizontal (bottom) panel of the bulkhead before the vertical (side) panels. This allows the side panels to rest on and support the edges of the bottom panel, utilizing gravity to keep the seams tight.
- Stagger the Seams: If the bulkhead runs longer than 8 feet, stagger the vertical seams on the bottom panel so they do not align with the seams on the side panels.
- Fastening Schedule: Use 1-1/4-inch coarse-thread drywall screws for wood framing, or 1-inch fine-thread screws for steel. Space screws 8 inches apart on the edges and 12 inches apart in the field. Ensure the screw head dimples the paper without breaking it.
- Corner Bead Installation: The external corners of a bulkhead are high-impact zones. Avoid cheap metal corner beads that dent easily. Use vinyl bullnose beads or composite paper-faced metal trim (like USG Sheetrock Brand Paper-Faced Metal-Trim) for superior impact resistance and seamless integration with the joint compound.
Finishing and the Grazing Light Effect
Bulkheads are highly susceptible to the 'grazing light effect.' Recessed lights positioned close to the bulkhead's vertical face cast harsh shadows that highlight even microscopic imperfections, tape ridges, and joint compound tool marks.
Level 4 vs. Level 5 Finish
A standard Level 4 finish (three coats of joint compound over tape) is generally inadequate for bulkheads illuminated by grazing light. You must specify a Level 5 finish. This involves applying a thin skim coat of joint compound over the entire surface of the gypsum board after the Level 4 taping is complete. This equalizes the porosity and texture between the paper face and the joint compound, eliminating 'photographing' (where the tape pattern shows through the paint).
Recommended Compounds
Use a setting-type compound (like USG Durabond 90) for the first coat over the tape to provide structural rigidity and resist shrinkage. Use a lightweight all-purpose pre-mixed compound for the second and third coats to minimize sanding effort and reduce the overall weight of the bulkhead.
Do not paint the bulkhead until the joint compound is 100% dry. Trapped moisture behind the paint film will cause blistering and joint banding. In high-humidity environments, allow an extra 24-48 hours of drying time between coats, and use a PVA drywall sealer before applying the topcoat.
Troubleshooting Common Bulkhead Failures
Even with proper installation, bulkheads can develop specific failure modes over time. Understanding these edge cases allows for proactive mitigation.
- Corner Cracking: The 90-degree internal angle where the bulkhead meets the main ceiling is a prime location for stress cracks caused by truss uplift or floor deflection. Fix: Use a flexible composite tape (like Strait-Flex) instead of standard paper tape for inside corners. In severe cases, install a reveal bead or shadow line to create a deliberate expansion gap.
- Screw Pops: Nails or screws pushing through the finished surface. This is usually caused by framing lumber shrinking or twisting after the drywall is hung. Fix: Always use screws, not nails, for bulkheads. If using wood, ensure it is kiln-dried. Drive a new screw 2 inches above or below the pop, then patch the old dimple.
- Joint Banding (Flashing): Visible lines where the seams are located, especially under LED lighting. Fix: This is a porosity issue. The joint compound absorbs paint differently than the drywall paper. Always apply a high-solids PVA drywall primer/sealer to the entire bulkhead before painting to unify the surface absorption rate.
Cost Breakdown and Budgeting
Bulkhead costs are typically calculated per linear foot rather than per square foot, due to the high labor intensity of framing, hanging, and finishing multiple narrow planes. Below is a breakdown of current market rates for residential construction.
| Component | Basic (Standard Board, Level 4) | Premium (Moisture-Resistant, Level 5) |
|---|---|---|
| Framing Materials (Lumber/Steel) | $4.50 - $6.00 | $5.50 - $8.00 |
| Gypsum Board & Fasteners | $2.00 - $3.50 | $3.50 - $5.50 |
| Labor (Framing & Hanging) | $12.00 - $18.00 | $15.00 - $22.00 |
| Labor (Taping & Finishing) | $8.00 - $12.00 | $14.00 - $20.00 |
| Total Estimated Cost per LF | $26.50 - $39.50 | $38.00 - $55.50 |
For a standard 15-foot kitchen bulkhead hiding a main HVAC trunk line, expect to budget between $400 and $600 for a basic finish, and $570 to $830 for a premium, moisture-resistant assembly with a Level 5 skim coat. Commercial projects utilizing Type X board and steel framing will see a 15-20% premium on material costs, though labor rates may normalize depending on union vs. non-union market dynamics. Always consult local drywall system catalogs to verify specific assembly fire ratings and acoustic STC values before finalizing commercial specifications.
Written by
Priya KapoorPriya Kapoor is a real estate market analyst and construction economics researcher with expertise in housing affordability, development feasibility, and infrastructure investment. She holds a Master of Regional Planning from Cornell University and previously worked as a senior analyst at CBRE's Investment Properties group, where she modeled returns for $4B in mixed-use development pipelines. Priya now runs an independent research practice advising developers, municipalities, and REITs on construction cost forecasting and market timing. She publishes the quarterly "BuildMat Market Pulse" report tracking material price indices across 12 commodity categories. Based in Austin, TX, Priya serves on the board of Habitat for Humanity Austin and is a marathon runner.
More from Priya Kapoor
View all
Construction Cost
Cost to Build a 1600 Sq Ft Home in 2026: Full Breakdown
Accurate 2026 cost to build a 1600 sq ft home—material, labor, and regional pricing breakdowns included. Plan your budget with real-time estimates.
Aug 11, 2026

Wood & Lumber
Name the Types of Wood for Pressure Treatment and Preservation
Learn how to name the types of wood best suited for pressure treatment. Compare species treatability, chemical retention levels, and 2026 preservation costs.
Aug 4, 2026

Stone & Masonry
Stone Veneer Suppliers Lindenhurst: 2026 Cost Analysis
Analyze 2026 stone veneer costs in Lindenhurst, NY. Compare local supplier pricing, delivery fees, and Suffolk County installation labor rates.
Aug 4, 2026