Gypsum Board Repair: Best Compounds, Patches, and Techniques
Master gypsum board repair with our comprehensive product guide. Compare setting-type compounds, patch kits, and mesh for flawless drywall fixes.

Diagnosing Drywall Damage: The Product Selection Matrix
Effective gypsum board repair requires matching the repair material to the structural demand and volumetric depth of the damage. Using a high-shrinkage drying compound for deep voids guarantees callback failures, while using a rapid-setting compound for final skim coats wastes time and ruins sandability. The Gypsum Association mandates specific fastening and taping protocols, but repair scenarios require a more nuanced product matrix.
Quick Selection Framework
- Hairline Cracks & Nail Pops: Drying-type all-purpose compound + paper tape or elastomeric patching material.
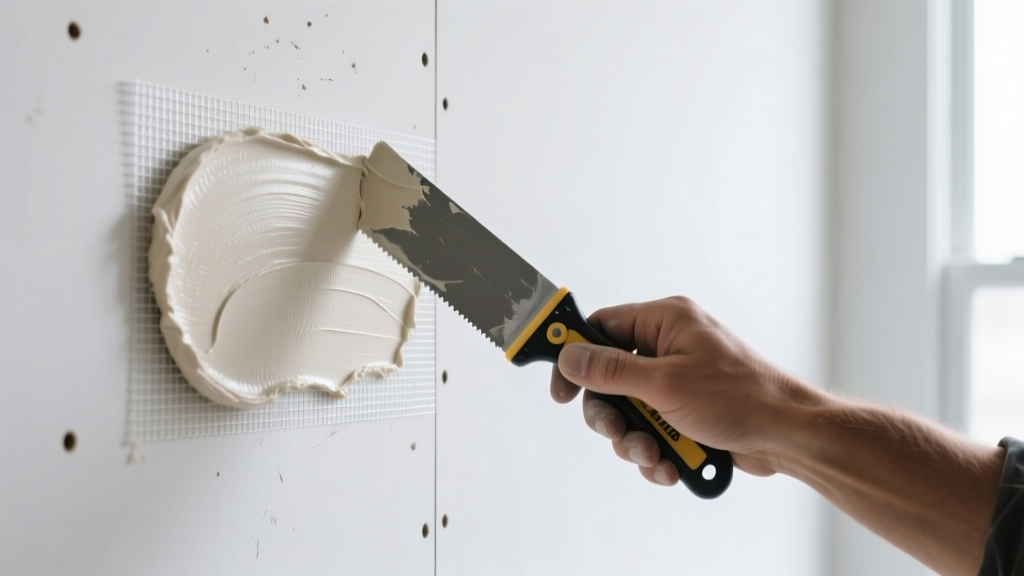
- Holes 1" to 4" (Doorknob Damage): Setting-type compound (5-20 min set) + self-adhesive fiberglass mesh.
- Holes 4" to 12" (Impact Damage): Setting-type compound + rigid backing strips or California patch technique.
- Seams & Corner Bead Blows: Setting-type compound for base coats + drying-type topping compound for finish.
The Chemistry of Gypsum Board Repair Compounds
To execute flawless repairs, you must understand the chemical difference between setting-type and drying-type joint compounds. This distinction dictates shrinkage rates, sanding profiles, and recoat windows.
Setting-Type Compounds (Chemical Cure)
Setting compounds are sold as dry powders and rely on the chemical rehydration of calcium sulfate hemihydrate. Retarders (like citric acid or keratin derivatives) are added at the factory to control working time. According to technical data from USG Corporation, products like Sheetrock Brand Easy Sand 5 offer a 5-minute working window and cure via an exothermic reaction. Because they cure chemically, they exhibit virtually zero shrinkage, making them the only acceptable choice for deep hole fills and structural bedding.
Drying-Type Compounds (Evaporative Cure)
Pre-mixed buckets contain vinyl polymers, limestone, and water. They cure strictly through evaporation. Products like ProForm ProMix Finish are engineered with fine aggregate for ultra-smooth skim coating but will shrink up to 15% by volume if applied too thickly.
| Product / Model | Type | Set / Dry Time | Shrinkage | Best Application |
|---|---|---|---|---|
| USG Easy Sand 5 | Setting (Powder) | 5 min working / 15 min cure | Negligible | Deep fills, rapid patches |
| USG Easy Sand 45 | Setting (Powder) | 45 min working / 80 min cure | Negligible | Bedding tape, large repairs |
| ProForm All-Purpose | Drying (Pre-mix) | 24 hours (thin coats) | Moderate | Taping, 2nd coats |
| ProForm ProMix Finish | Drying (Pre-mix) | 12-24 hours | Low (thin coats) | Final skim, texture base |
Reinforcement Systems: Tape and Backing
Compound alone lacks tensile strength. Any repair crossing a void or a seam requires mechanical reinforcement to resist the natural expansion and contraction of the building framing.
Fiberglass Mesh vs. Paper Tape
For localized hole repairs, self-adhesive fiberglass mesh (such as FibaTape) is the industry standard. Its open weave allows setting-type compound to extrude through the fabric, creating a mechanical lock. However, paper tape remains superior for long, continuous seams due to its higher tensile strength and resistance to blistering when embedded in a proper bed coat of compound.
The California Patch (Butterfly Method)
For medium holes (4"x4" to 8"x8") where installing wooden backing strips is physically difficult, the California patch is the most efficient technique. Cut a piece of scrap gypsum board 2 inches larger than the hole on all sides. Score the back paper and gypsum core, snapping the core away but leaving the face paper intact. The resulting 1-inch flange of face paper acts as an integrated, self-taping border that bonds seamlessly to the surrounding wall when buttered with Easy Sand 45.
Execution Protocols by Damage Scale
The National Wall and Ceiling Alliance emphasizes that proper preparation of the gypsum core is just as critical as the compound application.
- Preparation (All Sizes): Use a utility knife to bevel the edges of the damaged area inward at a 45-degree angle. This removes the fragile, crushed paper edge and creates a 'V' notch that forces the compound deep into the void, preventing surface-level air pockets.
- Small Voids (Under 2"): Pre-fill the void with a fast-setting compound (Easy Sand 5). Strike it flush with a 4-inch taping knife. Do not apply mesh tape; the chemical bond and minimal surface area are sufficient. Sand with 120-grit after 20 minutes.
- Medium Holes (2" to 8"): Apply self-adhesive mesh tape across the void. Mix a batch of setting compound to a thick, peanut-butter consistency. Press the compound through the mesh using a 6-inch knife. Apply a second, wider coat (10-inch knife) immediately after the first coat firms up. Setting compounds can be re-wetted and feathered while in the initial cure phase.
- Large Damage (Over 8"): Cut the hole back to the center of the adjacent wall studs. Install 1x3 wooden furring strips inside the cavity, screwed into the existing gypsum board to create a solid nailing flange. Screw a new piece of gypsum board to the furring strips. Tape the seams with paper tape and finish with a three-coat system (bed, fill, finish).
Sanding, Priming, and Texture Matching
A structurally sound repair will fail visually if the sanding profile and primer are mismatched. Setting-type compounds are significantly harder than drying-type toppings. Attempting to sand a fully cured Easy Sand 5 patch with 220-grit paper will result in severe scratching and uneven surfaces.
Pro Tip: Always use a 120-grit aluminum oxide sanding screen for setting compounds, and reserve 150 to 220-grit silicon carbide paper exclusively for final drying-type skim coats. Use a pole sander with an articulated head to maintain flat pressure across the patch perimeter.
Priming is non-negotiable. The repaired area consists of bare gypsum paper and porous joint compound, which will absorb paint at a different rate than the surrounding factory-painted wall, resulting in 'flashing' (visible dull spots). Apply a high-solids PVA drywall primer or an oil-based stain-blocking primer to seal the porosity before applying architectural topcoats.
For textured walls, matching the existing profile requires precise air pressure and material thinning. Orange peel textures require a hopper gun set to 40-60 PSI, with the compound thinned to the consistency of heavy cream. Knockdown textures require spraying heavy splatters and allowing them to set for exactly 3 to 5 minutes before flattening with a 12-inch drywall knife held at a 15-degree angle. Always test texture parameters on a scrap piece of cardboard before applying to the repaired wall.
2026 Sourcing and Cost Breakdown
Material costs for gypsum board repair remain highly affordable relative to labor. As of 2026, a 25-pound bag of setting-type compound retails between $18.00 and $22.00, while a 3.5-gallon bucket of premium lightweight pre-mixed topping compound ranges from $28.00 to $35.00. Professional-grade patch kits (which include a rigid aluminum-backed mesh panel) cost between $6.00 and $12.00 per unit and are recommended for DIYers tackling holes between 4" and 8" to eliminate the need for custom backing fabrication. Investing in high-quality stainless steel taping knives ($25-$40 each) prevents the rust staining and edge-degradation common with carbon steel alternatives, ensuring cleaner feathered edges on every repair.
Written by
James ThorntonJames Thornton is a construction industry veteran with 25 years of hands-on experience in wood framing, lumber grading, and residential building codes. He started as a framing carpenter in rural Oregon, earned his ICC Residential Building Inspector certification, and eventually became a senior plan reviewer for the City of Portland Bureau of Development Services. James holds a B.S. in Wood Science & Technology from Oregon State University and is a certified lumber grader through the West Coast Lumber Inspection Bureau (WCLIB). He has inspected over 3,000 residential construction sites and authored the city's internal guide on advanced framing techniques (2x6 at 24" O.C.). James lives in Bend, OR, where he builds custom timber-frame cabins and competes in lumberjack sports.
More from James Thornton
View all
Insulation
Best Home Insulation Materials: Complete 2026 Guide
Compare top home insulation materials for 2026. Find R-values, installed costs per square foot, and best uses for fiberglass, spray foam, and mineral wool.
Aug 4, 2026

Sustainable Building
Certify Your Green Building Material for LEED and WELL
Step-by-step guide to certifying a green building material for LEED v5 and WELL v2. Master EPDs, HPDs, and VOC limits for 2026 project specifications.
Aug 4, 2026

Stone & Masonry
Veneer Stacked Stone Panels: Interior Design & Style Showcase
Discover how veneer stacked stone panels transform interiors. Explore modern design profiles, material pairings, and technical installation specs.
Aug 4, 2026