Bathroom Gypsum Board Installation: A Wet vs. Dry Zone Guide
Master bathroom gypsum board installation with our wet vs. dry zone guide. Learn framing, fastening, and taping techniques to prevent mold and sagging.

The Code Reality: Where Water-Resistant Boards Belong
Installing bathroom gypsum board requires a fundamental understanding of moisture management and modern building codes. The days of universally applying paper-faced water-resistant gypsum board (commonly known as green board) to every bathroom surface are over. Current International Building Code (IBC) standards strictly prohibit the use of water-resistant gypsum panels as a substrate in direct wet areas, such as tub and shower surrounds. In these high-exposure zones, cementitious backer boards or fiber-cement panels are mandatory.
However, for the remaining 70% of a typical bathroom—the ambient humidity zones and high-splash areas—specialized bathroom gypsum board remains the superior, cost-effective choice. The key to a failure-free installation lies in treating the bathroom as a series of distinct micro-climates and applying specific fastening, taping, and sealing protocols to each. According to Building Science Corporation's guidelines on moisture flow, managing the vapor drive and preventing interstitial condensation is just as critical as stopping liquid water intrusion.
Material Selection Matrix: Matching the Board to the Bathroom Zone
Before driving a single screw, you must map the bathroom into three distinct zones and select the appropriate panel for each. This matrix eliminates the guesswork and ensures code compliance.
| Bathroom Zone | Moisture Exposure Level | Required Panel Type | Recommended Product Examples |
|---|---|---|---|
| Zone 1: Direct Wet (Shower/Tub surrounds) | Continuous liquid water, high heat | Cement Board or Fiber-Cement (Gypsum prohibited) | USG Durock, HardieBacker |
| Zone 2: High Splash (Vanity backsplashes, toilet surrounds) | Frequent liquid splashes, high humidity | Fiberglass-Faced Gypsum or Cement Board | Georgia-Pacific DensArmor Plus |
| Zone 3: Ambient Humidity (General walls, ceilings) | Elevated vapor, occasional condensation | Water-Resistant Gypsum (Green/Purple Board) | USG UltraLight Water-Resistant, Sheetrock Mold Tough |
For transitions between Zone 1 (cement board) and Zone 3 (bathroom gypsum board), refer to USG Durock Cement Board systems documentation for specific alkali-resistant mesh taping and thinset application requirements to bridge the two dissimilar materials seamlessly.
Step-by-Step Installation Protocol for Ambient and Splash Zones
Once the correct water-resistant or fiberglass-faced gypsum panels are selected for Zones 2 and 3, the installation must follow strict dimensional and fastening tolerances to prevent sagging and edge wicking.
Framing and Fastening Specifics
- Verify Framing Spacing: Bathroom ceilings are highly susceptible to moisture-induced sagging. Frame bathroom ceilings at a maximum of 12 inches on center (o.c.) using 2x4 or lightweight steel joists. Walls can remain at the standard 16 inches o.c., provided you are not installing heavy stone tile directly over the gypsum.
- Panel Orientation: Always install bathroom gypsum board perpendicular to the framing members. This increases the structural rigidity of the wall and minimizes the number of horizontal butt joints, which are notorious for trapping moisture if improperly finished.
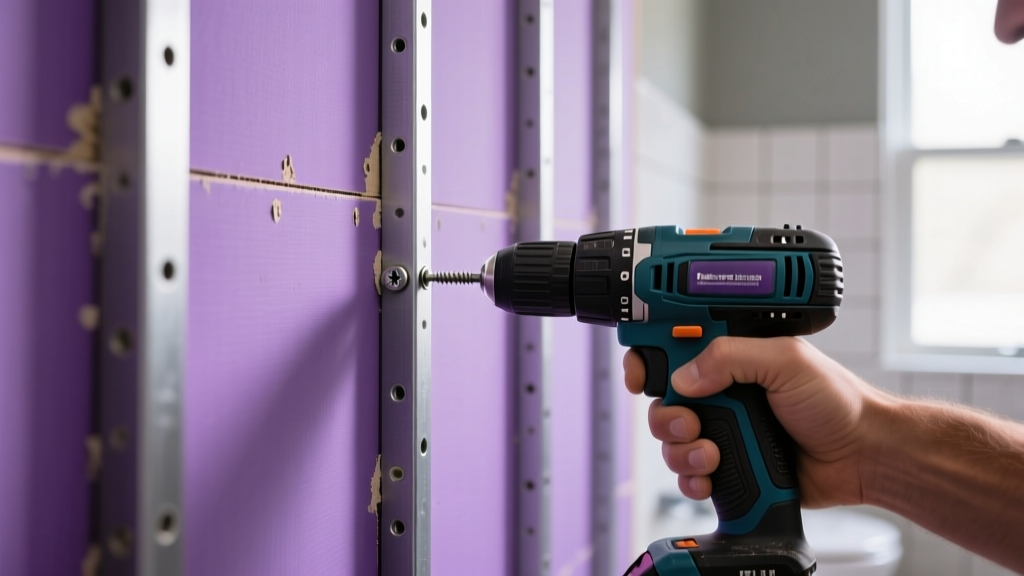
- Fastener Selection and Spacing: Use 1-1/4-inch coarse-thread drywall screws for wood framing, or 1-inch fine-thread screws for steel studs. Drive screws at a maximum spacing of 8 inches o.c. on walls and 7 inches o.c. on ceilings. Ensure the screw head creates a shallow dimple without breaking the paper or fiberglass facing.
The Critical Bottom Edge Capillary Break
Gypsum is highly susceptible to capillary action. If the bottom edge of a bathroom wall panel rests directly on a concrete slab or a wet tile subfloor, it will wick moisture upward, leading to baseboard rot and lower-wall mold. Maintain a strict 1/2-inch gap between the bottom of the gypsum board and the subfloor. Use temporary shims during installation to hold the board up, then remove them before taping. This gap must later be sealed with a continuous bead of 100% silicone caulk before baseboards or floor tile are laid.
Taping, Mudding, and Moisture Sealing
The joint treatment phase is where most bathroom installations fail. Standard air-drying joint compounds remain water-soluble even after curing, meaning a heavy steam shower can soften the mud over time, leading to cracking and tape delamination.
- First Coat (Embedding): Use a setting-type joint compound (such as USG Durabond 90 or Sheetrock Easy Sand 45) for the taping coat. Setting compounds undergo a chemical reaction that makes them highly water-resistant and structurally rigid once cured. Pair this with a mold-resistant fiberglass mesh tape (e.g., FibaTape) rather than paper tape, which can harbor mold spores if exposed to ambient moisture.
- Subsequent Coats (Topping): For the second and third coats, you may switch to a moisture-resistant all-purpose or lightweight topping compound to achieve a smooth Level 4 or Level 5 finish. Ensure each coat is bone-dry before applying the next; trapped moisture between coats will blister when the bathroom heats up.
- Primer Selection: Do not use standard PVA (polyvinyl acetate) drywall primer in a bathroom. PVA is water-soluble and will reactivate under high humidity. Instead, seal the finished bathroom gypsum board with a high-build, 100% acrylic vapor-retarding primer. Products like Zinsser Mold Killing Primer or Kilz Premium create an impermeable barrier that locks out ambient steam.
Troubleshooting Common Bathroom Drywall Failures
Even with the right materials, improper execution leads to costly callbacks. Use this diagnostic framework to identify and rectify common installation errors.
Failure 1: Screw Pops and Rust Bleed
Symptom: Circular bulges appearing through the paint, often accompanied by brown or orange staining.
Cause: Using uncoated screws that oxidized, or failing to properly dimple the screw head, leaving the head proud of the surface where it catches moisture from the mudding process.
Fix: Drive a new corrosion-resistant screw 2 inches above the popped screw. Countersink it properly. Seal the rust stain with a shellac-based spot primer (like B-I-N) before applying joint compound and repainting.
Failure 2: Edge Wicking and Baseboard Rot
Symptom: Soft, crumbling drywall at the floor line; peeling paint on the bottom 3 inches of the wall; mold growth behind baseboards.
Cause: The gypsum board was installed flush against the subfloor, allowing mop water or shower overflow to wick into the gypsum core via capillary action.
Fix: Cut out the bottom 2 inches of the damaged drywall using an oscillating multi-tool. Install a PVC or composite trim piece to bridge the gap, or replace the lower section with cement board, ensuring a 1/2-inch air gap and sealing the joint with 100% silicone.
Failure 3: Ceiling Sagging in Humid Conditions
Symptom: Visible bowing between joists, often accompanied by ridging at the fastener lines.
Cause: Framing spaced at 24 inches o.c. instead of 12 inches o.c., or the use of 1/2-inch standard gypsum instead of 5/8-inch water-resistant panels on a bathroom ceiling.
Fix: The only permanent remedy is to remove the sagging ceiling panels, add additional framing or furring strips to reduce the span to 12 inches o.c., and reinstall 5/8-inch water-resistant or fiberglass-faced gypsum board, fastening every 7 inches.
By respecting the distinct moisture zones within a bathroom and adhering to strict fastening and finishing protocols, contractors can deliver bathroom gypsum board installations that withstand decades of high-humidity exposure. For further technical specifications on panel limitations and fastener schedules, always consult the Gypsum Association installation standards before finalizing your material takeoffs.
Written by
David NakamuraDavid Nakamura is a licensed architect (AIA) and construction technology writer focused on sustainable building methods, mass timber engineering, and high-performance building envelopes. He holds a Master of Architecture from the University of Washington and is a certified Passive House Consultant (CPHC). David spent eight years at the Seattle firm Mithun, where he led the design of three LEED Platinum projects, before founding his own practice specializing in net-zero residential design. He serves on the editorial advisory board of GreenBuilder Magazine and has authored peer-reviewed papers on cross-laminated timber (CLT) connections for the Journal of Structural Engineering. In his spare time, David teaches woodworking at Pratt Fine Arts Center and kayaks the Puget Sound.
More from David Nakamura
View all
Construction Cost
Labor Cost to Build a Deck Per Sq Ft: 2026 Installation Guide
Discover the exact labor cost to build a deck per sq ft in 2026. This installation guide breaks down contractor rates, complexity factors, and hidden fees.
Aug 4, 2026

Construction Cost
How Much Does It Cost to Build a 3 Bedroom House? Financing Guide
Learn exactly how much it costs to build a 3 bedroom house and explore 2026 financing options, construction loan types, and budget frameworks for your build.
Aug 4, 2026

Construction Cost
Cost to Build a Tennis Court: 2026 Guide
How much does it cost to build a tennis court in 2026? Breakdowns for asphalt, concrete, and synthetic surfaces plus fencing and lighting.
Jul 30, 2026