Gypsum Board Suspended Ceiling Installation: Pro Framing & Finishing
Master gypsum board suspended ceiling installation with pro framing techniques, acoustic isolation tips, and precise fastener spacing.

The Anatomy of a High-Performance Suspended Ceiling
Executing a flawless gypsum board suspended ceiling requires managing dead loads, mitigating acoustic flanking, and preventing long-term deflection. As of 2026, the commercial and high-end residential sectors have largely transitioned from traditional 5/8-inch panels to 1/2-inch sag-resistant ultralight boards (such as USG Sheetrock Ultralight or CertainTeed ToughRock). These panels reduce dead load on the suspension grid by up to 25% and significantly decrease installer fatigue, but they demand strict adherence to framing tolerances to prevent joint photographing and fastener popping.
Never exceed the manufacturer's specified load limit for main tees. A standard 15/16-inch exposed grid system is typically rated for 4.0 lbs/sq. ft. Adding heavy acoustic insulation, recessed HVAC diffusers, and multiple layers of fire-rated gypsum board without supplemental hanger wires will cause catastrophic grid deflection.
Grid Layout and Main Tee Suspension Mechanics
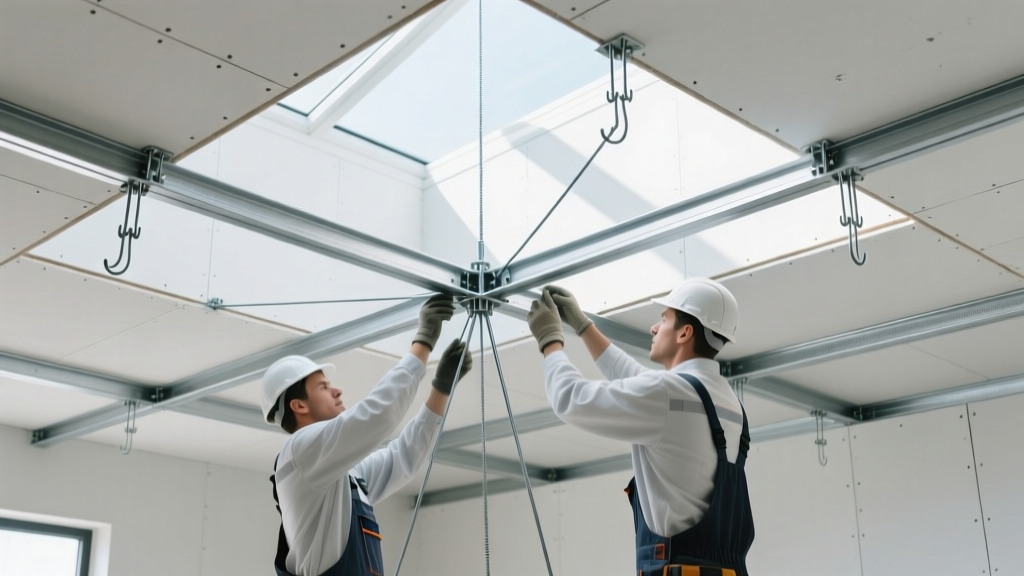
The structural integrity of a gypsum board suspended ceiling relies entirely on the metal framing grid. According to Gypsum Association guidelines, suspension systems must comply with ASTM C636. The layout begins with establishing a benchmark datum line using a rotary laser level, accounting for a minimum 3-inch plenum clearance above the ceiling line for HVAC and electrical routing.
Hanger Wire Placement and Tensioning
Hanger wires must be 12-gauge galvanized steel for commercial applications. Wires should be attached to the primary structure (concrete deck or steel joists) using powder-actuated fasteners or wedge anchors, never wrapped around ductwork, piping, or non-structural conduit.
| Component | Specification | Maximum Spacing |
|---|---|---|
| Hanger Wire (12-ga) | Galvanized Steel | 4 feet on center (o.c.) |
| Main Tees | Heavy-duty 15/16" steel | 4 feet o.c. |
| Furring Channels (Hat) | 25-gauge min, 7/8" depth | 16 inches o.c. (perpendicular) |
| Perimeter Molding | L-shaped or Shadowline | Fastened every 24 inches |
Gypsum Board Selection for Ceiling Applications
Choosing the correct panel prevents premature sagging, a common failure mode caused by moisture absorption before the building's HVAC system is fully balanced. Sagging manifests as visible bowing between furring channels, ruining the aesthetic of flat ceilings.
- 1/2" Sag-Resistant Ultralight: The 2026 baseline for standard commercial and residential ceilings. Weighs approximately 1.6 lbs/sq. ft. Requires 16" o.c. framing.
- 5/8" Type X (Firecode): Required for 1-hour fire-rated floor/ceiling assemblies. Weighs 2.2 lbs/sq. ft. Allows 24" o.c. framing but increases dead load.
- Foil-Backed Panels: Utilized in high-humidity zones or exterior soffits to block vapor drive, preventing moisture from compromising the gypsum core.
- Glass-Mat Gypsum: Used in plenums with extreme moisture exposure or where mold resistance is mandated by health codes (ASTM D3273).
Fastening Protocols: Preventing Pops and Deflection
Fastener failure in suspended ceilings is almost always a result of improper screw depth or framing movement. When attaching gypsum board to furring channels or joists, use 1-1/4-inch Type S (fine-thread) drywall screws for 1/2-inch board, or 1-5/8-inch screws for 5/8-inch board.
- Perimeter Fastening: Drive screws 3/8 inch from the board edge. Fasteners placed closer risk blowing out the tapered edge, destroying the joint's structural integrity.
- Field Spacing: Space screws a maximum of 12 inches o.c. along each furring channel. For 5/8-inch boards on 24-inch o.c. framing, reduce spacing to 8 inches o.c. at the edges.
- Dimpling Technique: The screw head must break the paper surface and create a shallow dimple without tearing the face paper. A torn paper face provides zero holding power and will result in a nail pop as the building settles.
- Staggering Joints: Stagger end joints by a minimum of 24 inches. Never align four corners at a single intersection, which creates a high-stress point prone to cracking.
Where the ceiling meets a non-load-bearing partition wall, do not fasten the ceiling board within 16 inches of the wall intersection. Instead, let the wall board support the ceiling edge. This 'floating angle' accommodates truss uplift and prevents severe corner cracking during seasonal humidity shifts.
Acoustic Isolation and Seismic Bracing
In multi-family residential and commercial office spaces, impact noise and airborne sound transmission through the ceiling plenum must be mitigated. Furthermore, seismic zones dictate strict lateral bracing requirements for suspended grids.
Resilient Channel vs. Hat Channel
Standard hat channels (furring channels) provide a flat nailing surface but transfer acoustic vibrations directly from the structure to the gypsum board. For acoustic isolation, install RC-1 resilient channels perpendicular to the joists at 24 inches o.c. Resilient channels feature a flexible flange that decouples the gypsum board from the framing, improving the STC (Sound Transmission Class) rating by 5 to 10 points. Ensure screws only penetrate the resilient channel and do not 'short-circuit' into the structural joist above.
Seismic Separation and Bracing
According to the International Building Code (IBC) and AWCI technical standards, ceilings in seismic design categories C, D, E, and F require lateral bracing. This includes:
- Compression Struts: Installed at 45-degree angles to prevent lateral grid sway.
- Seismic Separation Moldings: A 3/4-inch gap must be maintained at the perimeter where the ceiling meets the wall, allowing the ceiling grid to move independently of the building structure during a seismic event.
Taping and Finishing: Managing Flat Ceilings
Ceilings are unforgiving. Unlike walls, ceilings are frequently subjected to 'grazing light' (natural light from large windows or wall-washing LED fixtures), which highlights even microscopic imperfections.
For standard commercial spaces, a Level 4 finish is typical: three coats of joint compound over taped seams, with fastener heads covered in two coats. However, for spaces with critical lighting, gloss paints, or dark architectural colors, a Level 5 finish is mandatory. A Level 5 finish involves applying a thin, continuous skim coat of joint compound over the entire gypsum board surface after the Level 4 taping is complete. This equalizes the porosity and texture difference between the paper face and the joint compound, eliminating 'joint photographing' (where seams become visible under specific lighting angles).
"The most common cause of ceiling callbacks is not structural failure, but finishing defects under grazing light. Always mandate a Level 5 skim coat in architectural plans if wall-washing luminaires are specified within 3 feet of the ceiling plane." — Master Plasterer Guidelines, AWCI Document 1-A
Frequently Asked Questions (FAQ)
Why is my 1/2-inch ceiling board sagging between joists?
Sagging in 1/2-inch boards typically occurs when framing exceeds 16 inches o.c., or when the building's HVAC system is not yet operational during high-humidity construction phases. The gypsum core absorbs ambient moisture, increasing its weight and causing creep deflection. Always use specifically labeled 'sag-resistant' 1/2-inch panels and ensure climate control is active before closing ceilings.
Can I install recessed can lights directly into the suspended ceiling grid?
No. Recessed lighting fixtures must be independently supported by the primary building structure or by dedicated suspension wires attached to the joists. Hanging heavy IC-rated (Insulation Contact) LED housings directly on the cross tees or the gypsum board will cause localized deflection and potential grid failure.
What is the cost difference between a standard and a Level 5 ceiling finish?
In 2026, standard Level 4 taping and finishing costs approximately $1.50 to $2.10 per square foot in labor and materials. Upgrading to a Level 5 skim coat adds $1.25 to $1.80 per square foot due to the additional material volume, extended drying times, and specialized sanding equipment required to achieve a perfectly flat plane.
Written by
Priya KapoorPriya Kapoor is a real estate market analyst and construction economics researcher with expertise in housing affordability, development feasibility, and infrastructure investment. She holds a Master of Regional Planning from Cornell University and previously worked as a senior analyst at CBRE's Investment Properties group, where she modeled returns for $4B in mixed-use development pipelines. Priya now runs an independent research practice advising developers, municipalities, and REITs on construction cost forecasting and market timing. She publishes the quarterly "BuildMat Market Pulse" report tracking material price indices across 12 commodity categories. Based in Austin, TX, Priya serves on the board of Habitat for Humanity Austin and is a marathon runner.
More from Priya Kapoor
View all
Construction Cost
Cost to Build a 1600 Sq Ft Home in 2026: Full Breakdown
Accurate 2026 cost to build a 1600 sq ft home—material, labor, and regional pricing breakdowns included. Plan your budget with real-time estimates.
Aug 11, 2026

Wood & Lumber
Name the Types of Wood for Pressure Treatment and Preservation
Learn how to name the types of wood best suited for pressure treatment. Compare species treatability, chemical retention levels, and 2026 preservation costs.
Aug 4, 2026

Stone & Masonry
Stone Veneer Suppliers Lindenhurst: 2026 Cost Analysis
Analyze 2026 stone veneer costs in Lindenhurst, NY. Compare local supplier pricing, delivery fees, and Suffolk County installation labor rates.
Aug 4, 2026