Mastering Gypsum Cover Board Installation on Commercial Roofs
Learn precise gypsum cover board installation techniques for low-slope roofs, including fastener patterns, adhesive methods, and moisture prevention.

The Structural and Thermal Role of Gypsum Cover Boards
In low-slope and flat commercial roofing systems, the gypsum cover board acts as the critical transitional layer between the thermal insulation (typically polyiso, EPS, or XPS) and the primary waterproofing membrane. Products like Georgia-Pacific DensDeck Prime and USG Securock are engineered with fiberglass-mat facers and a moisture-resistant gypsum core. Unlike standard interior drywall, these boards are manufactured to meet Gypsum Association standards for exterior exposure, providing impact resistance, fire rating (ASTM E119), and a stable substrate for membrane adhesion.
- Impact Resistance: Protects softer polyiso insulation from foot traffic, hail, and dropped tools.
- Thermal Barrier: Increases the overall R-value and shields the membrane from extreme temperature fluctuations.
- Fire Rating: Non-combustible gypsum core prevents flame spread and protects the building deck.
Pre-Installation: Substrate Verification and Material Staging
Proper installation begins before the first board is laid. The underlying insulation must be fully adhered or mechanically fastened according to the insulation manufacturer's specifications. Verify that the insulation surface is clean, dry, and free of debris. Moisture trapped beneath the cover board will vaporize under solar loading, causing membrane blistering and delamination.
Material Acclimation and Staging Protocols
Gypsum cover boards are highly susceptible to edge wicking if exposed to standing water. Stage materials on the roof deck only when weather conditions permit immediate installation. Never leave pallets exposed to overnight dew or rain. If installing over a concrete deck, ensure the concrete has cured and passed a moisture vapor emission test (typically requiring less than 3 lbs per 1,000 sq ft per 24 hours via the calcium chloride test).
Attachment Methods: Mechanical vs. Adhesive Decision Matrix
The choice between mechanical fastening and adhesive attachment depends on the roof assembly design, wind uplift requirements, and membrane type. The National Roofing Contractors Association (NRCA) provides specific guidelines for matching attachment methods to roof geometries.
| Attachment Method | Best Application | Wind Uplift Capacity | Cost & Labor Profile |
|---|---|---|---|
| Mechanical Fastening | Single-ply membranes (TPO, PVC); high-wind zones | High (FM 1-90 to 1-150+) | Lower material cost, moderate labor |
| Hot Asphalt Mopping | Built-up roofs (BUR), modified bitumen | Very High (continuous bond) | High material/labor, requires kettle |
| Cold Adhesive (Urethane) | Odor-sensitive areas, occupied buildings | Moderate to High | High material cost, fast application |
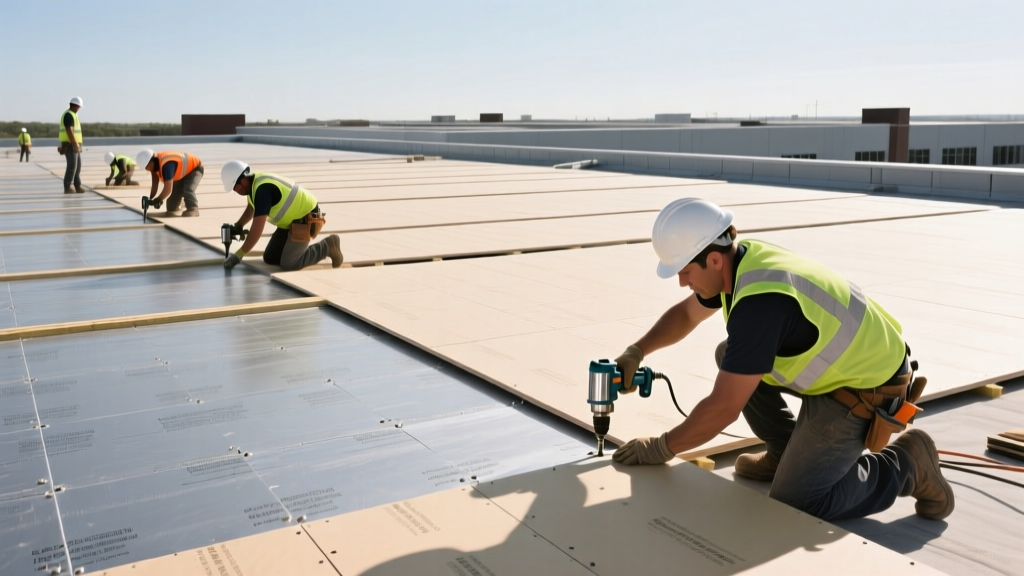
Step-by-Step Mechanical Fastening Protocol
When mechanically attaching gypsum cover boards (typically 1/4-inch or 1/2-inch thick panels in 4x8 foot dimensions), fastener density is dictated by FM Global wind uplift ratings and ANSI/SPRI FX-1 standards.
- Board Placement: Lay boards flat over the insulation with the long edges parallel to the slope or roof edge. Maintain a 1/8-inch gap between adjacent boards to allow for thermal expansion and prevent edge crushing.
- Perimeter Fastening: Begin by securing the perimeter of the board. Place fasteners 2 inches from the edges and space them 12 inches on center (o.c.).
- Field Fastening: Drive interior fasteners in a grid pattern, typically 12 inches o.c. in both directions. For a standard 4x8 board in a field zone, this equates to a minimum of 24 fasteners per board.
- Fastener Selection: Use corrosion-resistant screws with minimum 3-inch diameter galvanized or coated stress plates. The screw must penetrate the structural deck (steel or concrete) by at least 3/4-inch for steel, or 1-inch for concrete.
- Depth Verification: The fastener head and plate must sit flush with the fiberglass mat surface. Over-driving will fracture the gypsum core, compromising pull-through strength. Under-driving will create ridges that telegraph through the roof membrane.
Perimeter and Corner Zone Adjustments
Wind uplift forces are exponentially higher at roof perimeters and corners. In these zones, fastener density must be increased. Standard practice requires reducing fastener spacing from 12 inches o.c. to 6 inches o.c. along the edges and throughout the field of the board in corner zones, effectively doubling the fastener count to 48 or more per 4x8 panel.
Hot Asphalt and Cold Adhesive Application Techniques
For adhered membrane systems, the cover board must be fully bonded to the insulation below.
Hot Asphalt Mopping
When using hot asphalt, the asphalt must be heated to its equiviscous temperature (EVT), typically between 400°F and 425°F. Apply the asphalt using a mechanical spreader or hand mop in a uniform, continuous layer at a rate of 20 to 25 pounds per 100 square feet. Lay the gypsum board into the hot asphalt immediately before the asphalt cools and skins over. Roll the board with a 75-pound weighted roller to ensure 100% contact and eliminate voids.
Low-VOC Cold Adhesive
Two-component polyurethane cold adhesives are applied in continuous ribbons or a full-spread pattern. For ribbon applications, beads should be spaced 12 inches o.c. across the width of the board. Because cold adhesives rely on moisture to cure, they are highly sensitive to ambient humidity. In arid climates, a light misting of the substrate may be required to initiate the chemical cure before placing the cover board.
Joint Staggering and Membrane Readiness
Proper joint management prevents structural weak points and membrane stress concentrations.
Expert Rule of Thumb: Never align the joints of the cover board with the joints of the underlying insulation. Stagger all cover board end and edge joints by a minimum of 6 inches from the insulation joints below, and stagger adjacent rows of cover boards to form a continuous T-joint pattern. This distributes structural loads and prevents continuous thermal bridges.
Before applying the primary waterproofing membrane, sweep the entire cover board surface. Remove all loose gypsum dust, dirt, and debris. If using a self-adhering membrane or a fully adhered single-ply system, prime the fiberglass mat surface with the manufacturer-approved primer to ensure optimal peel adhesion.
Troubleshooting Common Installation Failures
Even experienced crews encounter edge cases during installation. Recognizing and mitigating these failure modes is critical for long-term roof performance.
- Fastener Back-Out: Occurs when screws reverse out of the deck due to thermal cycling or vibration. Fix: Ensure the drill clutch is calibrated correctly. If back-out persists in metal decks, switch to fasteners with deeper, more aggressive thread pitches designed specifically for thin-gauge steel.
- Edge Delamination: The fiberglass mat separates from the gypsum core at the board edges. Fix: This is almost always caused by moisture intrusion during staging. Cut out the delaminated sections and replace them. Never install boards with compromised edges.
- Membrane Blistering: Blisters form above the cover board joints after membrane installation. Fix: This indicates trapped moisture or improper asphalt mopping temperatures. Ensure the 1/8-inch expansion gap is maintained and that asphalt is applied at the precise EVT to prevent vapor entrapment.
- Crushed Edges: Boards are forced tightly together, causing the edges to crumble and create ridges. Fix: Enforce the 1/8-inch gap rule during layout. Use a spacer tool to maintain consistent gaps across the roof plane.
Written by
Sarah WhitfieldSarah Whitfield is a chartered quantity surveyor (MRICS) and construction cost analyst with 15 years of experience in material pricing, procurement strategy, and project budgeting. She earned her degree in Construction Management from the University of Reading (UK) and has worked on projects ranging from $2M custom homes to $180M mixed-use developments across North America and Europe. Sarah currently leads cost estimating for BuildMat Insight, maintaining a proprietary database of 4,000+ material price points updated quarterly. She is a frequent contributor to RSMeans cost data panels and has presented at the International Cost Engineering Council (ICEC) congress. Based in Denver, CO, Sarah is an avid trail runner and volunteer mentor for Women in Construction.
More from Sarah Whitfield
View all
Wood & Lumber
What Are the Different Types of Wood? A Builder's Guide
Compare structural softwoods, finish hardwoods, and engineered lumber. Analyze Janka ratings, MOE values, and 2026 pricing for construction.
Aug 4, 2026

Walls & Panels
Steel Framing vs Wood Framing: Corrosion and Moisture Defense
Compare steel framing vs wood framing for moisture resistance. Learn about galvanized coatings, condensation risks, and corrosion protection strategies.
Jul 21, 2026

Stone & Masonry
How to Cut Stone Veneer: Wet Saw vs Grinder Comparison
Compare the best tools for cutting stone veneer. We review wet saws, angle grinders, and chop saws to help you achieve clean, chip-free cuts.
Jul 21, 2026