Master Fire Rated Drywall Installation for 1-Hour and 2-Hour Walls
Learn exact installation procedures for fire rated drywall. Covers Type X and Type C framing, fastener spacing, joint treatment, and penetration firestopping.
The System vs. The Material: Understanding UL Assemblies
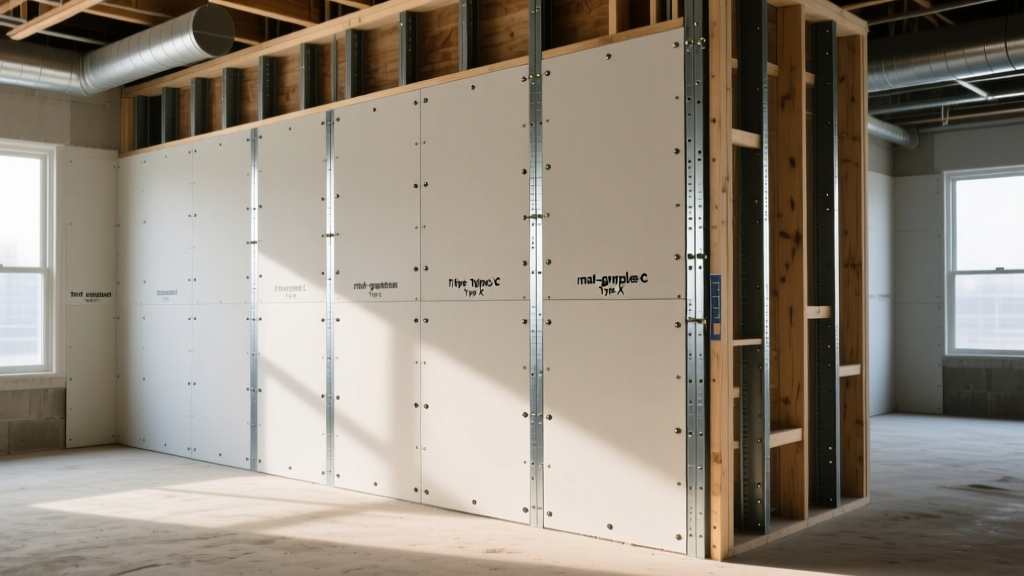
Installing fire rated drywall is fundamentally different from hanging standard interior partitions. When you install standard 1/2-inch gypsum board, you are simply creating a physical barrier. When you install fire rated drywall, you are executing a tested, engineered life-safety system. The Gypsum Association Fire Resistance Design Manual explicitly states that fire resistance is a property of the entire assembly—including the framing, fasteners, joint treatment, and insulation—not just the board itself.
Board Selection: Type X vs. Type C Core Chemistry
To achieve 1-hour or 2-hour fire ratings, contractors must select the correct board thickness and core formulation. Standard 5/8-inch board will not pass fire testing due to rapid calcination (the chemical process where gypsum loses its water of crystallization and turns to powder). Fire rated drywall incorporates specific additives to delay this process.
| Feature | Standard 5/8" Board | Type X (e.g., USG Firecode) | Type C (e.g., USG Firecode C) |
|---|---|---|---|
| Core Additives | None / Minimal | Glass fibers | Glass fibers + Vermiculite |
| Shrinkage Resistance | Low | Moderate | High (Vermiculite expands when heated to fill gaps) |
| Typical Assembly Rating | N/A (0 Minutes) | 1-Hour (Single layer) | 2-Hour (Single layer) or 3-Hour/4-Hour (Multi-layer) |
| Weight per Sq. Ft. | ~2.2 lbs | ~2.3 lbs | ~2.4 lbs |
For most commercial 1-hour corridor and shaft wall applications, Type X is the industry standard. Type C is mandatory for multi-layer systems, 2-hour area separation walls, and ceiling assemblies where core shrinkage could expose the framing to direct flame impingement.
Framing Tolerances and Fastener Protocols
The structural skeleton of a fire-rated wall must meet strict minimum dimensions. Undersized framing will warp under the thermal stress of a fire, pulling the fasteners through the gypsum core.
Steel Stud Specifications
For standard 1-hour and 2-hour vertical assemblies, steel studs must be a minimum of 2-1/2 inches wide and 25-gauge (0.0179 inches thick) or heavier. Lightweight 20-gauge or 25-gauge studs narrower than 2-1/2 inches are not permitted in most load-bearing or high-rating UL designs. Stud spacing is strictly limited to 24 inches on center (o.c.) for most single-layer applications, though 16 inches o.c. is required for certain acoustic or multi-layer assemblies.
Wood Stud Specifications
Wood framing requires a minimum nominal 2x4 (actual 1.5" x 3.5") Douglas Fir or Spruce-Pine-Fir stud. Wood studs must be spaced at a maximum of 16 inches o.c. for fire-rated assemblies, unlike non-rated residential walls which can often utilize 24-inch spacing.
The Fastener Matrix
Fastener failure is the primary cause of assembly collapse during fire testing. As the paper facing burns away, the screw head must remain embedded in the core to hold the board to the frame.
| Board Type | Framing | Screw Type | Min. Length | Edge Spacing | Field Spacing |
|---|---|---|---|---|---|
| 5/8" Type X | Steel (25ga+) | Type S (Fine) | 1-1/4" | 8" o.c. | 12" o.c. |
| 5/8" Type X | Wood (2x4) | Type W (Coarse) | 1-5/8" | 7" o.c. | 12" o.c. |
| 5/8" Type C | Steel (25ga+) | Type S (Fine) | 1-1/4" | 8" o.c. | 12" o.c. |
Joint Treatment: Beyond Aesthetics
In standard drywalling, joint treatment is purely cosmetic. In fire rated drywall assemblies, joint treatment is structural. The USG Fire-Rated Systems guide dictates that all joints, including butt joints and inside corners, must be taped and covered with joint compound to prevent hot gases from penetrating the wall cavity and igniting the opposite side.
For fire-rated walls, you must use paper tape embedded in a setting-type joint compound (such as USG Easy Sand 45 or 90) or an all-purpose pre-mixed compound. Setting-type compounds are highly recommended for commercial fire-rated work because their chemical cure prevents shrinkage, ensuring the joint remains completely filled even under thermal expansion. Mesh tape is generally prohibited in tested fire assemblies unless specifically noted in the UL design, as it lacks the tensile strength of paper tape when exposed to heat.
Penetration Management and Firestopping
The most rigorous part of a fire inspection is the penetration check. A 2-hour wall is rendered useless if a 3-inch PVC pipe melts away and leaves a hole for smoke and fire to travel through. Every penetration must be sealed with an approved, listed firestop system.
- Combustible Pipes (PVC, CPVC, PEX): Must be sealed with intumescent firestop sealant (e.g., Hilti CP 606 or 3M Fire Barrier Sealant). When exposed to heat, the sealant expands up to 10 times its volume, crushing the melting pipe and sealing the void.
- Non-Combustible Pipes (Copper, Steel, Cast Iron): Can be sealed with firestop silicone or mineral wool packed tightly and capped with intumescent caulk.
- Electrical Boxes: Standard plastic electrical boxes are permitted in 1-hour and 2-hour walls, but they must be separated by a minimum of 24 inches horizontally on opposite sides of the wall. If this spacing cannot be maintained, the boxes must be wrapped in intumescent firestop putty pads.
- HVAC Duct Penetrations: Require specialized fire dampers and collar systems, not just surface caulk.
5 Critical Failure Points in Fire Inspections
Fire marshals and third-party inspectors (such as those from Intertek or UL) look for specific installation errors that compromise the assembly. Avoid these five common failures:
- Excessive Perimeter Gaps: The gap between the bottom edge of the drywall and the floor decking cannot exceed 5/8" for most 1-hour assemblies. If the floor is uneven and the gap is larger, the assembly fails. Use fire-rated mineral wool or approved firestop caulk to fill gaps exceeding 1/4".
- Missing Fasteners at Cutouts: When cutting drywall around electrical boxes or HVAC registers, installers often miss the required fastener within 8 inches of the cut edge. Every cut edge must have a screw within 8 inches of the corner of the cutout.
- Improper Insulation Batching: If the UL design requires mineral wool or fiberglass batt insulation to achieve the rating, it must completely fill the cavity. Compressing the insulation or leaving gaps at the top and bottom plates voids the thermal barrier.
- Unsealed Control Joints: In long corridor walls, expansion/control joints are required to prevent cracking. Standard plastic control joints are not fire-rated. You must use fire-rated control joints that incorporate an intumescent strip to seal the gap during a fire.
- Wrong Compound on Fasteners: Using lightweight topping compound to cover screw heads on a fire-rated ceiling assembly. Topping compound lacks the adhesive strength and heat resistance required; all fasteners in a fire assembly must be covered with all-purpose or setting-type compound.
Mastering the installation of fire rated drywall requires strict adherence to tested designs. By selecting the correct Type X or Type C board, utilizing the precise fastener matrix, and rigorously firestopping all penetrations, contractors ensure the life-safety integrity of the building envelope.