Level 4 Gypsum Board Finish: Specs, Dimensions & Tolerances
Explore exact specifications, dimensions, and flatness tolerances for a level 4 gypsum board finish to ensure flawless flat paint and light textures.

Defining the Level 4 Gypsum Board Finish
The level 4 gypsum board finish is the industry baseline for interior walls and ceilings scheduled to receive flat paints, light textures, or commercial-grade wallcoverings. Governed by ASTM C840 and the Gypsum Association’s GA-214 standard, this finish level requires a precise sequence of taping and joint compound applications to eliminate visible seams, fastener dimples, and surface voids. While it provides a smooth substrate for standard decorative treatments, it is not engineered to withstand severe side-lighting or high-gloss coatings without risking joint telegraphing.
• Flat Joints: 1 tape embed coat + 2 finish coats (3 total)
• Inside Corners: 1 tape embed coat + 1 finish coat (2 total)
• Outside Corners: 3 separate coats over corner bead flanges
• Fastener Heads: Minimum 2 separate coats (3 recommended for field practice)
• Accessories: 2 separate coats over bead flanges
Dimensional Tolerances and Surface Flatness
Achieving a true level 4 gypsum board finish begins before the first layer of compound is mixed. The underlying framing and gypsum panel installation must meet strict dimensional tolerances. If the substrate exceeds maximum deviation limits, joint compound cannot be feathered widely enough to hide the plane changes, leading to visible humps under raking light.
| Measurement Parameter | Standard Tolerance (GA-214) | Critical Lighting Tolerance |
|---|---|---|
| Surface Plane Deviation | Max 1/4 inch in 10 feet (6 mm in 3 m) | Max 1/8 inch in 10 feet (3 mm in 3 m) |
| Adjacent Panel Edge Mismatch | Max 1/16 inch (1.6 mm) | Max 1/32 inch (0.8 mm) |
| Fastener Dimple Depth | 1/32 inch without breaking face paper | 1/32 inch without breaking face paper |
When framing deviations exceed 1/4 inch in 10 feet, the finisher must either request framing corrections or apply a base layer of setting-type compound to build out the low areas before beginning the standard level 4 sequence. According to the Gypsum Association technical guidelines, attempting to hide severe framing bows with standard drying-type joint compound will result in excessive shrinkage, cracking, and extended drying times.
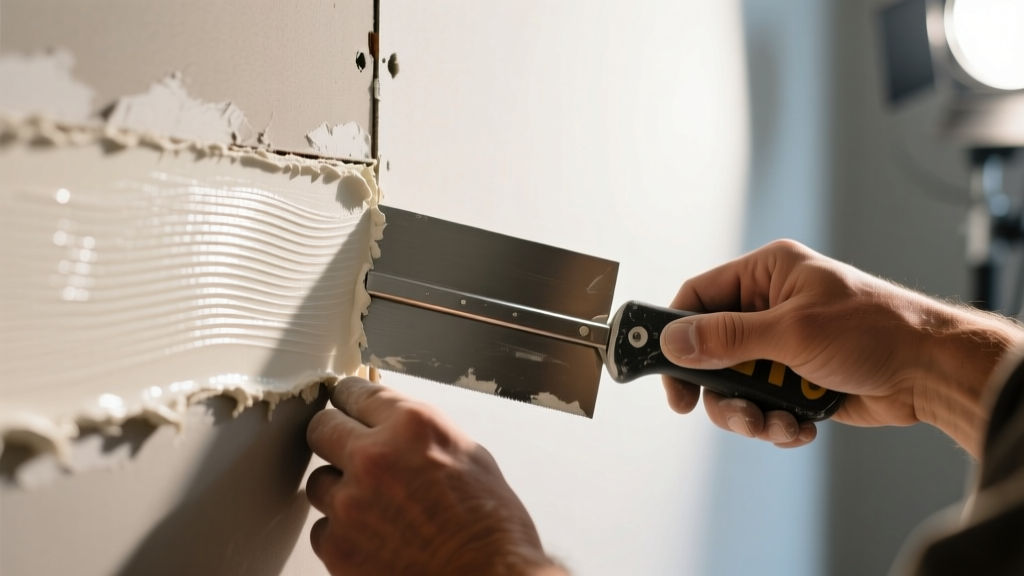
Joint Compound Application Specifications
The physical dimensions of each joint compound coat dictate the final flatness of the wall. Feathering the edges of the compound over a wide area creates an optical illusion of flatness, even if the physical joint is slightly raised.
Tape and Embedment Coat
Paper tape is the mandatory standard for level 4 flat joints due to its superior tensile strength and minimal thickness (approx. 0.015 inches). Fiberglass mesh tape is generally restricted to setting-type compounds and is not recommended for the primary flat joints in a level 4 finish due to the risk of blistering and ridge formation.
- Compound Type: All-Purpose (drying) or 45-minute Setting-Type.
- Knife Dimension: 4-inch or 6-inch taping knife.
- Target Thickness: 1/32 inch beneath the tape, squeezing out excess to prevent ridges.
Filler and Finish Coats
Subsequent coats must progressively widen to blend the joint into the surrounding gypsum face paper. The ASTM C840 specification mandates that each coat be allowed to dry completely before the next is applied.
- First Finish Coat (Filler): Applied with an 8-inch or 10-inch knife. The compound should cover the tape and feather out at least 2 inches beyond the edges of the embedment coat. Target center thickness is 1/16 inch.
- Second Finish Coat (Skim/Finish): Applied with a 10-inch or 12-inch knife. This coat must feather out to a total joint width of 14 to 16 inches. Use a lightweight topping compound (e.g., USG Sheetrock Plus 3) for this final layer to minimize shrinkage and reduce sanding effort.
Substrate and Fastener Preparation Specs
The dimensions and spacing of the fasteners directly impact the amount of compound required and the risk of nail pops or screw ridges. For 1/2-inch gypsum board applied to wood framing, use 1-1/4 inch coarse-thread drywall screws. For 25-gauge or lighter steel framing, use 1-inch fine-thread screws.
Every fastener head must be driven to a precise depth of 1/32 inch below the surface. If the screw breaks the face paper, the holding power is compromised, and an additional fastener must be driven 2 inches away. The dimpled heads are then covered with two coats of compound using a 6-inch knife, feathering the edges smoothly into the board.
Sanding Grit and Dust Control Requirements
Sanding transforms the dried joint compound into a seamless, glass-like surface. The grit progression is critical; starting with too coarse a paper will gouge the compound, while finishing with too fine a paper will burnish the surface, creating a polished spot that absorbs paint differently than the surrounding paper.
- Initial Sanding (Ridge Removal): Use 120-grit sandpaper or a 120-grit sanding screen on a pole sander. Focus strictly on knocking down ridges, tool marks, and dried compound drips. Do not attempt to achieve final smoothness at this stage.
- Final Sanding (Blending): Switch to 150-grit or 180-grit sandpaper. Sand the feathered edges until they transition imperceptibly into the gypsum face paper. Run your hand across the joint; if you can feel a distinct transition line, further sanding or an additional skim coat is required.
- Dust Extraction: Mechanical sanders must be equipped with HEPA-filtered vacuum attachments. Airborne dust settling on the freshly sanded surface will create micro-pitting when primed.
Environmental Conditions for Curing
Drying-type joint compounds rely on evaporation. The ambient environment must be strictly controlled to ensure uniform drying and prevent edge-cracking or delayed shrinkage. Maintain a minimum room temperature of 50°F (10°C) for 24 hours prior to, during, and after application. Relative humidity should be kept below 70%. Continuous air circulation via HVAC or temporary box fans is required, but direct high-velocity airflow on the wet compound will cause surface skinning and trapped moisture, leading to delayed blistering.
Decision Framework: When Level 4 Fails
Specifying a level 4 gypsum board finish in the wrong environment is the leading cause of drywall callbacks. Use the decision matrix below to determine if Level 4 is sufficient or if the project requires an upgrade to Level 5 (which includes a full skim coat over the entire surface).
| Project Condition | Level 4 Viability | Required Action if Level 4 Fails |
|---|---|---|
| Flat/Matte Paint (Eggshell, Matte) | PASS | N/A - Standard application is sufficient. |
| Light Spray Texture (Orange Peel) | PASS | N/A - Texture hides minor joint banding. |
| Semi-Gloss or High-Gloss Paint | FAIL | Upgrade to Level 5; gloss highlights joint ridges. |
| Severe Side-Lighting (Windows, Wall-washers) | FAIL | Upgrade to Level 5; raking light exposes 1/16" deviations. |
| Heavy Vinyl Wallcovering | PASS | Ensure primer is compatible with adhesive. |
For comprehensive detailing on finishing standards and troubleshooting joint telegraphing, refer to the Northwest Wall and Ceiling Bureau technical resources and manufacturer-specific application guides like the USG Joint Compound application data. Proper adherence to these dimensional specifications ensures the level 4 finish performs flawlessly under its intended decorative treatments.
Written by
Marcus ChenMarcus Chen is a licensed structural engineer (PE) and building materials analyst with over 12 years of experience across residential, commercial, and industrial construction. He holds a Master of Science in Civil Engineering from UC Berkeley and spent six years at Thornton Tomasetti before transitioning to independent consulting and technical writing. Marcus specializes in material selection for seismic-prone regions, concrete reinforcement strategies, and lifecycle cost analysis. His work has been cited by the American Concrete Institute (ACI) and the Structural Engineers Association of California (SEAOC). When he is not on a job site or at his desk, you will find him hiking the Sierra Nevada or restoring a 1920s craftsman bungalow in Oakland, CA.
More from Marcus Chen
View all
Construction Cost
How Much Did the Eiffel Tower Cost to Build?
How much did the Eiffel Tower cost to build in 1889? We adjust for inflation and compare its budget to modern skyscraper construction.
Aug 4, 2026

Fire Resistance
What Is a Fire Resistant Material? Testing & Certification Guide
Discover what is a fire resistant material through ASTM and UL testing. Learn how fire ratings, certifications, and assemblies work in construction.
Aug 4, 2026

Construction Cost
How Much Did the Burj Khalifa Cost to Build?
How much did the Burj Khalifa cost to build? We break down the $1.5B project and extract 5 money-saving strategies for your next build.
Jul 30, 2026