Installing Fire-Rated Gypsum Pink Board: Wall Assembly Guide
Learn the exact installation procedures for fire-rated gypsum pink board, including framing, fastener spacing, and joint taping for 1-hour assemblies.
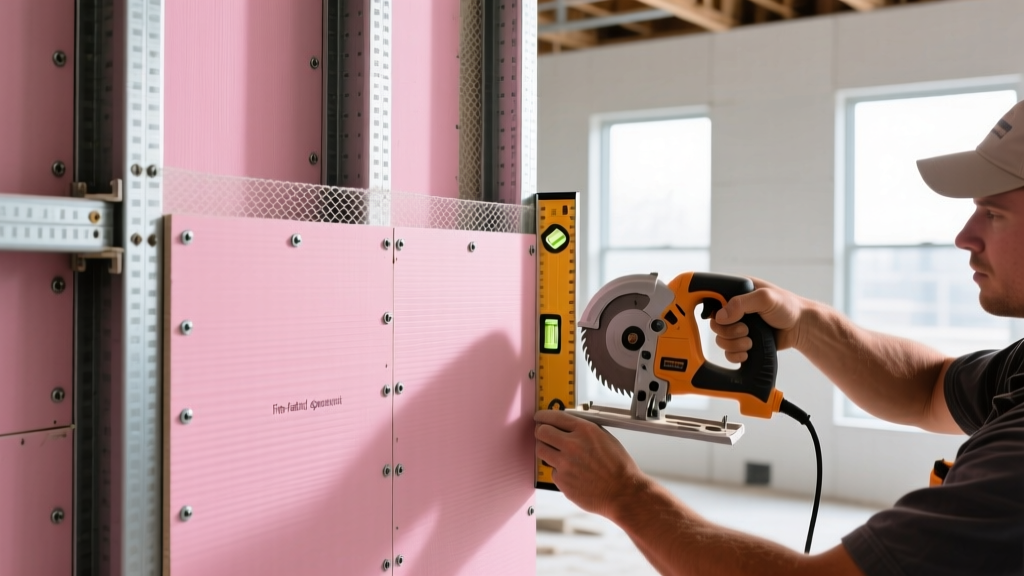
Understanding Gypsum Pink Board in Fire Assemblies
In global construction markets, particularly across Europe, the Middle East, and specialized North American projects, gypsum pink board refers to fire-resistant plasterboard characterized by its distinct pink face paper. While North American contractors often associate fire-rated Type X drywall with red face paper (such as CertainTeed or USG products), international manufacturers like Knauf (Fire Panel) and Saint-Gobain Gyproc (FireLine) utilize a pink facing to denote enhanced fire performance. The core of gypsum pink board is heavily reinforced with glass fibers and proprietary additives that prevent the calcined gypsum core from shrinking, cracking, or crumbling when exposed to the extreme temperatures of a structural fire.
Pre-Installation: Framing and Deflection Head Prep
The fire rating of a gypsum pink board assembly is entirely dependent on the structural integrity of the underlying framing. A 1-hour or 2-hour fire rating will fail prematurely if the stud deflection causes the board to crack and expose the core to flames.
Metal Stud Specifications and Deflection Tracks
For standard 1-hour fire-rated partitions utilizing 15mm (5/8-inch) gypsum pink board, framing must consist of minimum 20-gauge (0.033-inch) steel studs spaced at 16 inches on center (o.c.) or 24 inches o.c., strictly dictated by the tested UL design. The top track must be a deflection head (slip track) to accommodate structural floor sag without transferring compressive loads to the drywall. Install a compressible mineral wool or fire-rated foam backer rod in the deflection gap before applying the final perimeter firestop sealant.
Fastener Selection and Spacing Matrix
Improper fastener selection is the leading cause of fire assembly failure during municipal inspections. Gypsum pink board requires specific screw types that penetrate the steel stud without stripping the gypsum core. Below is the mandatory fastener matrix for standard fire-rated wall and ceiling applications.
| Assembly Type | Board Thickness | Screw Type & Length | Edge Spacing | Field Spacing |
|---|---|---|---|---|
| Wall (Single Layer) | 15mm (5/8") | Type S, 1-5/8" | 12" o.c. | 16" o.c. |
| Wall (Double Layer) | 15mm (5/8") Base | Type S, 1-1/4" | 24" o.c. | 24" o.c. |
| Wall (Double Layer Face) | 15mm (5/8") Face | Type S, 1-5/8" | 12" o.c. | 12" o.c. |
| Ceiling (Single Layer) | 15mm (5/8") | Type S, 1-5/8" | 8" o.c. | 12" o.c. |
Reference: Fastener spacing aligns with guidelines published by the Gypsum Association in the GA-216 application standard for fire-rated panels.
Step-by-Step Panel Installation Procedure
Executing the hang requires precision to maintain the continuous fire membrane. Follow this sequence to ensure structural integrity and code compliance.
- Panel Orientation: Install gypsum pink boards vertically (parallel to studs) for standard 1-hour walls to minimize horizontal butt joints, which are the weakest points in a fire membrane. For 2-hour multi-layer assemblies, the base layer may be installed horizontally, but the face layer must be vertical.
- Staggering Joints: Never align vertical joints on opposite sides of a partition. Stagger face-layer joints by a minimum of 24 inches from base-layer joints to prevent a continuous thermal path through the wall cavity.
- Driving the Screws: Drive Type S screws so the head creates a precise dimple approximately 1/32-inch deep into the pink face paper. Critical Failure Point: If the screw head breaks the face paper, the holding power is compromised, and the board will pull away from the stud during a fire. Discard and re-drive any broken-paper screws at least 2 inches away from the failed hole.
- Cutting and Scoring: Use a sharp utility knife and a T-square to score the pink face paper, snap the core, and cut the back paper. Do not use a power saw inside the enclosed room, as excessive gypsum dust will contaminate the joint compound adhesion later.
Managing Penetrations and Electrical Cutouts
The most common reason a gypsum pink board assembly fails its final fire inspection is the improper treatment of electrical and plumbing penetrations. A fire-rated wall is only as strong as its weakest cutout.
Standard plastic or metal electrical boxes breach the fire membrane. If you must install recessed boxes in a 1-hour or 2-hour gypsum pink assembly, you must install intumescent fire putty pads (e.g., 3M Fire Barrier Putty Pads) over the back and sides of every box. Furthermore, opposing electrical boxes on the same stud cavity must be separated horizontally by a minimum of 24 inches to prevent fire from tunneling directly through the wall cavity.
For plumbing pipes penetrating the board, the hole must be cut no more than 1/4-inch larger than the pipe diameter. The annular space must then be packed with mineral wool and sealed with an intumescent firestop caulk. For detailed penetration firestopping designs, consult the UL Fire Resistance Directory to match your specific pipe material (PVC, copper, or steel) with the correct tested sealant system.
Joint Treatment and Fire-Rated Finishing
The pink face paper is highly absorbent and requires specific joint treatment to achieve a Level 4 or Level 5 finish while maintaining the fire rating. The joint compound itself acts as a thermal barrier; skipping coats or thinning the mud will compromise the assembly.
- Tape Selection: Use standard paper joint tape for flat seams and pre-creased paper tape for internal corners. While fiberglass mesh is popular in standard drywall, paper tape provides superior tensile strength and fire resistance for rated assemblies.
- Coat 1 (Bedding): Apply a heavy bed coat of setting-type joint compound (e.g., 45-minute or 90-minute Durabond) over all seams and screw dimples. Setting compounds undergo a chemical cure that is far more resistant to heat than air-drying premixed mud.
- Coat 2 (Filling): Apply a wider coat (minimum 10 inches) using a lightweight all-purpose compound to feather the edges.
- Coat 3 (Topping): Apply a final 12-inch to 14-inch topping coat. Sand lightly with 150-grit sandpaper. Do not sand down to the pink face paper, as exposing the raw gypsum core destroys the fire rating at the seam.
Perimeter Firestopping and Code Compliance
The installation of the gypsum pink board is incomplete until the perimeter is sealed. Fire and toxic smoke will exploit the 1/2-inch gap between the top track and the concrete deck above. Apply a continuous bead of intumescent firestop sealant (such as Hilti CP 606 or Tremco FireBlock) at the head-of-wall joint. The sealant must be applied at a minimum thickness of 1/2-inch and must bond to both the drywall face and the concrete deck.
Before closing the walls for municipal inspection, photograph all internal fire-stopping, putty pads, and screw spacing. Many building departments now require photographic evidence of the fire-rated framing and penetrations before the gypsum pink board is taped and finished. Proper documentation ensures your assembly passes the fire marshal's review on the first visit, avoiding costly tear-outs and re-installations.