Level 5 Gypsum Board Finish Specifications: Thickness and Tolerances
Master level 5 gypsum board finish specifications. Explore skim coat thickness, joint compound types, GA-214 standards, and precise application tolerances.

The GA-214 Standard: Defining Level 5
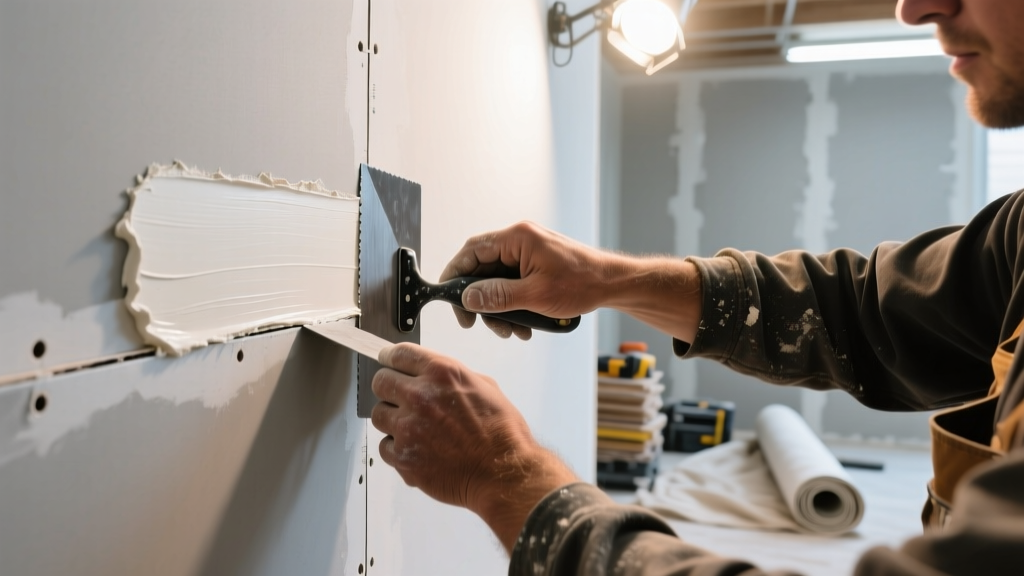
The level 5 gypsum board finish represents the highest tier of surface preparation defined by the Gypsum Association in its GA-214 standard. Unlike Level 4, which only requires taping, embedding, and three separate coats of joint compound over fasteners and joints, a Level 5 finish mandates a continuous, uniform skim coat applied over the entire surface of the gypsum board. This specification exists to eliminate joint banding, fastener photographing, and surface texture variations that become visible under critical or grazing lighting conditions.
From a dimensional standpoint, the skim coat is not intended to build significant thickness or correct structural framing errors. Instead, it is designed to unify the porosity and surface texture of the paper facing and the joint compound. The specified thickness of a Level 5 skim coat ranges strictly from 1/32 inch to 1/16 inch (0.8 mm to 1.6 mm). Applying the compound thicker than this threshold introduces excessive shrinkage, prolonged drying times, and a high risk of micro-cracking along the board seams.
Quick Specification Card: Level 5 Finish
- Base Requirement: Completed Level 4 finish (3 coats over joints/fasteners)
- Skim Coat Thickness: 1/32" to 1/16" (0.8mm - 1.6mm) uniform coverage
- Surface Flatness Tolerance: 1/8" in 10 feet (3mm in 3m) per ASTM C840
- Mandatory Primer: PVA or acrylic drywall sealer (minimum 1.5 mils dry film thickness)
- Sanding Grit: 150 to 220 grit aluminum oxide or silicon carbide
Material Specifications and Compound Selection
Selecting the correct joint compound is critical for achieving the dimensional stability required in a Level 5 finish. While ready-mixed compounds are standard for taping and topping in Level 4 applications, the skim coat phase demands materials with minimal shrinkage and high bond strength. According to the USG Drywall Construction Guide, the choice between setting-type and ready-mixed compounds dictates the application method and drying timeline.
| Compound Type | Example Product | Shrinkage Rate | Set/Dry Time | Level 5 Application |
|---|---|---|---|---|
| Setting-Type (Powder) | USG Durabond 45 | Negligible (<1%) | 45 minutes (chemical set) | Ideal for filling deep recesses or correcting minor framing bows prior to the final skim. |
| Ready-Mixed (Topping) | USG Sheetrock Plus 3 | Moderate (5-8%) | 24 hours (evaporative) | Standard for the final continuous skim coat due to superior workability and extended open time. |
| Lightweight All-Purpose | ProForm All Purpose | Low (3-5%) | 12-18 hours | Acceptable for skim coating when thinned with exactly 1/2 pint of water per gallon. |
When thinning ready-mixed compound for a Level 5 skim coat, the dimensional ratio is strict: add no more than 1/2 pint to 1 pint of clean water per gallon of compound. Over-thinning breaks the binder polymers, resulting in a chalky surface that will fail adhesion testing when primer is applied. The mixed compound must pass the 'ribbon test'—when scooped on a 10-inch trowel and held vertically, the compound should slide off in a continuous ribbon without tearing or slumping.
Dimensional Tolerances and Surface Flatness
A common misconception is that a Level 5 finish corrects wavy framing or poorly hung gypsum board. It does not. The skim coat only addresses surface texture and porosity. The underlying dimensional flatness must comply with ASTM C840 and the Association of the Wall and Ceiling Industry (AWCI) standards before the skim coat is even considered.
Measurement Protocol
To verify compliance, inspectors use a 10-foot (3-meter) precision aluminum straightedge. The straightedge is placed horizontally, vertically, and diagonally across the wall surface. For a Level 5 finish, the maximum allowable deviation between the straightedge and the wall surface is 1/8 inch (3.17 mm) over any 10-foot span. For comparison, a Level 4 finish allows up to 1/4 inch (6.35 mm) of deviation. If the framing or board installation exceeds the 1/8-inch tolerance, the wall must be furred out, planed, or shimmed before taping begins.
"Applying a Level 5 skim coat over a wall that fails the 1/8-inch in 10-feet flatness test will actually amplify the visual defect under grazing light. The skim coat creates a perfectly uniform texture, which acts as a canvas that highlights the underlying geometric waves rather than hiding them."
Tooling and Application Dimensions
The physical dimensions of the tools used directly impact the thickness and consistency of the skim coat. Using undersized tools results in overlapping ridges that require aggressive sanding, which risks burning through the paper face of the gypsum board.
- Skim Coat Trowels: A 14-inch to 18-inch (35 cm to 45 cm) wide stainless steel trowel is required for the initial application. The blade must have a minimum thickness of 0.015 inches to prevent flexing, which causes uneven compound distribution.
- Smoothing Blades: A 24-inch to 32-inch (60 cm to 80 cm) smoothing blade or skimming plate is used immediately after application to knock down ridges and ensure the 1/32-inch to 1/16-inch thickness specification is met.
- Angle Heads: For interior corners, a 7-inch or 10-inch adjustable angle head set precisely to 90 degrees must be used. The corner bead must be a minimum of 2.5 inches wide (vinyl or metal) to provide adequate flange coverage.
- Sanding Equipment: Pole sanders must be a minimum of 36 inches in length to maintain a consistent, flat pressure profile. Hand sanding is strictly prohibited on large flat surfaces as it creates localized depressions (dish-outs) that violate the ASTM flatness tolerances.
Inspection Lighting Specifications
The defining characteristic of a Level 5 finish is its performance under critical lighting. The inspection protocol requires a specific light intensity and angle to verify the absence of joint banding and tool marks.
The standard inspection tool is a 500-watt incandescent work light or a 50-watt LED equivalent (producing approximately 5,000 to 7,000 lumens). The light source must be positioned 12 to 18 inches (30 cm to 45 cm) away from the wall surface. The beam must strike the wall at an acute angle of incidence—typically less than 15 degrees from the surface plane. This 'grazing light' technique casts micro-shadows across any ridge, depression, or variation in surface texture. If ridges from the trowel edges or the outline of the drywall tape are visible under this lighting condition, the surface fails the Level 5 specification and requires an additional skim layer or targeted sanding.
2026 Cost and Labor Metrics
Upgrading from a Level 4 to a Level 5 finish significantly impacts both material consumption and labor hours. The continuous skim coat requires approximately 0.04 to 0.05 gallons of joint compound per square foot, alongside a 30% to 50% increase in skilled labor time for application, drying management, and precision sanding.
| Cost Component (Per Sq. Ft.) | Level 4 Finish (2026 Baseline) | Level 5 Finish (2026 Estimate) | Delta / Premium |
|---|---|---|---|
| Materials (Compound, Tape, Primer) | $0.35 - $0.45 | $0.55 - $0.70 | +$0.20 - $0.25 |
| Skilled Labor (Hang & Finish) | $1.25 - $1.75 | $2.10 - $2.80 | +$0.85 - $1.05 |
| Sanding & Cleanup | $0.20 - $0.30 | $0.45 - $0.65 | +$0.25 - $0.35 |
| Total Estimated Cost | $1.80 - $2.50 | $3.10 - $4.15 | +$1.30 - $1.65 |
Common Failure Modes and Technical Fixes
Even when specifications are followed, environmental variables can cause Level 5 finishes to fail. Understanding these failure modes is essential for quality control.
- Joint Photographing: This occurs when the taped joints appear as distinct, glossy lines through the final paint. Cause: Failure to apply a dedicated PVA drywall primer, or applying the skim coat too thin over the tape edges. Fix: Ensure the primer achieves a minimum 1.5 mils dry film thickness to equalize the porosity of the paper face and the joint compound.
- Skim Coat Blistering: Small, pinhead-sized air bubbles trapped beneath the surface of the skim coat. Cause: Applying the skim coat over a dusty Level 4 surface, or over-troweling the compound, which traps air and seals the surface before the air can escape. Fix: Vacuum the Level 4 surface with a HEPA-filtered shop vac before skimming. Apply the compound with a light touch, avoiding excessive burnishing with the trowel.
- Burnished Surface Rejection: The paint peels or fails to adhere in patches. Cause: The finisher used excessive pressure with a steel trowel during the final smoothing pass, creating a dense, glass-like 'burnished' surface that is non-porous. Fix: Lightly sand the entire wall with 180-grit sandpaper to break the burnished crust before priming. Never use a steel trowel for the final pass on a Level 5 finish; switch to a flexible 24-inch skimming blade.
Achieving a true level 5 gypsum board finish requires strict adherence to dimensional tolerances, precise material ratios, and rigorous lighting inspections. By treating the skim coat as a highly specified architectural coating rather than a simple layer of mud, contractors can deliver surfaces that meet the most demanding aesthetic and functional requirements of modern commercial and high-end residential construction.
Written by
David NakamuraDavid Nakamura is a licensed architect (AIA) and construction technology writer focused on sustainable building methods, mass timber engineering, and high-performance building envelopes. He holds a Master of Architecture from the University of Washington and is a certified Passive House Consultant (CPHC). David spent eight years at the Seattle firm Mithun, where he led the design of three LEED Platinum projects, before founding his own practice specializing in net-zero residential design. He serves on the editorial advisory board of GreenBuilder Magazine and has authored peer-reviewed papers on cross-laminated timber (CLT) connections for the Journal of Structural Engineering. In his spare time, David teaches woodworking at Pratt Fine Arts Center and kayaks the Puget Sound.
More from David Nakamura
View all
Construction Cost
Labor Cost to Build a Deck Per Sq Ft: 2026 Installation Guide
Discover the exact labor cost to build a deck per sq ft in 2026. This installation guide breaks down contractor rates, complexity factors, and hidden fees.
Aug 4, 2026

Construction Cost
How Much Does It Cost to Build a 3 Bedroom House? Financing Guide
Learn exactly how much it costs to build a 3 bedroom house and explore 2026 financing options, construction loan types, and budget frameworks for your build.
Aug 4, 2026

Construction Cost
Cost to Build a Tennis Court: 2026 Guide
How much does it cost to build a tennis court in 2026? Breakdowns for asphalt, concrete, and synthetic surfaces plus fencing and lighting.
Jul 30, 2026