Supplier Gypsum Board: Matching Materials to Installation Techniques
Learn how to align your supplier gypsum board orders with advanced installation techniques for curved walls, acoustic decoupling, and glass-mat handling.

The Procurement-Installation Gap in Drywall Contracting
Drywall contractors frequently treat material procurement and physical installation as siloed operations. A project manager orders the materials, and the framing crew hangs them. However, aligning your supplier gypsum board selections with specific, advanced installation techniques is critical for avoiding callbacks, core blowouts, and acoustic flanking. As building codes tighten and architectural designs incorporate more complex geometries and acoustic requirements in 2026, the margin for error between what is ordered and how it is installed has effectively vanished.
Working directly with a specialized supplier ensures you receive the exact panel formulations required for specialized techniques. Standard 1/2-inch regular core panels will fail if subjected to radiused bending, and high-density acoustic boards will compromise their Sound Transmission Class (STC) ratings if fastened with incorrect screw types or rigid framing contacts. This guide bridges the procurement phase with job-site execution, detailing the exact installation protocols required for specialized gypsum products.
Material-Specific Installation Matrix
Before the first panel is lifted, installers must verify that the fastener schedule and framing layout match the specific board delivered by the supplier. The matrix below outlines the critical installation variables for specialized gypsum products.
| Supplier Board Type | Core / Facing Profile | Required Fastener | Max Framing Spacing | Specific Install Technique |
|---|---|---|---|---|
| USG Sheetrock Flex (1/4") | Low-density aerated core | 1-1/4" Type W (coarse) | 16" O.C. (walls/ceilings) | Double-layer application; stagger joints; dry-bend to 32" radius. |
| CertainTeed SilentFX (5/8") | Viscoelastic polymer core | 1-5/8" Type S (fine) | 24" O.C. (with decoupling) | Isolate from rigid framing; use resilient clips; no rigid fastener penetration through to stud. |
| GP DensGlass (5/8") | Fiberglass mat, treated core | 1-5/8" Hi-LO thread | 16" O.C. max | Do not score-and-snap like paper; must use utility knife to cut both mat faces. |
| National Gypsum Gold Bond XP (5/8") | Moisture/mold resistant core | 1-1/4" or 1-5/8" Type S | 24" O.C. (ceilings) | Require 3/8" gap at floor track; seal with acoustic/moisture sealant. |
Advanced Technique: Radiused Assemblies and Flex Board
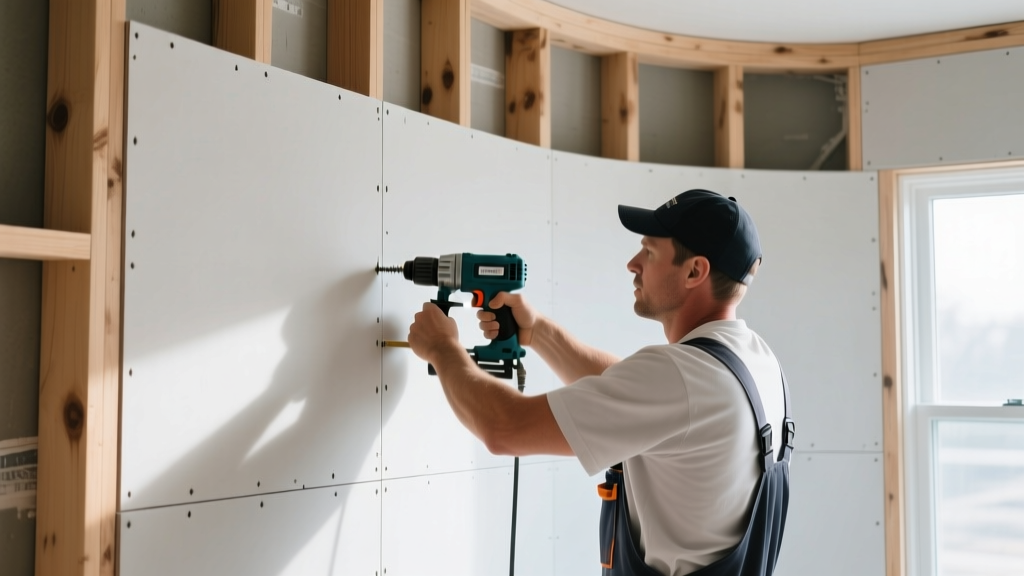
Curved walls and radiused ceiling bulkheads require precise coordination between your supplier and your installation crew. If your design calls for a curved wall, you must explicitly order flexible gypsum board from your supplier. Standard 1/4-inch board has a denser core that will snap under tension.
Dry vs. Wet Bending Protocols
When installing 1/4-inch flexible board, the bending technique is dictated by the radius of the framing:
- Dry Bending (Radii 32 inches and larger): Install the board directly onto the curved framing. Fasten from the center of the panel outward to the edges to push air and tension out. For structural integrity, always apply flex board in two layers, staggering the vertical seams by at least 16 inches. Use a 3/8-inch nap roller to apply laminating adhesive between the two layers before securing the face layer with 1-inch Type W screws.
- Wet Bending (Radii down to 15 inches): For tighter curves, the gypsum core must be softened. Mist the back paper of the panel with approximately 30 to 40 ounces of clean water using a pump sprayer. Allow the water to absorb into the core for exactly 15 minutes. Do not over-saturate, as this will degrade the paper-to-core bond and cause delamination. Once pliable, bend the panel against the framing and secure immediately. Allow 48 hours of drying time before applying joint compound.
Fastener Schedules and Core Density Variables
Gypsum board core density varies significantly between manufacturers and product lines. For example, lightweight panels like USG EcoSmart are engineered to be up to 25% lighter than standard 5/8-inch Type X boards. While this reduces installer fatigue, the lower-density core is highly susceptible to fastener blowouts if screw gun clutches are not calibrated correctly.
When transitioning to lightweight supplier gypsum board, reduce the torque setting on your collated screw guns. The screw head must dimple the face paper without breaking the paper surface. If the paper tears, the fastener loses its holding power entirely. According to the Gypsum Association's GA-216 standard, a broken paper facing requires a new fastener to be driven 2 inches away from the blown-out screw.
Regardless of core density, penetration depth remains non-negotiable. Screws must penetrate wood framing by a minimum of 5/8 inch and steel framing by at least 3/8 inch. For 5/8-inch panels on steel studs, always use 1-5/8-inch fine-thread (Type S) screws. Using coarse-thread screws on 20-gauge or lighter steel studs will strip the metal and fail pull-through tests.
High-STC Acoustic Decoupling Installations
Achieving STC ratings of 55 or higher requires more than just ordering acoustic board; it demands a systemic installation approach. When your supplier delivers high-STC panels (such as CertainTeed SilentFX or USG Soundbreak XP), the installation technique must focus on eliminating rigid mechanical connections that transmit vibrational energy.
Resilient Channel and Clip Isolation
Acoustic boards must be decoupled from the structural framing. Install resilient channels or specialized acoustic isolation clips at 24 inches O.C. vertically. Critical installation rule: The drywall screws securing the acoustic board to the resilient channel must be exactly 1-1/4 inches long. If you use 1-5/8-inch screws, they will penetrate through the channel and bite into the steel stud behind it, creating a rigid acoustic bridge that destroys the STC rating.
Perimeter Sealant and Putty Pads
Sound behaves like water; it will exploit any unsealed gap. Installers must apply a continuous, unbroken 3/8-inch bead of non-hardening acoustic sealant at the intersection of the bottom track and the subfloor, as well as the top track and the ceiling deck. Furthermore, every electrical outlet box must be wrapped in a 1/8-inch thick acoustic putty pad, with the pad extending at least 1 inch beyond the edges of the box flange to seal against the gypsum face.
Glass-Mat Handling and Cutting Techniques
For exterior sheathing, tile backer, or high-moisture commercial shaft walls, suppliers will provide fiberglass-faced gypsum panels (e.g., Georgia-Pacific DensGlass or USG Securock). The installation technique for cutting and handling these panels differs fundamentally from standard paper-faced drywall.
You cannot use the traditional score-and-snap method on the edge of a table. The fiberglass mat will not tear cleanly, leaving jagged, frayed edges that compromise fire-stopping and joint treatment. Instead, lay the panel flat on a rigid surface. Use a heavy-duty utility knife with a fresh hooked blade to cut completely through the fiberglass mat and the gypsum core along a straightedge. Snap the panel backward, then slice through the back mat. Always wear an N95 respirator and long sleeves, as the micro-fiberglass particles will cause severe skin and respiratory irritation during the cutting process.
Technical FAQ: Supplier and Installation Coordination
Can I use standard 1/4-inch board for a curved wall if I wet it?
No. Standard 1/4-inch board lacks the specialized low-density core and reinforced paper facings required for bending. Wetting standard board will simply turn the gypsum core into mud, causing the panel to collapse under its own weight and tear the face paper. You must order specific flexible board from your supplier.
How do I handle edge damage on acoustic boards delivered by the supplier?
Acoustic boards with viscoelastic polymer cores are highly susceptible to edge crushing during transit. If the tapered edges are crushed, the panel cannot be properly taped and finished. Cut away the damaged edge with a router or fine-tooth saw until you reach solid core material. Treat the resulting butt joint with a backing strip and three coats of setting-type joint compound.
What is the maximum framing spacing for 5/8-inch fire-rated ceilings?
For 1-hour fire-rated assemblies using 5/8-inch Type X gypsum board, framing must be spaced at a maximum of 24 inches O.C. when installed parallel to the framing, and 16 inches O.C. when installed perpendicular. Always verify the specific UL design number provided by your supplier, as some proprietary lightweight Type X boards allow 24-inch O.C. spacing in both directions.
For comprehensive fastener schedules and joint treatment specifications, contractors should regularly consult the USG Sheetrock Installation Guide and the CertainTeed Gypsum Resources Library to ensure compliance with current 2026 building codes and manufacturer warranties.
Written by
David NakamuraDavid Nakamura is a licensed architect (AIA) and construction technology writer focused on sustainable building methods, mass timber engineering, and high-performance building envelopes. He holds a Master of Architecture from the University of Washington and is a certified Passive House Consultant (CPHC). David spent eight years at the Seattle firm Mithun, where he led the design of three LEED Platinum projects, before founding his own practice specializing in net-zero residential design. He serves on the editorial advisory board of GreenBuilder Magazine and has authored peer-reviewed papers on cross-laminated timber (CLT) connections for the Journal of Structural Engineering. In his spare time, David teaches woodworking at Pratt Fine Arts Center and kayaks the Puget Sound.
More from David Nakamura
View all
Construction Cost
Labor Cost to Build a Deck Per Sq Ft: 2026 Installation Guide
Discover the exact labor cost to build a deck per sq ft in 2026. This installation guide breaks down contractor rates, complexity factors, and hidden fees.
Aug 4, 2026

Construction Cost
How Much Does It Cost to Build a 3 Bedroom House? Financing Guide
Learn exactly how much it costs to build a 3 bedroom house and explore 2026 financing options, construction loan types, and budget frameworks for your build.
Aug 4, 2026

Construction Cost
Cost to Build a Tennis Court: 2026 Guide
How much does it cost to build a tennis court in 2026? Breakdowns for asphalt, concrete, and synthetic surfaces plus fencing and lighting.
Jul 30, 2026