Guide to Levels of Gypsum Board Finish: Which Grade Do You Need?
Select the right levels of gypsum board finish for your project. Compare costs, lighting requirements, and GA-214 standards for Levels 0 through 5.

The Governing Standards: GA-214 and ASTM C840
Specifying the correct drywall finish is not a matter of subjective preference; it is governed by strict industry frameworks. The Gypsum Association's GA-214 standard and ASTM C840 (Standard Specification for Application and Finishing of Gypsum Board) define six distinct levels of gypsum board finish, numbered 0 through 5. Misalignment between the specified finish level, the architectural lighting plan, and the final paint sheen is one of the most common causes of construction defect litigation. Selecting the appropriate level requires a precise understanding of substrate preparation, joint compound chemistry, and ambient lighting dynamics.
Levels 0 Through 3: Utility, Concealment, and Heavy Texture
The lower end of the finishing spectrum is reserved for areas where visual perfection is either unnecessary or deliberately masked by heavy surface treatments.
Level 0 & Level 1: The Unfinished and Concealed Baselines
Level 0 is strictly temporary. No taping, finishing, or corner beads are installed. This level is specified for temporary construction enclosures or when the final decoration method has not yet been determined.
Level 1 requires joint tape to be embedded in joint compound, but the tape is left exposed. No additional coats, fastener coverage, or corner bead finishing are required. This level is exclusively used in concealed spaces, such as above suspended ceilings, in attic spaces, or in service corridors where fire-resistance ratings or smoke-barrier continuity require taped joints but visual aesthetics do not.
Level 2 & Level 3: Backing Boards and Heavy Textures
Level 2 involves embedding the tape and applying one coat of joint compound over all joints, angles, and fastener heads. The surface is wiped clean but not sanded to a smooth finish. This is the mandatory substrate standard for water-resistant gypsum backing board (e.g., USG Fiberock or Durock) that will receive ceramic tile or stone veneer via thin-set mortar.
Level 3 adds a second coat of compound over flat joints and one coat over fasteners. The surface must be smooth and free of tool marks, but minor ridges are acceptable. Level 3 is the required baseline for walls that will receive heavy spray textures (such as knockdown, orange peel, or acoustic popcorn) or commercial-grade vinyl wallcoverings. Do not specify Level 3 for walls receiving flat paint.
Levels 4 and 5: The Residential and Commercial Showcases
When walls are to be painted or receive thin wallcoverings, the specification must jump to Level 4 or Level 5. The distinction between the two dictates the success of the final aesthetic.
Level 4: The Residential Standard
Level 4 is the default specification for most residential construction and commercial back-of-house areas. It requires two coats of compound over flat joints, three coats over butt joints, and two coats over fastener heads. All surfaces must be sanded smooth.
Level 5: The Flawless Standard for Critical Lighting
Level 5 includes all requirements of Level 4, plus a tight, continuous skim coat of joint compound applied over the entire surface of the gypsum board. This skim coat fills the microscopic voids in the paper face of the drywall, equalizing the porosity and texture between the paper and the joint compound.
Level 5 is non-negotiable for walls receiving gloss, semi-gloss, or enamel paints, as well as any wall subjected to critical grazing light. The skim coat ensures that the painted surface reflects light uniformly, eliminating the phenomenon known as 'joint photographing' or 'ghosting,' where the taped joints appear as distinct stripes under angled light.
Compound Selection Matrix by Finish Level
A Level 5 finish will fail if the wrong chemical compound is used for the skim coat. All-purpose compounds contain higher glue concentrations and limestone fillers, leading to severe shrinkage and difficult sanding when applied thinly over large areas. Always specify topping compounds for final coats.
| Finish Level | Taping Coat (Embedding) | Filler Coat(s) | Final / Skim Coat |
|---|---|---|---|
| Level 1 & 2 | Setting-Type (e.g., Durabond 45) or All-Purpose | N/A | N/A |
| Level 3 | All-Purpose | Lightweight All-Purpose | N/A |
| Level 4 | All-Purpose or Taping | Lightweight All-Purpose | Lightweight Topping (e.g., USG UltraLightweight Topping) |
| Level 5 | All-Purpose or Taping | Lightweight All-Purpose | Dedicated Skim Coat Compound (e.g., ProForm Topping or USG Topping) |
Cost and Labor Timelines (2026 Estimates)
Budgeting for drywall finishing requires understanding the exponential increase in labor and material costs as you move up the finish levels. The following costs reflect national averages for professional commercial and high-end residential contractors, encompassing labor, scaffolding, and materials.
| Finish Level | Cost per Sq. Ft. (Labor + Material) | Drying Time Between Coats | Sanding Required? |
|---|---|---|---|
| Level 1 | $0.50 - $0.80 | 24 hours (or chemical set) | No |
| Level 2 | $0.75 - $1.10 | 24 hours | No (wipe only) |
| Level 3 | $1.00 - $1.40 | 24 hours | Light sanding |
| Level 4 | $1.50 - $2.25 | 24 hours | Yes (120-150 grit) |
| Level 5 | $2.25 - $3.50+ | 24 hours for skim coat | Yes (150-180 grit pole sand) |
The Raking Light Inspection Protocol
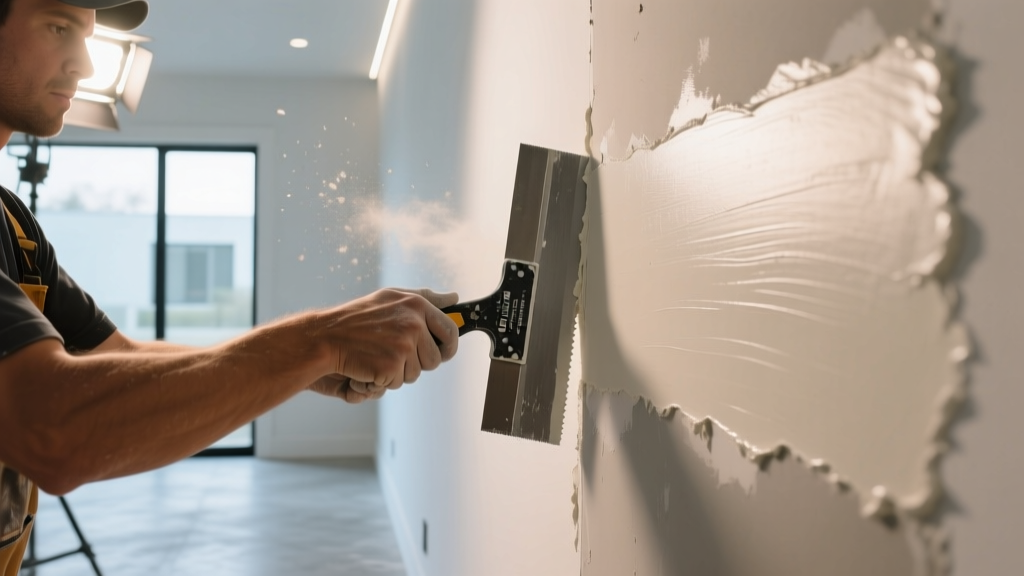
Inspecting Levels 4 and 5 requires adherence to the PCA P5 standard for drywall inspection. Inspections must not be conducted with standard overhead room lighting.
- Light Source: Use a high-lumen LED work light or halogen lamp (minimum 1000 lumens).
- Positioning: Hold the light parallel to the wall surface, approximately 3 feet away from the baseboard, shining across the face of the drywall (raking light).
- Viewing Distance: The inspector must stand at a normal viewing distance of 5 feet from the wall.
- Acceptance Criteria: For Level 4, minor tool marks and faint joint ridges are acceptable if they do not cast a shadow longer than 1/16th of an inch under raking light. For Level 5, the surface must appear completely monolithic, with no visible shadows, ridges, or fastener depressions casting shadows under the raking light.
By strictly aligning your architectural lighting plans, paint sheens, and contractor specifications with the GA-214 levels of gypsum board finish, you eliminate the most common variables that lead to punch-list disputes and costly rework.
Written by
David NakamuraDavid Nakamura is a licensed architect (AIA) and construction technology writer focused on sustainable building methods, mass timber engineering, and high-performance building envelopes. He holds a Master of Architecture from the University of Washington and is a certified Passive House Consultant (CPHC). David spent eight years at the Seattle firm Mithun, where he led the design of three LEED Platinum projects, before founding his own practice specializing in net-zero residential design. He serves on the editorial advisory board of GreenBuilder Magazine and has authored peer-reviewed papers on cross-laminated timber (CLT) connections for the Journal of Structural Engineering. In his spare time, David teaches woodworking at Pratt Fine Arts Center and kayaks the Puget Sound.
More from David Nakamura
View all
Construction Cost
Labor Cost to Build a Deck Per Sq Ft: 2026 Installation Guide
Discover the exact labor cost to build a deck per sq ft in 2026. This installation guide breaks down contractor rates, complexity factors, and hidden fees.
Aug 4, 2026

Construction Cost
How Much Does It Cost to Build a 3 Bedroom House? Financing Guide
Learn exactly how much it costs to build a 3 bedroom house and explore 2026 financing options, construction loan types, and budget frameworks for your build.
Aug 4, 2026

Construction Cost
Cost to Build a Tennis Court: 2026 Guide
How much does it cost to build a tennis court in 2026? Breakdowns for asphalt, concrete, and synthetic surfaces plus fencing and lighting.
Jul 30, 2026