Troubleshooting Thin Gypsum Board: Fixing Sags, Cracks, and Impact Damage
Expert guide to troubleshooting thin gypsum board. Learn how to diagnose and repair 1/4-inch drywall sags, joint cracks, and impact damage.

The Structural Vulnerability of 1/4-Inch and 5/16-Inch Drywall
Thin gypsum board—specifically 1/4-inch (6.4mm) and 5/16-inch (7.9mm) panels—is an essential material for radius walls, archways, and overlay applications. Manufactured under ASTM C1396 specifications, these panels feature a reduced gypsum core and lighter face paper. While this flexibility allows for tight bending radii, it severely compromises the board's structural rigidity. When installed incorrectly or subjected to standard residential framing deflection, thin drywall is highly susceptible to ceiling sag, joint telegraphing, and catastrophic impact fractures.
Troubleshooting thin gypsum board requires understanding its mechanical limits. Unlike standard 1/2-inch panels that can span 24-inch on-center (O.C.) framing, 1/4-inch panels require strict adherence to framing tolerances and specialized fastening protocols. This guide details the exact diagnostic steps and repair methodologies for the most common failures associated with thin-profile gypsum products.
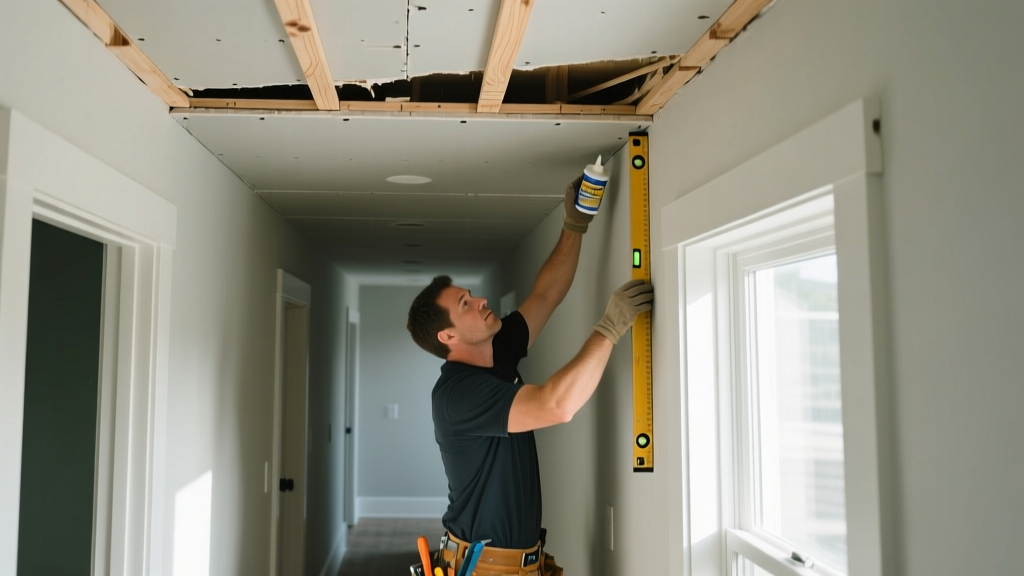
Diagnostic Matrix: Symptom to Solution
Before initiating repairs, accurately identify the failure mode. Thin board failures are rarely isolated to the gypsum itself; they almost always stem from substrate or framing deficiencies.
| Symptom | Root Cause | Diagnostic Check | Repair Strategy |
|---|---|---|---|
| Ceiling Sag / Belly | Framing spaced >16" O.C. or single-layer ceiling application | Push up on sag; measure joist spacing via attic or cutout | Sister furring strips at 12" O.C.; overlay with 1/2" board |
| Joint Telegraphing | Missing edge backing or framing twist | Shine raking light across seam; check for hollow spots | Route out joint; apply setting compound with fiberglass mesh |
| Radial Cracking on Curves | Dry-bending beyond minimum radius without scoring/wetting | Measure curve radius; inspect back paper for micro-tears | Inject adhesive; brace with curved backer; skim coat |
| Punch-Through / Shatter | Doorknob impact or point-load stress on unsupported spans | Probe hole edges for crumbling core and detached face paper | California patch (small) or blocking replacement (large) |
Troubleshooting Ceiling Sag and Deflection
Critical Code Warning: According to the Gypsum Association GA-216 guidelines, 1/4-inch gypsum board must NEVER be used as a single-layer ceiling application on new framing. It is strictly designed for wall applications, curved surfaces, or as a face layer laminated over an existing, structurally sound ceiling surface.
When a contractor ignores this specification and hangs 1/4-inch board directly to ceiling joists, gravity and humidity will cause the panels to sag between the joists, creating visible "bellies." If the joists are spaced at 24 inches O.C., the failure is accelerated.
The Overlay and Sistering Repair Method
To permanently fix a sagging thin-board ceiling without tearing it all down, you must reinforce the substrate and add a rigid overlay.
- Install Furring Strips: Screw 1x3 wood furring strips or 2-1/2" metal hat channel perpendicular to the existing joists, spaced at 12 inches O.C. Use 2-1/2" or 3" structural screws to pull the furring tight against the sagging 1/4" board and into the joists above. This will mechanically lift and flatten the sag.
- Apply Adhesive: Run a continuous 3/8" bead of USG Drywall Adhesive or a high-quality construction adhesive (like Liquid Nails LN-9000) along the furring strips.
- Overlay with 1/2-Inch Board: Hang standard 1/2-inch gypsum board over the newly reinforced ceiling. Fasten with 1-5/8" Type S drywall screws, ensuring the screws penetrate through the 1/2" board, the 1/4" board, and bite at least 5/8" into the wood furring strips. Space screws 7 inches apart on edges and 12 inches in the field.
Fixing Joint Telegraphing and Hairline Cracks
Thin gypsum board lacks the mass to bridge moving joints. If the underlying framing twists or settles, the stress transfers directly through the 1/4-inch core, snapping the paper tape and cracking the joint compound. Standard pre-mixed all-purpose mud (which shrinks as it dries) will not hold these joints together.
Step-by-Step Routing and Taping Protocol
For recurring cracks on thin board seams, abandon standard paper tape and pre-mixed mud. Use a high-tensile setting-type compound and fiberglass mesh.
- Route the Crack: Use a drywall router or a utility knife to carve a 1/4-inch wide "V" groove directly down to the gypsum core along the cracked seam. Vacuum out all dust and loose paper.
- Pre-fill with Setting Compound: Mix a setting-type compound like USG DuraBond 90. This product undergoes a chemical crystallization process rather than drying by evaporation, meaning it will not shrink and has immense structural shear strength. Force the DuraBond deep into the routed groove and let it cure (approx. 90 minutes).
- Apply Alkali-Resistant Mesh: Embed a 2-inch wide strip of FibaTape Extreme or standard fiberglass mesh tape over the hardened DuraBond fill.
- Skim Coat: Apply a final topping coat of USG Easy Sand 20 over the mesh, feathering it out 12 inches on either side of the joint to hide the transition.
Repairing Impact Damage on Thin Panels
Because 1/4-inch drywall has a minimal gypsum core, blunt force impacts (like a doorknob striking a wall) don't just dent the paper; they shatter the core and blow out the back side of the panel. Standard peel-and-stick patches will fail here because the surrounding thin board cannot support the leverage of a patch.
The "California Patch" vs. Backing Board Replacement
For holes under 5 inches in diameter, a modified California patch works if executed with precision. Cut a square piece of 1/2-inch drywall (using thicker board for the patch adds necessary rigidity that the surrounding 1/4-inch board lacks). Score the back paper, snap the core, and leave a 1-inch border of face paper. Apply DuraBond to the back of the paper border, insert the 1/2-inch core through the hole, and pull tight. The thicker patch core acts as its own backer.
For holes larger than 5 inches, the California patch will telegraph and crack. You must cut the damaged 1/4-inch section back to the center of the nearest studs. Install 2x4 wood blocking horizontally between the studs, screwing it into the existing framing. Cut a new piece of 1/4-inch gypsum board, secure it to the blocking with 1-inch Type S screws, and tape the joints using the DuraBond routing protocol detailed above.
Curved Wall Delamination Fixes
Thin gypsum board is frequently used to wrap radius walls. The minimum bending radius for dry 1/4-inch board is typically 10 feet; for wet-applied board, it drops to 5 feet. When contractors force dry board around a 4-foot radius without scoring the back paper, the face paper delaminates from the core, creating hollow, bubbled sections.
To repair delamination without replacing the entire curved section, drill 1/8-inch pilot holes through the face paper into the hollow voids. Inject a low-expansion polyurethane adhesive or specialized drywall adhesive into the voids. Immediately place a flexible, curved backer board (like 1/4-inch bending plywood) against the wall and brace it tightly with adjustable lally columns or temporary wood shores. Leave the bracing in place for 24 hours to allow the adhesive to cure and re-bond the face paper to the shattered core. Once removed, skim coat the drill holes with Easy Sand 45.
Written by
Elena RodriguezElena Rodriguez is a civil engineer and technical writer specializing in concrete technology, masonry systems, and ASTM/ACI compliance. She earned her B.S. in Civil Engineering from Texas A&M University and spent a decade at a materials testing laboratory, performing over 2,000 concrete compressive strength tests and masonry prism evaluations. Elena is an ACI-certified Field Testing Technician (Grade I) and a member of ASTM Committee C12 on Natural Building Stone. She currently consults on forensic engineering cases involving concrete failures and moisture intrusion. Based in San Antonio, TX, Elena is a proud member of the Society of Women Engineers (SWE) and coaches her daughter's FIRST Robotics team.
More from Elena Rodriguez
View all
Walls & Panels
Cost Analysis: Light Gauge Steel Framing Advantages and Disadvantages
Evaluate light gauge steel framing advantages and disadvantages through a strict cost analysis lens, comparing material, labor, and lifecycle expenses.
Aug 4, 2026

Walls & Panels
Gypsum Board Types: Exact Specifications, Thickness & Dimensions
Compare standard, Type X, and moisture-resistant gypsum board types. Get exact specifications, thicknesses, dimensions, and ASTM standards for your project.
Aug 4, 2026

Fire Resistance
Best Fire-Resistant Outdoor Decking Materials: 2026 Buyer Guide
Discover the best fire-resistant outdoor decking materials for 2026. Compare Class A PVC, aluminum, and hardwood options for WUI compliance and safety.
Aug 4, 2026